
Print color separations
This guide covers printing color separations, where VectorCraft prints one gray page for each ink: cyan, magenta, yellow, black and each spot color. It shows how to get the inks ready, check the plates on screen, set up the Print dialog’s Output section, choose which inks print, use a press profile, and check the separated pages before you send them.
Get the inks ready
Section titled “Get the inks ready”Separations print the four process inks and one plate for each spot color swatch in the document.
- Choose File → Document Color Mode → CMYK Color if the document is RGB. VectorCraft converts the colors of the art, symbols, swatches, brushes and graphic styles in one undo step. Colors in the Gray color model stay gray and print on the black plate. Neutral RGB grays separate through the CMYK profile like any other color: light grays print in cyan, magenta and yellow only, darker grays print in all four inks, and black becomes a rich black.
- Make a spot color swatch for each premixed ink the job uses. The swatch name is the plate name in Separations Preview and on the printed pages. Manage color and proof for print shows how to make a spot swatch.
- Apply the spot swatches to the art that prints in those inks.
Every spot color swatch in the document gets its own plate, whether the art uses it or not. Delete spot swatches the job does not use, or turn their plates off in the Print dialog. Art colored with the Registration swatch prints on every plate.
You can print an RGB document as separations without converting it. VectorCraft then converts its colors to CMYK with the color settings, and the Print dialog’s Summary shows a warning.
Check the plates on screen
Section titled “Check the plates on screen”- Choose Window → Separations Preview.
- Turn on Overprint Preview (separations).
- Click a plate’s eye to show or hide that plate. Alt-click (Option-click on macOS) an eye to show only that plate.
When one plate shows, the canvas draws that ink’s coverage in shades of gray, and full coverage shows as black. Spot plates appear after the process plates with “(spot)” after their name.
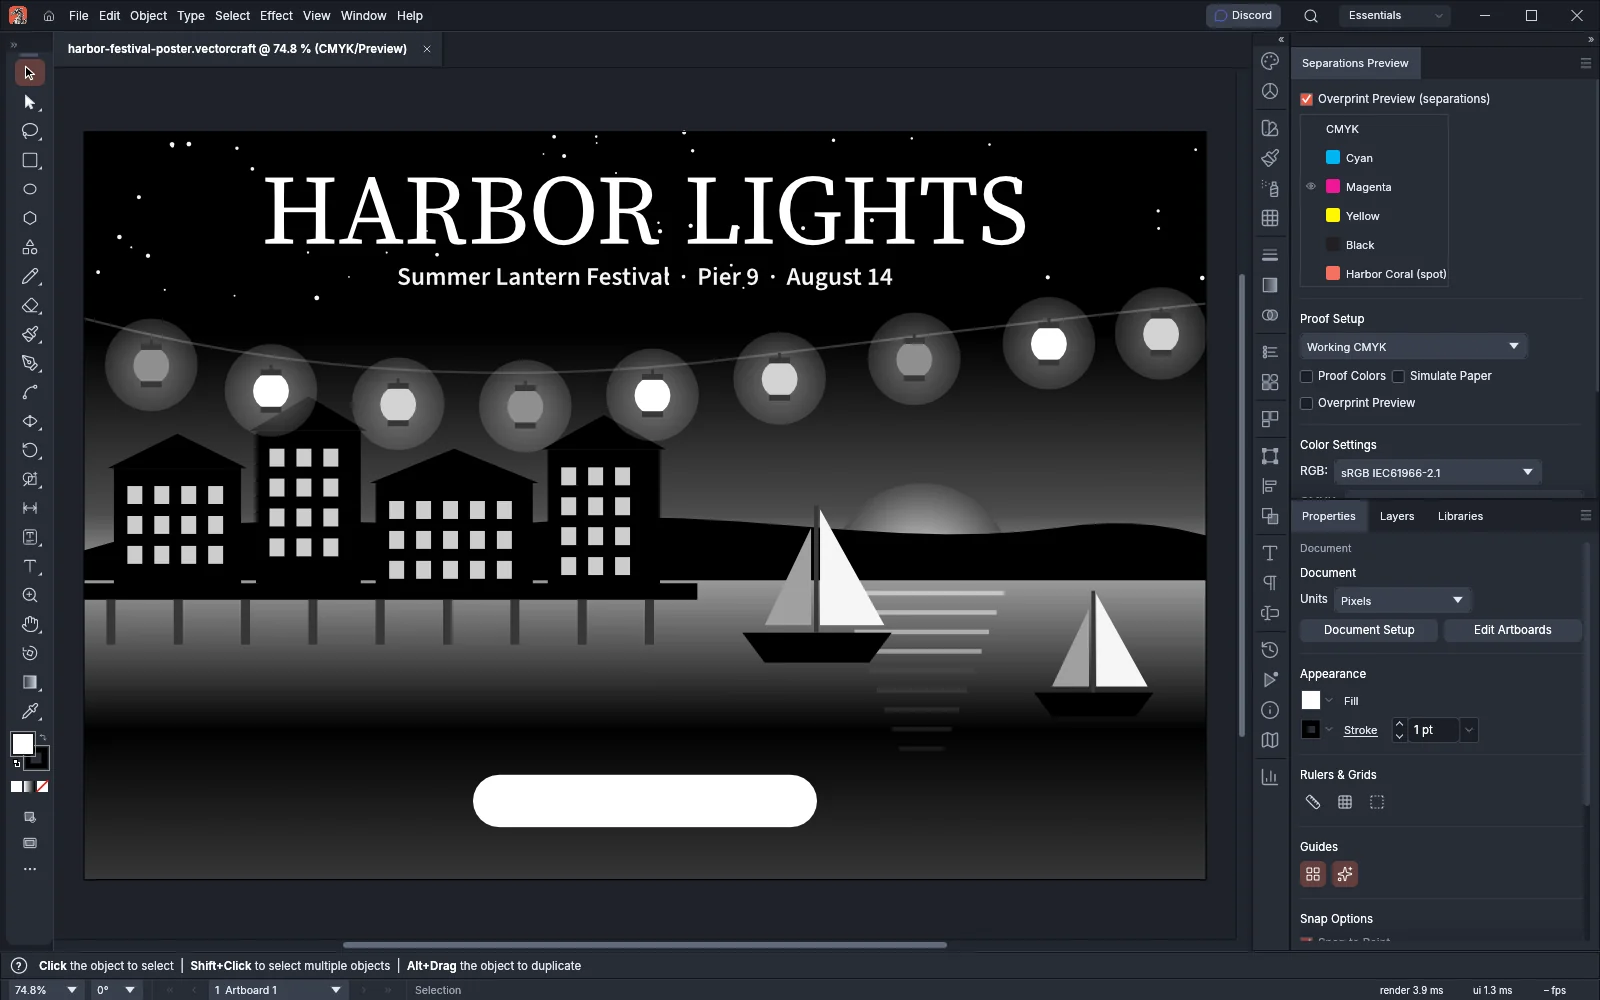
Manage color and proof for print covers Separations Preview, overprinting and soft proofing in more detail.
Set up the Output section
Section titled “Set up the Output section”- Choose File → Print… (Ctrl+P, or Cmd+P on macOS).
- Under Printer, choose the printer or imagesetter that prints the plates, or PDF File to save the plates as a PDF.
- Open the Output section.
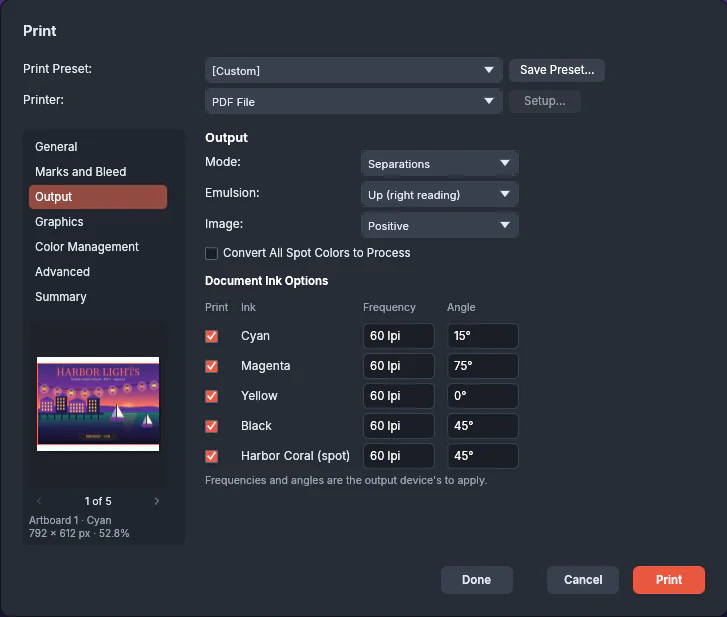
- Set Mode to Separations.
- Set Emulsion and Image to what the press or film needs. Ask the print shop if you are not sure.
- Turn on Convert All Spot Colors to Process only if the job prints with the four process inks alone. The spot plates are then removed, and spot colors print as mixes of cyan, magenta, yellow and black.
- Press Print, or press Done to keep the settings with the document without printing.
| Option | What it does | Choices | Default |
|---|---|---|---|
| Mode | Prints one color page, or one gray page for each ink that prints | Composite, Separations | Composite |
| Emulsion | Sets which side of the film the image reads from. Down (right reading) mirrors the page | Up (right reading), Down (right reading) | Up (right reading) |
| Image | Prints the page as it is, or as a film negative with the page inverted | Positive, Negative | Positive |
| Convert All Spot Colors to Process | Separates spot colors into the process inks, so no spot plates print. Available in Separations mode only | On, off | Off |
Choose which inks print
Section titled “Choose which inks print”The Document Ink Options list under the Output options shows each ink in the document. The list appears only when Mode is Separations. In Composite mode, the section shows the note “Separations list the document’s inks here: one page per ink that prints.”
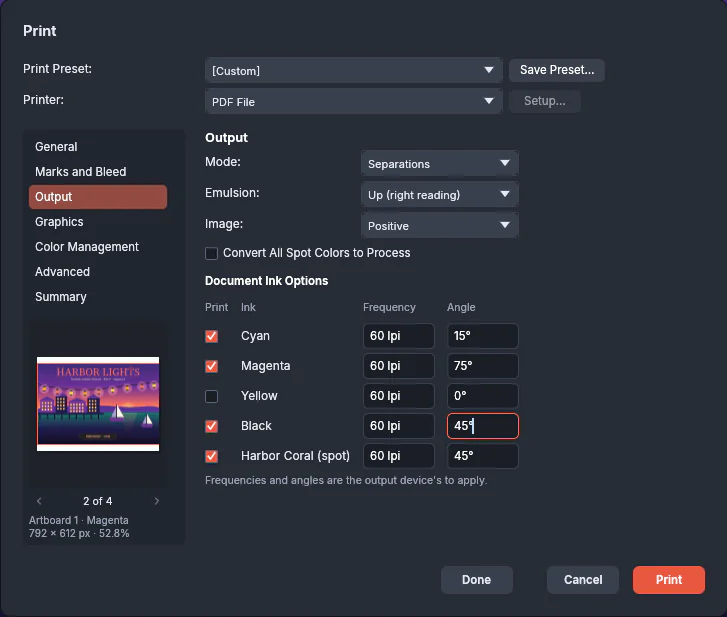
- Clear an ink’s Print check box to leave its plate out of the job. Keep at least one ink checked, or the dialog cannot print.
- Type a Frequency in lines per inch (lpi) and an Angle in degrees for an ink if the print shop asks for them.
- Use the arrows under the preview to step through the pages. The line under the preview names the artboard and the ink of the page that shows.
VectorCraft prints one page for each ink that prints, on each artboard. A one-artboard poster with four process inks and one spot ink prints five pages, or four with one ink turned off.
| Ink | Frequency | Angle |
|---|---|---|
| Cyan | 60 lpi | 15° |
| Magenta | 60 lpi | 75° |
| Yellow | 60 lpi | 0° |
| Black | 60 lpi | 45° |
| Each spot ink | 60 lpi | 45° |
The output device applies its own halftone screens. The note under the list reads “Frequencies and angles are the output device’s to apply.” When you change an ink’s frequency or angle, Summary shows the warning “ink frequencies and angles are not written as halftone screens yet: the output device’s screens apply”.
Use a press profile for separations
Section titled “Use a press profile for separations”The Color Management section sets the profile that separates the colors.
- Open the Color Management section.
- Under Printer profile, pick the press’s CMYK profile. VectorCraft separates the colors through that profile. Same As Source separates them through the CMYK profile assigned to the document with Edit → Assign Profile…, or through the CMYK working space in the color settings when the document has none.
- Under Rendering intent, choose how colors outside the press’s gamut are separated. The default is Relative Colorimetric.
- Leave Preserve CMYK Numbers on to print CMYK colors with their own values on each plate. Turn it off to separate CMYK colors again through the profile chosen in step 2.
An RGB printer profile does not apply to separations. If you pick one in Separations mode, VectorCraft leaves it out, and Summary shows the warning “separations separate with a CMYK profile: the RGB printer profile is left out”.
Check the Advanced section
Section titled “Check the Advanced section”Two options in the Advanced section apply to Composite mode only:
- Print as Bitmap is unavailable in Separations mode. If a saved setting turns it on, Summary warns that separations print the art as it is.
- Overprints is unavailable in Separations mode. Separations always keep overprinting fills and strokes.
Check the separated pages
Section titled “Check the separated pages”Print to a PDF first and check each plate before the job goes to the press.
- In the Marks and Bleed section, turn on Page information. Each plate page then names its ink at the bottom edge. Turn on Trim marks, Registration marks and Color bars too if the print shop needs them.
- Under Printer, choose PDF File.
- Open the Summary section. Pages shows the page count, Options lists every option that differs from the default, and Warnings lists anything that will print differently from the settings.
- Press Print and choose where to save the PDF.
- Open the PDF and check each page. Each plate prints its ink’s coverage in gray, and full coverage prints black.
| Summary warning | What it means |
|---|---|
| the document is RGB: separations convert its colours to CMYK with the colour settings | The document is in RGB mode. Convert it with File → Document Color Mode → CMYK Color to control the conversion yourself. |
| ink frequencies and angles are not written as halftone screens yet: the output device’s screens apply | An ink has its own frequency or angle. The output device applies its own screens. |
| separations separate with a CMYK profile: the RGB printer profile is left out | The printer profile is an RGB profile. Pick a CMYK profile or Same As Source. |
| Print as Bitmap is for composite output: separations print the art as it is | Print as Bitmap is on. Separations print the art without it. |