
Workflows
LightCraft has two main views. The grid (View › Photo Grid or View › Square Grid, or press G) shows many photos at once. The Detail View (D, or double-click a photo) shows one photo large. The panels on the right, such as Edit, Crop & Rotate, Remove, Masking and Presets, open from the Window menu or the icons on the far right.
To see every keyboard shortcut, choose Help › Keyboard Shortcuts (Ctrl+/, or ⌘/ on a Mac).
Import photos
Section titled “Import photos”Choose File › Import Photos… or File › Import from Folder…. In the Import Photos window:
- Check the photos to bring in. Check All and Uncheck All change every photo at once. Photos already in the library are marked and start unchecked.
- Under Transfer, choose how the files get into the library:
- Add in place keeps the files where they are. The library only points to them.
- Copy copies them into the library’s
Originalsfolder, or a folder you choose. - Move copies them, then removes each original once the copy is checked.
- With Copy or Move, choose how to sort them into Folders (by day, by month or into one folder), and optionally Rename them. Copy as DNG converts raw files to DNG.
- Optionally add the photos to an Album, apply a Preset, or add Keywords.
- Click the import button at the bottom.
To work on a folder without importing it, use Local › Browse Folder… in the sidebar.
Organize
Section titled “Organize”- Albums and Folders: File › New Album… (Ctrl+N) and File › New Folder…. Folders hold albums.
- Smart albums: File › New Smart Album… fills an album by rules, such as rating or camera.
- Keywords: press K for the Keywords panel.
- Search: type in Search Photos at the top. Search understands fields, for example
rating:>3 flag:pick iso:>800 date:2026-04 keyword:mountains. - People: View › People groups the faces you have named. See People and faces.
- Stacks: select two or more photos and choose Photo › Stack › Group into Stack (Ctrl+G). Photo › Stack › Auto-Stack by Capture Time… stacks shots taken close together.
Deleting a photo moves it to Recently Deleted, where you can bring it back.
Cull a shoot
Section titled “Cull a shoot”Select photos and press a key. The same actions are in the Photo menu.
| Key | Action |
|---|---|
| 0 | Clear the star rating |
| 1 to 5 | Set the star rating |
| 6, 7, 8, 9 | Red, yellow, green or blue label |
| P | Flag as a pick |
| X | Flag as rejected |
| U | Clear the flag |
| [ and ] | Lower or raise the star rating by one |
| The backtick key | Cycle the flag: none, pick, rejected |
| Shift with a rating, label or flag key | Apply it, then go to the next photo |
| Shift+K | Add the keywords you set with Set Keyword Shortcut… (Ctrl+Alt+Shift+K) to the selected photos, or remove them if every photo has them all |
| Home, End | Go to the first or last photo |
Photo › Auto Advance moves to the next photo after each key. View › Compare (Shift+C) shows two photos side by side with zoom and pan kept in step. View › Survey (N) tiles the selected photos.
Rejecting a photo only marks it. It doesn’t delete the file.
In the grid, \ shows and hides the Filter Bar. In the Detail View it switches to the original instead.
Photo › Assisted Culling… scores the selected photos for focus and clipping, groups look-alike shots taken within a few seconds of each other, and marks the sharpest one in each group.
Edit a photo
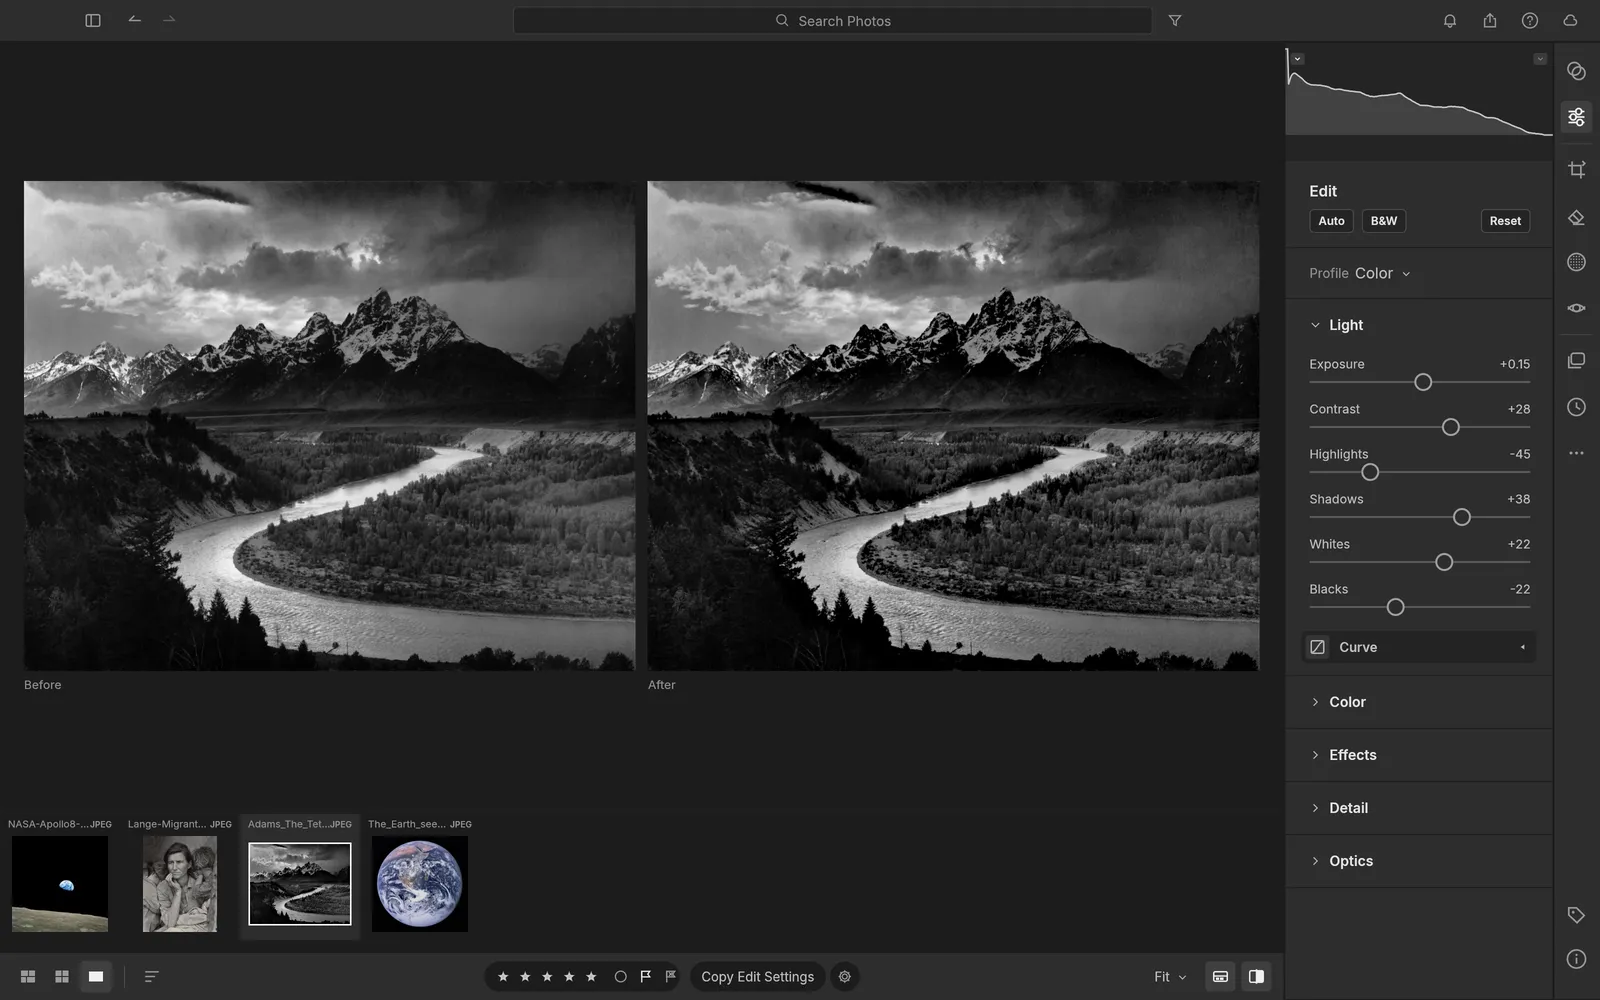
Section titled “Edit a photo”Open a photo in the Detail View and press E for the Edit panel.
- Auto sets a starting point. B&W turns the photo black and white. Reset removes all edits.
- Light: Exposure, Contrast, Highlights, Shadows, Whites and Blacks, plus the tone Curve.
- Color: white balance, Vibrance, Saturation, the Color Mixer and color grading wheels.
- Effects: Texture, Clarity, Dehaze, Vignette and Grain.
- Detail: sharpening and noise reduction. For raw photos, switch on AI Denoise and set its Amount. It needs nothing installed. You can add your own model in Settings › AI Denoise. Photos that aren’t raw keep the normal noise reduction.
- Optics: lens corrections, chromatic aberration and defringe.
To check your work, press \ to switch to the original and back, or Y for before and after side by side. J shows clipped highlights and shadows.
Crop and straighten
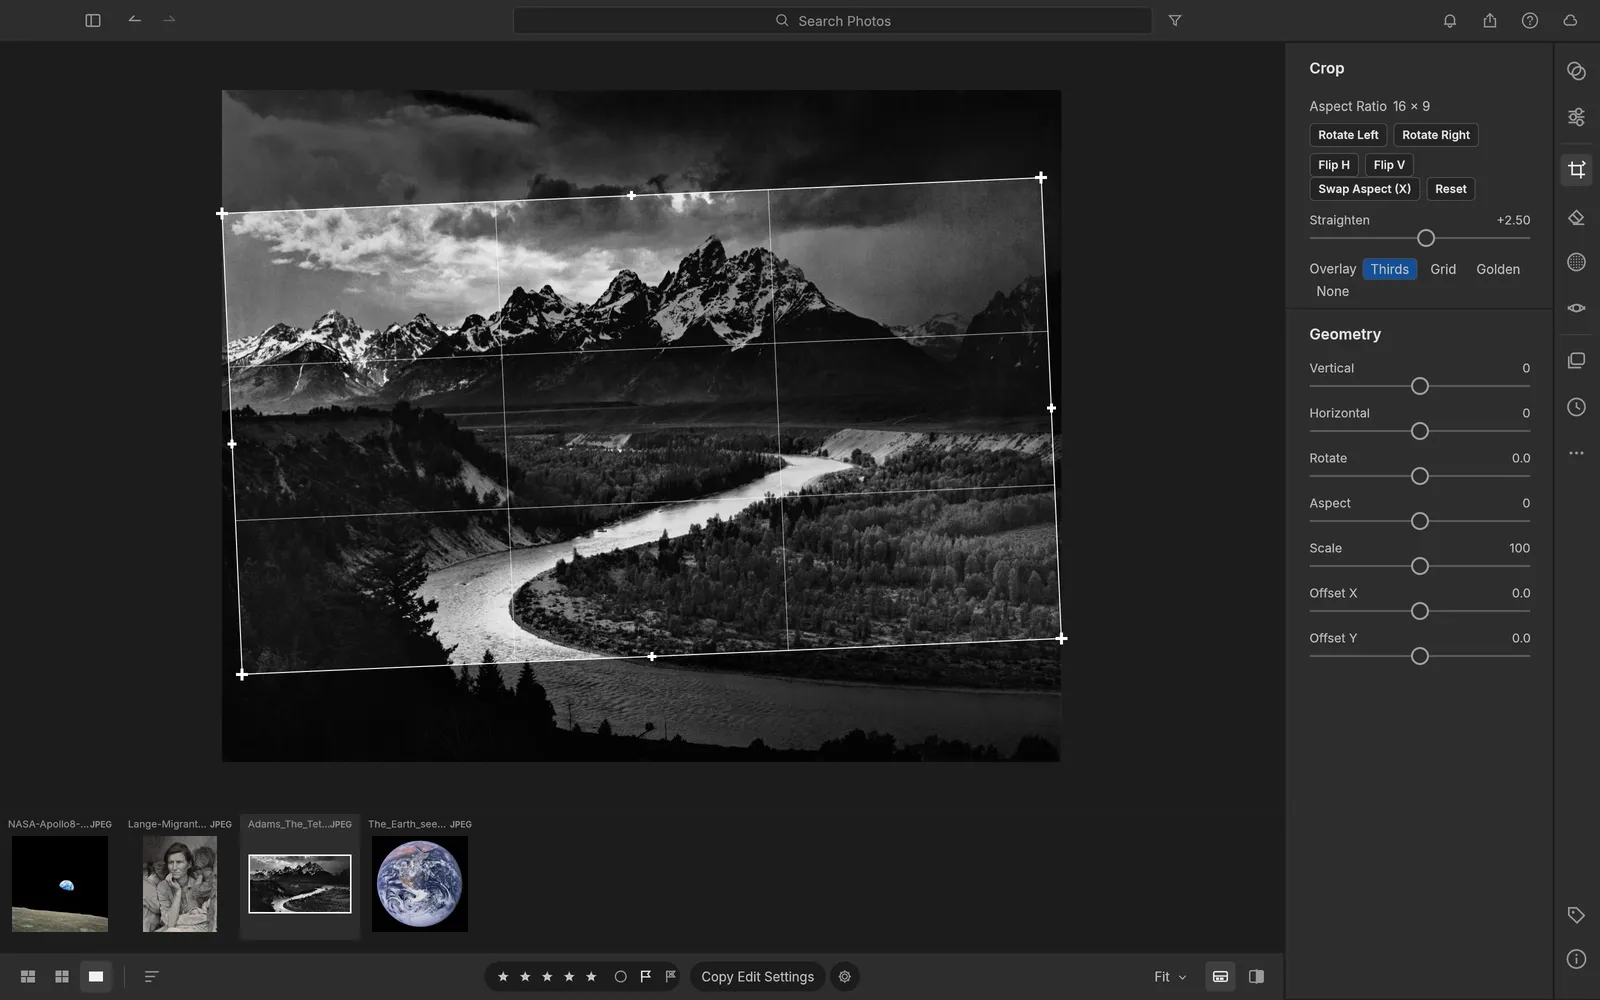
Section titled “Crop and straighten”Press C for Crop & Rotate. Drag the corners to crop, pick an Aspect Ratio, and drag Straighten to level the horizon. Rotate Left, Rotate Right, Flip H and Flip V turn and mirror the photo. Overlay shows thirds, a grid or golden-ratio guides. The Geometry sliders fix converging verticals and other perspective problems. Press Enter when you’re done.
Edit part of a photo with masks
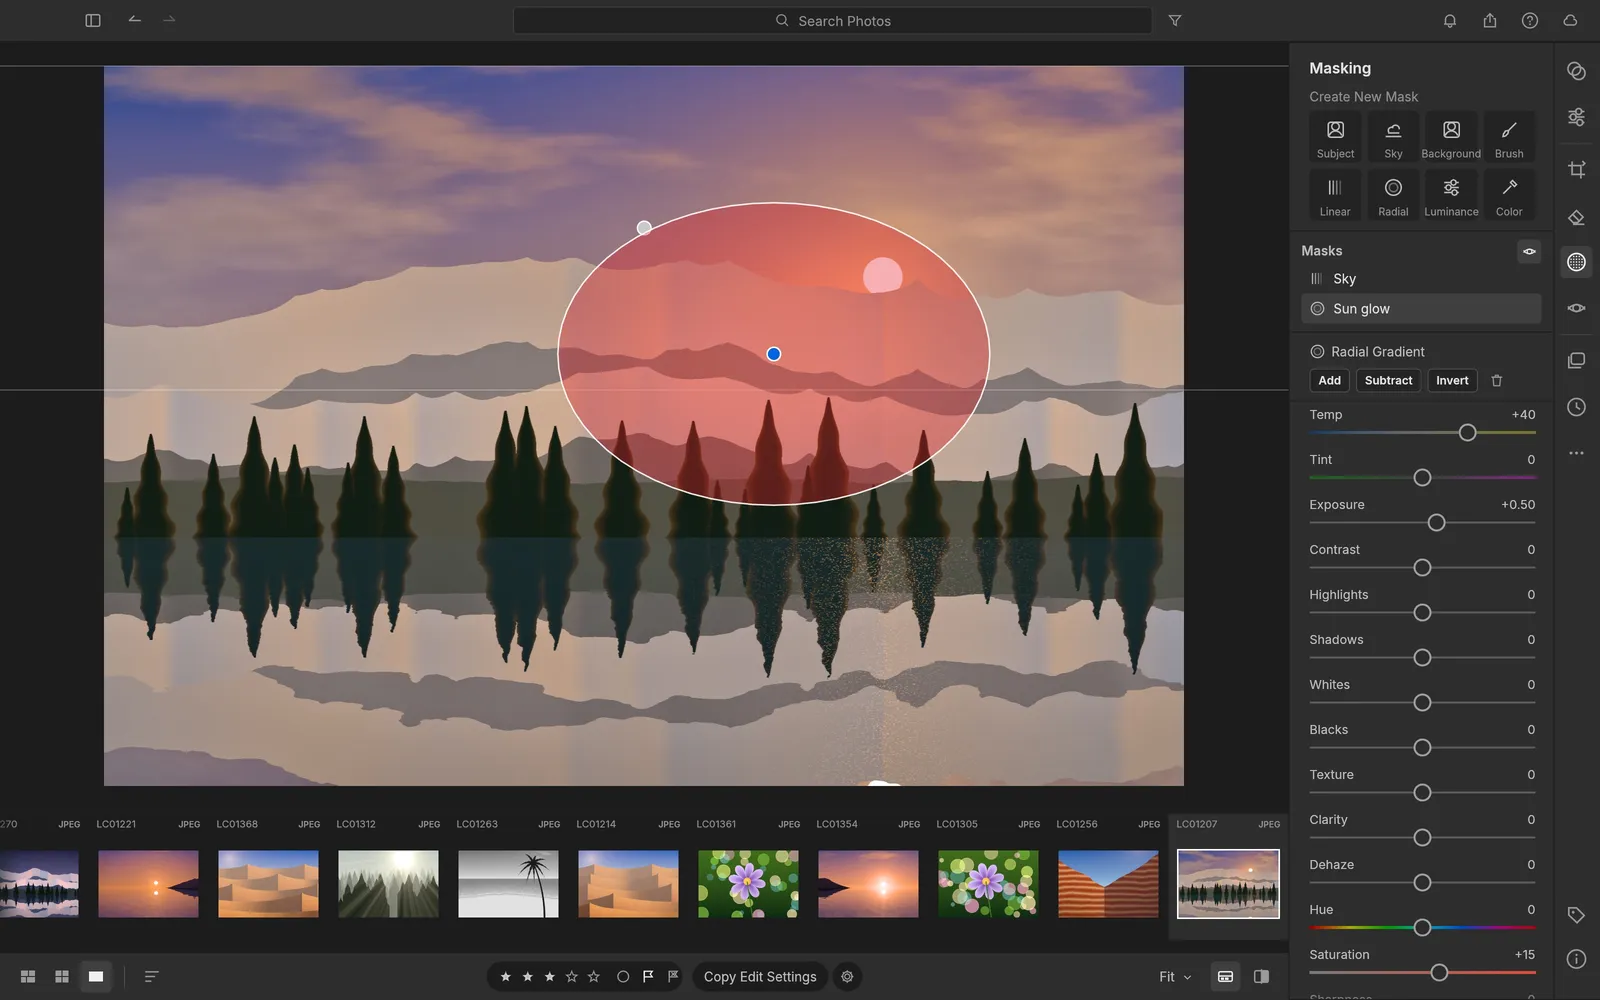
Section titled “Edit part of a photo with masks”Press M for Masking, and choose a mask under Create New Mask:
- Brush: paint where the change should go.
- Linear and Radial gradients: drag them onto the photo.
- Luminance and Color: select by brightness or color.
- Subject, Sky and Background: select them automatically.
Then move the sliders below to change only the masked area. Add and Subtract combine masks, and Invert flips one. O shows the mask as a colored overlay.
To use them:
- Object: click the thing you want to select. Each click refines the selection. Alt-click a part to leave it out.
- Describe: type what to select, such as
skyorthe red car, and press Enter. Separate several things with commas:car, road.
If the download doesn’t work, see Install the AI mask model by hand.
Remove distractions
Section titled “Remove distractions”Press H for Remove, set Size, and paint over a speck, a wire or a stray object. LightCraft repairs it when you release the mouse button: there is no Apply button. Choose Remove, Content-Aware, Heal or Clone at the top of the panel before you paint. To change a repair, click its pin, then adjust it or click Delete (⌫).
Visualize Spots (A) shows a black-and-white view that makes dust spots easy to see. Red Eye is in the Window menu.
Presets and copying edits
Section titled “Presets and copying edits”- Press Shift+P for Presets. LightCraft comes with 41 presets, and each has an Amount slider.
- Photo › Create Preset… saves your current settings as a preset.
- File › Import Profiles & Presets… and File › Export Presets… move presets and profiles between computers or from other apps, including Lightroom presets.
- File › Import Keywords… and File › Export Keywords… do the same for your keyword list.
- Edit › Choose Edit Settings to Copy… (Ctrl+Shift+C) and Edit › Paste Selected Settings… (Ctrl+Shift+V) copy edits from one photo to others, with just the settings you choose.
People and faces
Section titled “People and faces”LightCraft reads the face names that Lightroom and digiKam write into photos. It shows them as boxes on the photo, and View › People groups photos by person. View › Face Boxes shows or hides the boxes.
To find faces in photos that have none yet, select them and choose Photo › Detect Faces. The first time, LightCraft asks to download a small face-detection model. Nothing is downloaded until you accept.
Recognizing who is who needs an extra model. Nothing is included, and everything else works without one. Get one in Settings › Faces, which shows each model’s license before you can download it.
Work with several libraries
Section titled “Work with several libraries”A library is a folder with your catalog, previews and edits. To start another one, choose File › New Library…. To switch, choose File › Open Library… (Ctrl+O).
To choose which library opens at start, go to Settings › General and set At launch to Open the last library or Ask me. Ask me lists your recent libraries. Holding Alt (Option on a Mac) as the window appears asks once. You can also start LightCraft with --library and a folder.
User presets you made in one library can follow you into the next one you open. See Known problems, not fixed yet.
Photo menu at a glance
Section titled “Photo menu at a glance”| Command | What it does |
|---|---|
| Rename Photos… (F2) | Renames the files on disk from a template such as {date}_{name}. You can undo it. |
| Edit Capture Time… | Changes the capture date and time. |
| Auto-Tag from Tracklog… | Adds GPS positions to photos from a GPX track log, matched by capture time. |
| Stack | Groups photos into a stack. Auto-Stack by Capture Time… does it for you. |
| Edit In › Edit in PhotoCraft (Ctrl+Shift+E) | Opens a copy of the photo in PhotoCraft. |
| Edit In › Edit in Other Editor (Ctrl+Alt+E) | Opens a copy in another editor. |
| Edit In › Open Original in Other Editor (RAW, no copy) | Opens the raw file itself, for example in a raw developer. |
| All Metadata… | Shows every metadata field of the photo. |
Change what you see
Section titled “Change what you see”| Command | What it does |
|---|---|
| View › Filter Bar (Shift+F) | Filter the photos in view |
| View › Reference View (Shift+R) | Keeps one photo beside the one you are working on |
| View › Lights Out (Shift+L) | Dims everything but the photo. Esc turns it off |
| View › View Options… (Ctrl+J) | Chooses the lines the Info overlay shows |
| View › Cycle Info Overlay (Ctrl+I) | Steps through the Info overlay settings |
| View › Soft Proofing (S) | Previews the photo for another color profile |
| View › Navigator | Shows a small map when you are zoomed in |
| View › Before/After Side by Side (Y) | Shows the original next to your edit |
| View › Before/After Split (Shift+Y) | Splits one photo into before and after |
| Window › Second Window (Ctrl+F11) | Opens a second window, for example for another screen |
Lens corrections
Section titled “Lens corrections”Some raw files carry their own lens correction. For the others, LightCraft uses the open lensfun lens database. It isn’t included. LightCraft asks once if you want to download it. To download it later, go to Settings › General and choose Download Lens Database. Then turn on Enable Lens Corrections in the Optics section of the Edit panel.
Settings
Section titled “Settings”Choose Edit › Settings… (Ctrl+,, or ⌘, on a Mac). The tabs are:
| Tab | What it holds |
|---|---|
| General | Language, which library opens at launch, whether Auto Advance is on, which dialogs ask for confirmation, your external editors, and the lens database |
| Import | Defaults for raw and other photos, a metadata preset, XMP sidecars, importing dropped files without review, and Auto Import from a watched folder |
| Performance | Whether to use the GPU, the preview cache size and the previews LightCraft builds ahead |
| Display | Your monitor’s color profile |
| Interface | Light or dark appearance, and what the filmstrip, grid, keywords and Detail View show |
| Slideshow | Templates and layout for slideshows |
| Faces | Face detection and recognition models |
| AI Denoise | Your own denoise models, and whether denoising runs on the graphics card or the processor |
Change the language
Section titled “Change the language”Choose Edit › Language. LightCraft comes in English, Indonesian, Czech, German, Spanish, French, Italian, Polish, Portuguese, Finnish, Swedish, Vietnamese, Russian, Ukrainian, Georgian, Japanese, and Simplified and Traditional Chinese.
Merge photos
Section titled “Merge photos”Select bracketed or overlapping photos and choose Photo › Photo Merge › HDR…, Panorama… or HDR Panorama…. The result is a new DNG.
Export
Section titled “Export”Select photos and choose File › Export….
- Set Format: JPEG, PNG, TIFF, PSD, WebP, AVIF, JPEG XL, DNG or Original files. Original files copies the files unchanged, each with an XMP sidecar holding its edits.
- Leave Full size checked, or choose Resize to a long edge, width, megapixels and so on.
- Optionally set Color space, Sharpen, Metadata, Remove location info or a Watermark.
- Next to Folder, click Choose…. Set File name with tags such as
{name}-{seq}, and If file exists. - Click the export button at the bottom.
Type a name next to Save preset to keep your choices. File › Export with Previous repeats the last export. On a Mac, Add to Apple Photos also adds the exported files to Photos.
Print, contact sheets and slideshows
Section titled “Print, contact sheets and slideshows”- File › Contact Sheet PDF… makes a PDF of thumbnails of the selected photos.
- File › Print… (Ctrl+P) lays photos out on pages, as single images, contact sheets or picture packages, and saves them as a PDF. Printing straight to a printer isn’t there yet: print the PDF instead.
- View › Slideshow plays the photos full screen. View › Export Slideshow… saves it as a PDF, JPEG images or a video.
Back up your library
Section titled “Back up your library”Choose File › Back Up Library…. To restore one, choose File › Restore Library from Backup….