
Getting started
1. Install FilmCraft
Section titled “1. Install FilmCraft”The quickest way is ArtCraft Launcher: install it, then press Install on FilmCraft’s card. To download FilmCraft on its own, see Install and update.
2. Open FilmCraft
Section titled “2. Open FilmCraft”FilmCraft opens on a demo project, so you can look around before importing anything. Along the top are the Home button and three tabs:
- Import brings media into your project.
- Edit is where you cut, grade and mix.
- Export renders your sequence to a file.
The menus (File, Edit, Clip, Sequence, Markers, Graphics and Titles, View, Window and Help) sit next to the tabs. On a Mac they are in the menu bar at the top of the screen.
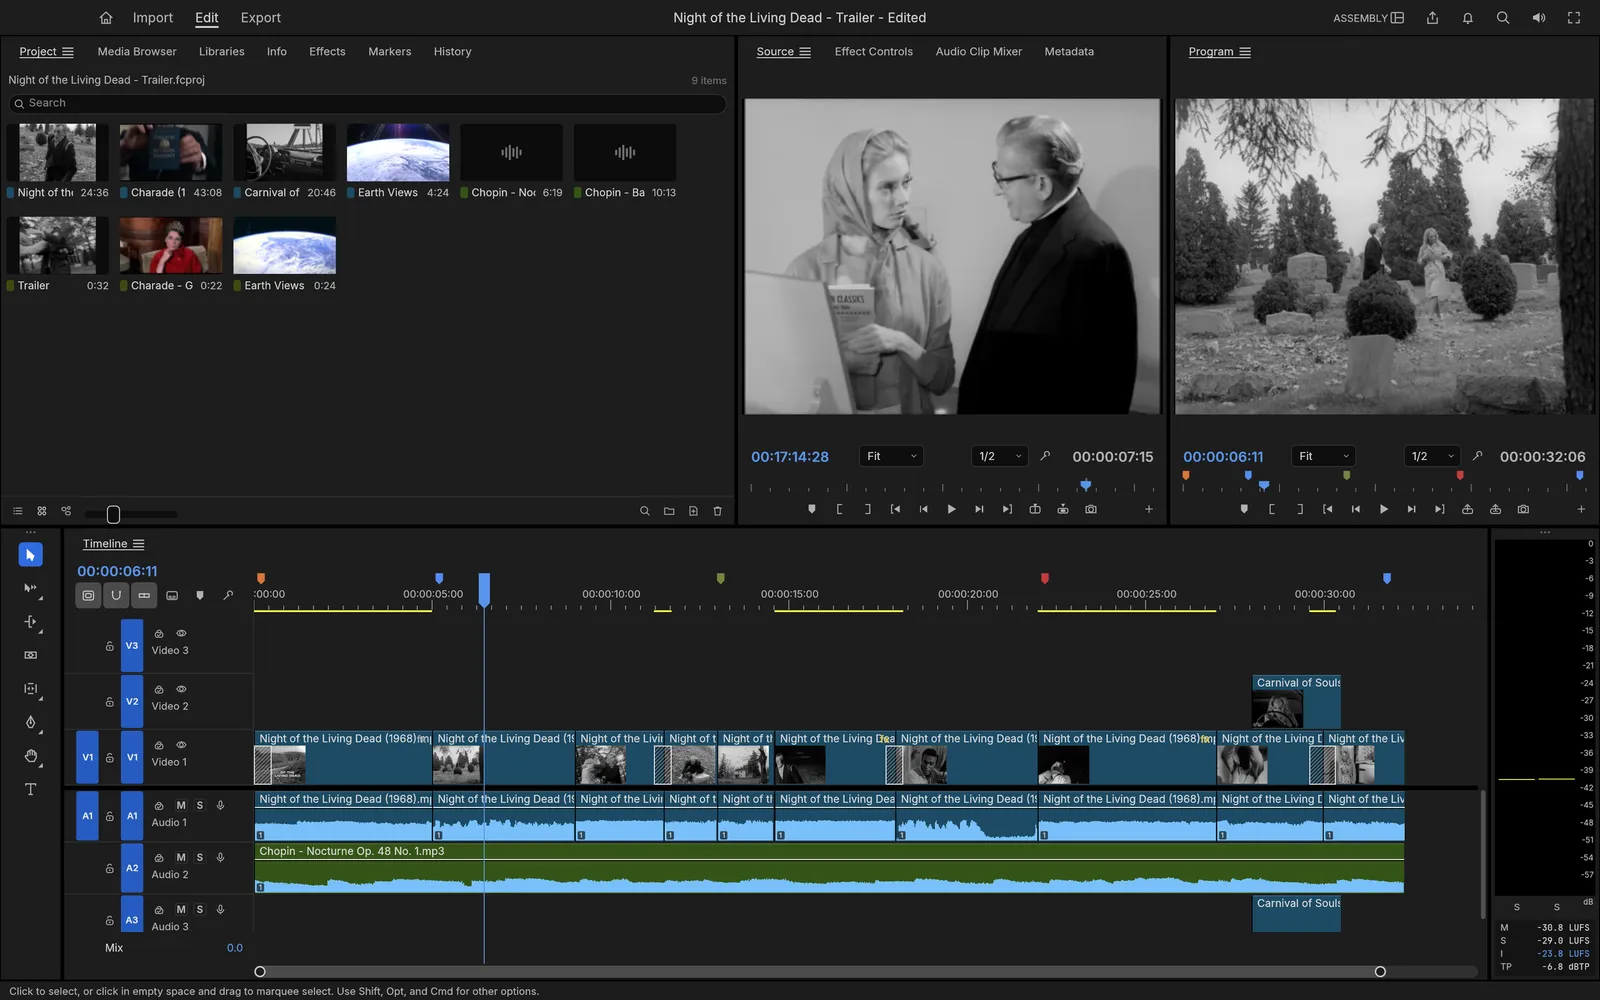
3. Start a project and import your media
Section titled “3. Start a project and import your media”- Choose File › New › Project… to start your own project.
- Choose File › Import… (Ctrl+I, or ⌘I on a Mac) and pick your video, audio and still files. You can also drop files or folders onto the window.
- The files appear in the Project panel.
FilmCraft doesn’t copy your media into the project. Keep the files where they are, or FilmCraft won’t find them next time.
4. Make a sequence
Section titled “4. Make a sequence”In the Project panel, right-click a clip and choose New Sequence From Clip. FilmCraft makes a sequence with the same settings as the clip, and puts its picture on a video track such as V1 and its sound on an audio track such as A1.
To add more clips, drag them from the Project panel onto the timeline.
5. Cut
Section titled “5. Cut”- Press Space to play and stop. J, K and L play backward, stop and play forward.
- Press C for the Razor Tool and click a clip to cut it in two. Press V to go back to the Selection Tool.
- Select a clip and press Backspace to remove it and leave a gap (Edit › Clear), or Shift+Delete to remove it and close the gap (Edit › Ripple Delete).
- Edit › Undo (Ctrl+Z, or ⌘Z on a Mac) undoes a mistake.
For fades and transitions, see Workflows.
6. Save
Section titled “6. Save”Choose File › Save (Ctrl+S, or ⌘S on a Mac). FilmCraft also saves an auto-save copy every few minutes.
7. Export
Section titled “7. Export”- Click the Export tab.
- Enter a File Name and a Location.
- Leave Format at H.264 for an MP4 that plays almost anywhere.
- Click Export.
The export runs in the background, so you can keep editing. For other formats, see Workflows.
Next steps
Section titled “Next steps”- Workflows: trimming, color, effects, audio, titles and more.
- Troubleshooting: if something goes wrong.