Draw on the grid
This page explains how to turn on the document grid, set its spacing and look, and snap the art you draw, move and resize to it, and how the grid differs from the pixel grid and the transparency grid.
Show the grid
Section titled “Show the grid”- Choose View → Show Grid (Ctrl+‘, or Cmd+’ on macOS). The grid covers the canvas, including the area around the artboards, and the command changes to View → Hide Grid.
- To hide the grid again, choose View → Hide Grid or press the same shortcut.
You can also click Show Grid in the Rulers & Grids section of the Properties panel while nothing is selected. The grid is off by default, and it does not show in Presentation Mode.
| Command | Windows and Linux | macOS |
|---|---|---|
| View → Show Grid | Ctrl+’ | Cmd+’ |
| View → Snap to Grid | Ctrl+Shift+’ | Cmd+Shift+’ |
| View → Pixel Preview | Ctrl+Alt+Y | Cmd+Option+Y |
| View → Rulers → Show Rulers | Ctrl+R | Cmd+R |
| Edit → Preferences… | Ctrl+K | Cmd+K |
Set the grid spacing and look
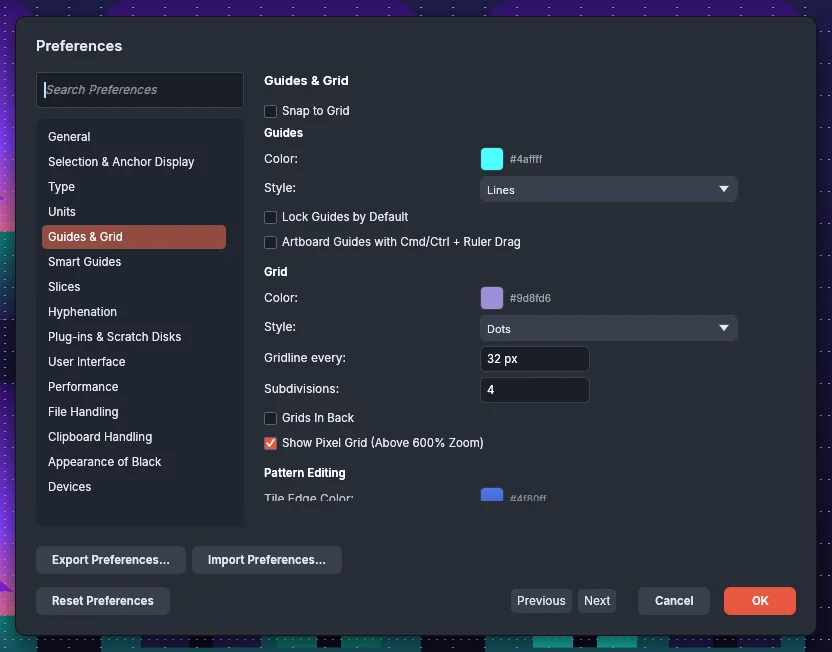
Section titled “Set the grid spacing and look”- On Windows and Linux, choose Edit → Preferences… (Ctrl+K) and click Guides & Grid in the list of pages. On macOS, choose VectorCraft → Settings → Guides & Grid…, or press Cmd+K and click Guides & Grid.
- Under Grid, set the options in the following table.
- Click OK. Open documents redraw their grid with the new spacing.
| Option | Default | What it does |
|---|---|---|
| Color | #c8c8c8 | Sets the color of the gridlines. The subdivision lines are drawn in a lighter version of the same color |
| Style | Lines | Lines draws the gridlines and the subdivision lines. Dots draws a dot at each point where a gridline crosses a subdivision |
| Gridline every | 72 pt | Sets the distance between gridlines, from 1 to 16383 pt. The field shows the general unit set on the Units page |
| Subdivisions | 8 | Sets how many cells each gridline space is divided into, from 1 to 1000 |
| Grids In Back | On | Draws the grid behind the art, where filled shapes hide it. Turn it off to draw the grid over the art |
| Show Pixel Grid (Above 600% Zoom) | On | Shows the pixel grid in Pixel Preview at 600% zoom and closer |
The Snap to Grid check box at the top of the page is the same setting as View → Snap to Grid.
When you zoom out, the subdivision lines are left out once they would be closer together than 6 screen pixels, and the whole grid is left out once the gridlines themselves would be closer than 4 screen pixels. In the Dots style, the dots are left out once the gridlines would be closer than 8 screen pixels.
The Guides & Grid preferences list the same options with the guide settings.
Snap art to the grid
Section titled “Snap art to the grid”- Choose View → Show Grid so that you can see the lines that art snaps to.
- Choose View → Snap to Grid (Ctrl+Shift+‘, or Cmd+Shift+’ on macOS). You can also turn it on in the Control bar’s Snapping menu, in the Properties panel’s Snap Options while nothing is selected, or with the Snap to Grid check box in Preferences → Guides & Grid.
- Draw, move or resize art. The points you place snap to the nearest grid point.
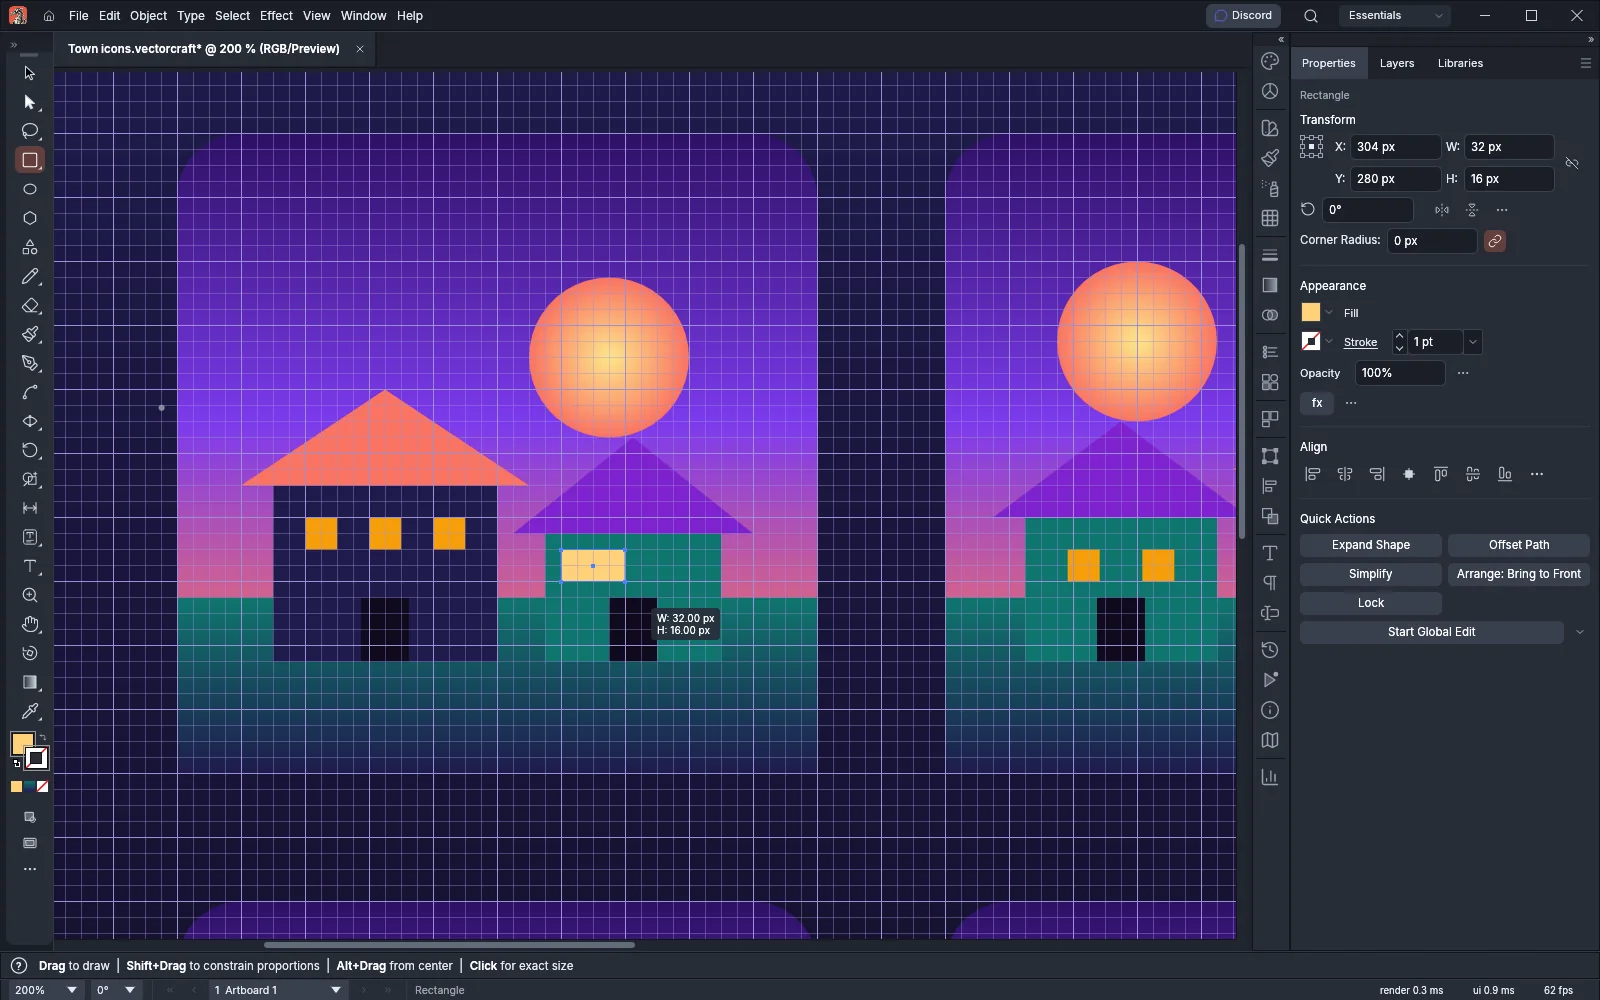
Snap to Grid snaps to the subdivision lines as well as the gridlines. With Gridline every set to 32 px and Subdivisions set to 4, art snaps every 8 px. Set Subdivisions to 1 to snap to the gridlines alone.
Each kind of edit snaps in its own way:
- When you draw with a tool such as the Rectangle tool (M), each point you click or drag to snaps to the nearest grid point. When you hold Shift to constrain a shape or an angle, VectorCraft applies the constraint after it snaps the point. The size readout still shows the width and height.
- When you move art with the Selection tool (V), the selection moves so that on each axis its edge nearest a line of the grid sits on that line, however far away the line is. The center of the selection does not snap.
- When you drag a handle of the bounding box, the side or corner that moves snaps to the nearest line of the grid.
- When you drag a ruler guide, it snaps to a line of the grid. Hold Shift to snap it to the ruler’s tick marks instead.
What changes with Smart Guides
Section titled “What changes with Smart Guides”While Snap to Grid is on, art snaps only to the grid:
- The Selection tool and the drawing tools do not snap to Smart Guides or to Snap to Point targets, and they show no alignment guides.
- Snap to Glyph does not work.
- Object Highlighting does not outline the object under the pointer.
- Snap to Last Location does not send a dragged selection back to where it started.
- Snap to Pixel has no effect. Turn Snap to Grid off to place art on whole pixels.
Turn Snap to Grid off to snap with Smart Guides again. The Smart Guides commands are listed in Use rulers, guides and grids, and Snap and align with Smart Guides shows how to use them.
Where the grid starts
Section titled “Where the grid starts”The grid is laid out from the document’s zero point. In a new document, that is the top-left corner of the first artboard, so a gridline runs along that artboard’s top and left edges.
Moving the ruler origin does not move the grid. When you drag the ruler origin to a new point, the rulers count from that point, but the gridlines stay where they are, and art still snaps to the same positions. To line art up with gridlines that start at another point, choose a Gridline every value that divides evenly into the distance from the document’s zero point. For how to move and reset the ruler origin, see Use rulers, guides and grids.
See the pixel grid
Section titled “See the pixel grid”The pixel grid draws a line at every pixel, so you can see which pixels the art covers when it is exported.
- Choose View → Pixel Preview (Ctrl+Alt+Y, or Cmd+Option+Y on macOS). The art shows as it will look when written to pixels.
- Zoom in to 600% or closer. Fine gray lines appear between the pixels.
- To place art on whole pixels, choose View → Snap to Pixel and make sure View → Snap to Grid is off.
- Draw or move art. With the Selection tool, the readout shows the move in whole pixels.
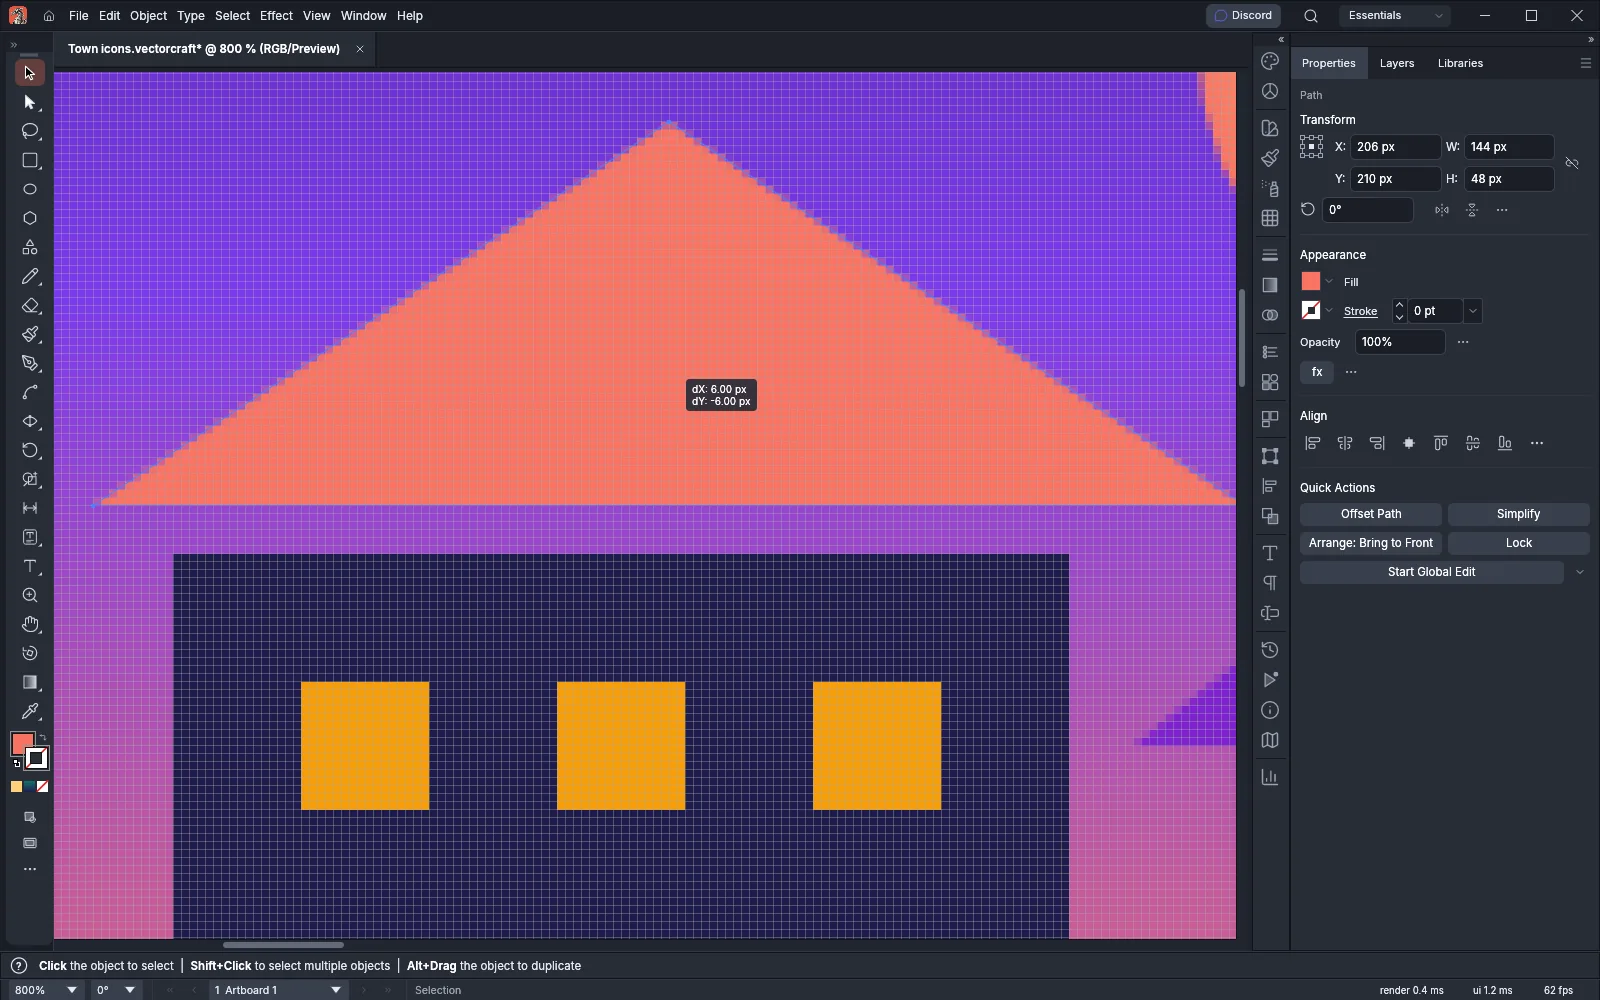
The pixel grid needs Show Pixel Grid (Above 600% Zoom) on in Preferences → Guides & Grid. It is on by default. While Pixel Preview is on, the tools do not snap to Smart Guides. To make art you have already drawn line up with the pixels, see Keep small art sharp on screen.
The grid and the transparency grid
Section titled “The grid and the transparency grid”VectorCraft has two grids with similar names:
| Document grid | Transparency grid | |
|---|---|---|
| Command | View → Show Grid | View → Show Transparency Grid |
| What it shows | Lines or dots that you place art on | A checkerboard on the artboards in place of the white paper, so you can see which parts of the art are transparent |
| Settings | Preferences → Guides & Grid | File → Document Setup…, Transparency tab: Grid Size and Grid Colors |
| Size on screen | Grows and shrinks as you zoom | Keeps the same cell size at every zoom |
| Snapping | View → Snap to Grid snaps art to it | Art does not snap to it |
| Turned on for | Every open document | The current document only |
Both have a button in the Rulers & Grids section of the Properties panel while nothing is selected. For the transparency grid’s options, see Set up a document and artboards.