Workflows
FigCraft’s main menu (the button at the top of the left rail) has File, Edit, View, Object, Text, Arrange, Vector, Plugins, Preferences, Libraries and Help. If you can’t find a command, press Ctrl+K (⌘K on a Mac) and type its name into Actions.
Pick a tool
Section titled “Pick a tool”The toolbar at the bottom holds the drawing tools. Most have a key.
| Tool | Key |
|---|---|
| Move, Scale, Hand | V, K, H |
| Frame | F |
| Section | Shift+S |
| Slice | S |
| Rectangle, Ellipse | R, O |
| Line, Arrow | L, Shift+L |
| Polygon, Star | None |
| Pen, Pencil | P, Shift+P |
| Text | T |
| Comment | C |
| Shape builder | Shift+M |
A Section groups frames on the canvas, so you can lay out screens in labeled areas. A Slice marks an area to export that isn’t a layer. View › Slices shows or hides them.
Lay out screens with auto layout
Section titled “Lay out screens with auto layout”Auto layout lines up a frame’s children in a row, a column, a wrapping row or a grid, and resizes the frame to fit.
- Select a frame or some layers and press Shift+A (Object › Add auto layout). Object › Suggest auto layout works out a layout from where the layers already are.
- In the Design panel, set the direction, gap, padding and alignment. Drag the padding and gap handles on the canvas too.
- Each child can Hug its contents, Fill the space, or keep a Fixed size, with minimum and maximum sizes.
- Arrow keys move a child along the layout.
For frames without auto layout, use constraints and layout grids. View › Layout grids (Shift+G) shows them.
Build components and variants
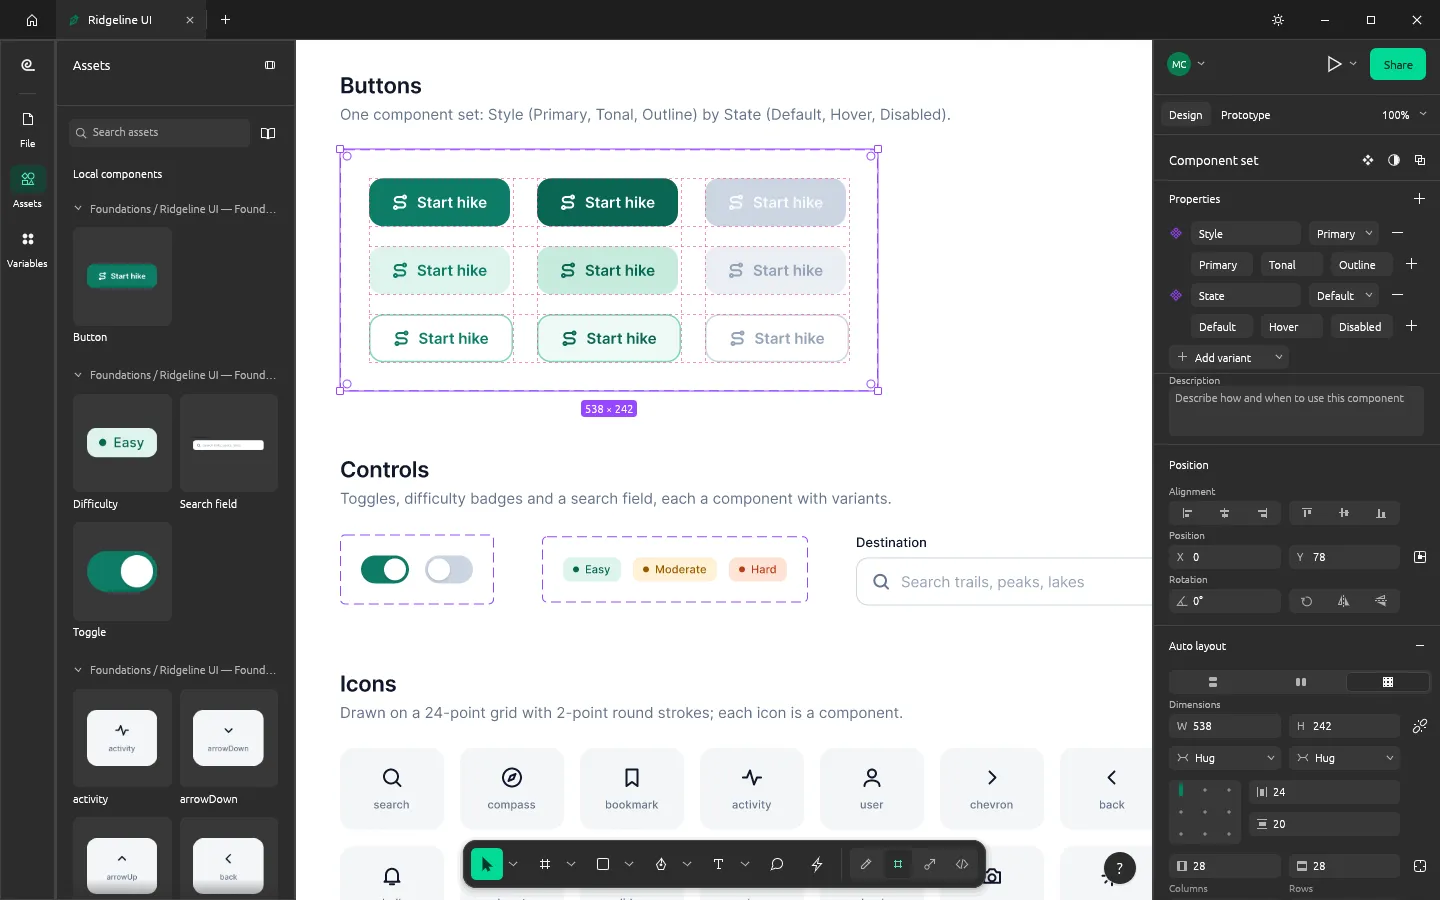
Section titled “Build components and variants”A component is a design you reuse. Change the main component and every copy (instance) updates, while keeping the changes you made to each one.
- Select a layer and press Ctrl+Alt+K (⌥⌘K on a Mac), or choose Object › Create component.
- To make variants, select several components and choose Object › Combine as variants. Then set variant properties such as Style and State in the Design panel.
- The Assets panel lists your components with live thumbnails. Drag one onto the canvas to place an instance.
- On an instance, Object has Reset all changes, Detach instance and Go to main component.
- Object › Push changes to main component copies the changes you made on an instance into the main component. Restore main component brings back a main component that was deleted, from one of its instances.
- Object › Create multiple components turns each selected layer into its own component.
- In a component, a frame has a Slot menu with Make slot. FigCraft asks for a slot name. Instances can then fill the slot with their own content.
- Libraries › Hide when publishing keeps the selected components out of the library you publish.
To use components in other files, publish this file as a library with Libraries › Publish library…, then add it in other files from Libraries › Open libraries.
Select, rename and align
Section titled “Select, rename and align”- Edit › Find and replace… (Ctrl+F) searches the text on your page.
- Edit › Copy properties (Ctrl+Alt+C) and Paste properties (Ctrl+Alt+V) move a layer’s look onto another layer.
- Edit › Paste over selection (Ctrl+Shift+V) pastes in the same place as the selected layer. Paste to replace (Ctrl+Shift+R) swaps the selection for what you copied.
- Edit › Select matching layers (Ctrl+Alt+A) and Edit › Select all with same pick every layer with the same Fill, Stroke, Effect, Text properties, Font, Instance or Properties.
- Object › Rename (Ctrl+R or F2) renames a layer. Batch rename… renames the whole selection at once.
- Arrange aligns and distributes the selection, with keys such as Alt+A for left and Alt+D for right. Tidy up, Pack horizontal and Pack vertical space out the layers. Round to pixels snaps them to whole pixels.
- Object also has Use as mask, Crop image, Rasterize selection, Move to page and Hide other layers.
Use styles and variables
Section titled “Use styles and variables”- Styles save a fill, text, effect or layout grid setting under a name, so you can apply it again.
- Variables hold a color, number, text or true/false value. Open the Variables panel from the left rail to create them. A collection can have modes, such as Light and Dark, with a value for each.
- Bind a variable to a fill, stroke, effect, layout grid or component property. Switch a frame’s mode in the Design panel to see it in the other theme.
To hand variables to developers, open the Variables panel and click Export…. Choose Variables JSON…, CSS custom properties… or Dart constants for Flutter…. Import… adds or updates collections from a variables JSON file. If an entry can’t be imported, FigCraft skips it and says how many.
Draw vectors
Section titled “Draw vectors”- P is the Pen tool and Shift+P the Pencil. Double-click a shape or path to edit its points and handles.
- Shift+M is the Shape builder: click or drag across the regions of overlapping shapes to merge them, or hold Alt to remove them.
- Object › Boolean groups has Union, Subtract, Intersect and Exclude. The shapes inside stay editable.
- Object › Flatten (Ctrl+E) and Object › Outline stroke turn layers into plain paths.
- The Vector menu has Join selection (Ctrl+J), Smooth join selection (Ctrl+Shift+J), Delete and heal selection (Shift+Delete), Simplify vector, Reverse path direction and Offset path.
Zoom, grids and snapping
Section titled “Zoom, grids and snapping”- View › Pixel grid (Shift+’) shows the pixel grid at high zoom. View › Pixel preview shows the design as it looks at 1x or 2x.
- View › Rulers (Shift+R) shows rulers. View › Outlines shows the layers as outlines, with options for the selection, hidden layers and object bounds. Mask outlines and Frame outlines do the same for masks and frames.
- Under Preferences, Snap to geometry, Snap to objects and Snap to pixel grid turn each kind of snapping on or off. Keep tool selected after use stops FigCraft from going back to Move. Use number keys for opacity sets the opacity of the selection from the number keys. Nudge amount… sets how far the arrow keys move a layer.
Make a prototype
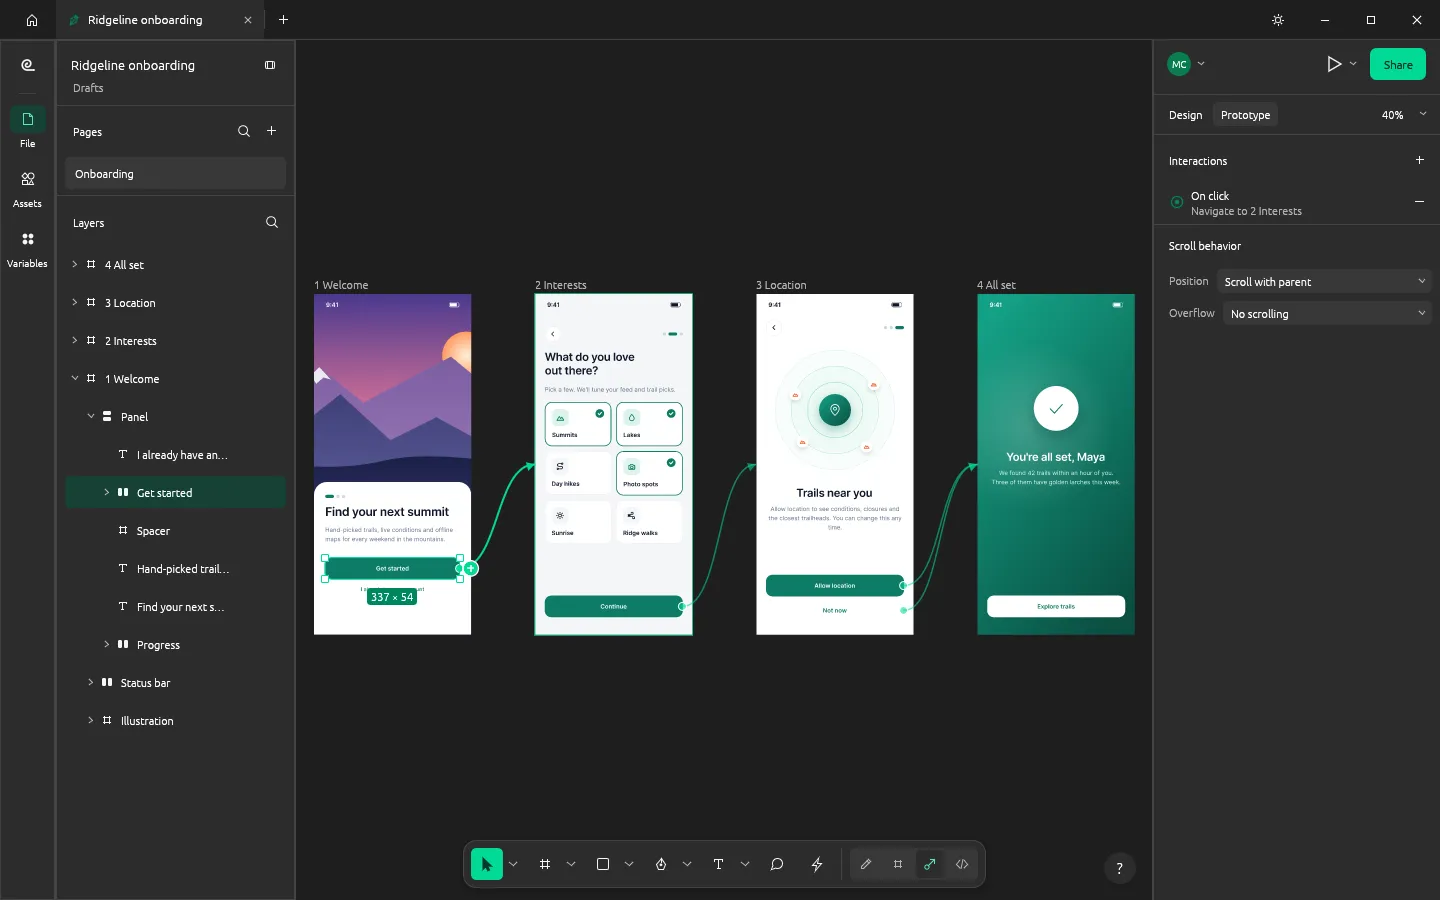
Section titled “Make a prototype”Switch the right panel to Prototype (Shift+E toggles between Design and Prototype).
- Select a button or layer. Drag the round handle on its edge to the frame it should open, or click + next to Interactions.
- Choose a trigger, such as On click, and an action, such as Navigate to, with a transition.
- Press the play button at the top of the right panel, or Ctrl+Alt+Enter (⌥⌘Enter on a Mac), to present it. Shift+Space previews it on the canvas.
While presenting, →, Space or N goes to the next frame, ← to the previous one, R restarts and F goes full screen.
Prototypes can also set and check variables, so a screen can count taps or remember a choice.
Hand off with Dev Mode
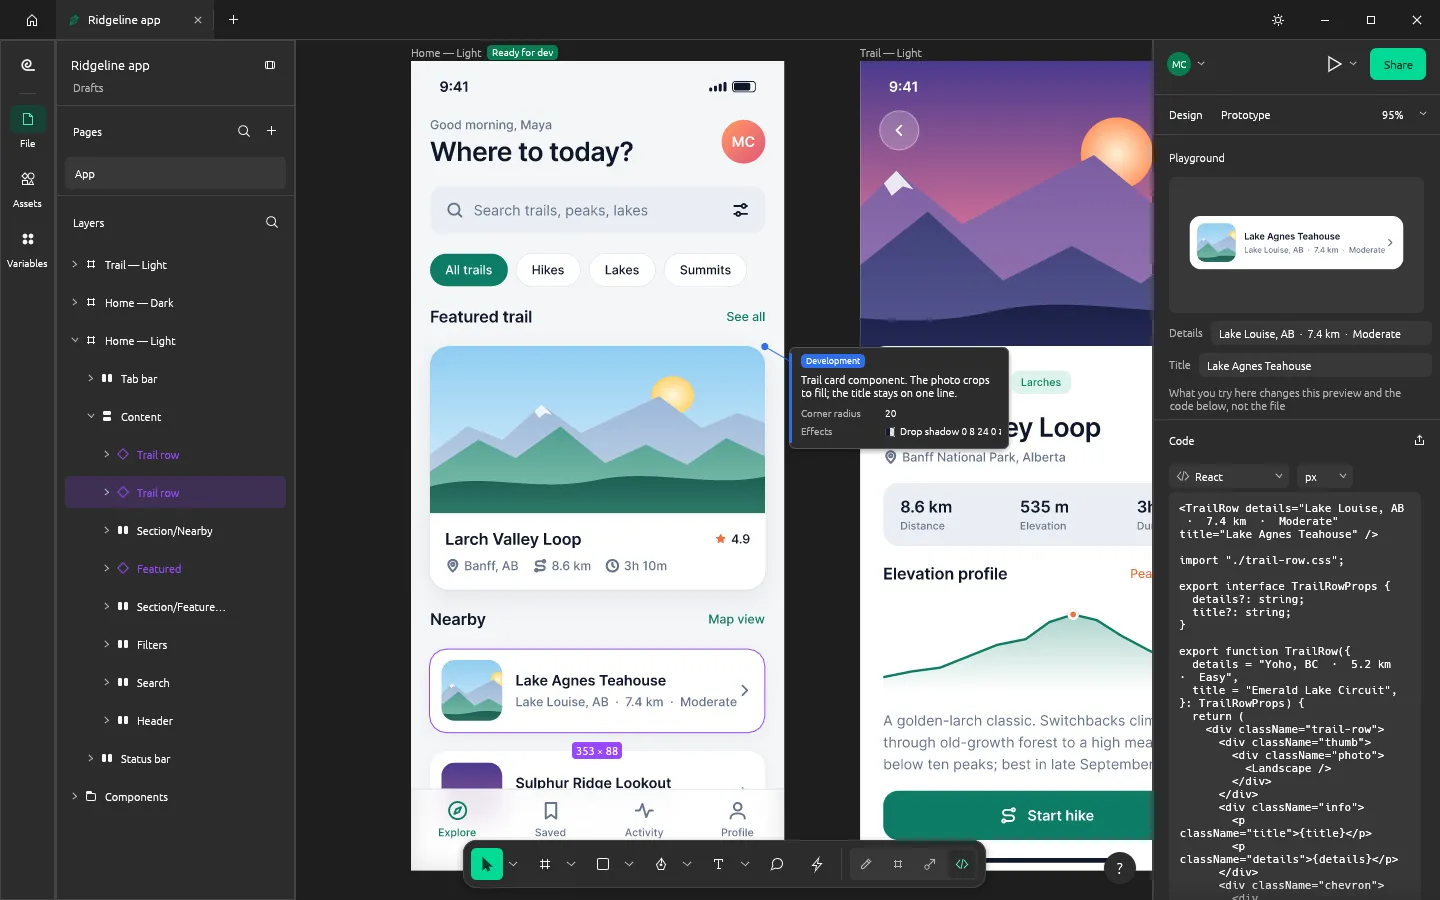
Section titled “Hand off with Dev Mode”Press Shift+D, or choose Inspect in the toolbar’s switcher, to turn on Dev Mode. It only inspects: to edit again, press Shift+D or switch back to Design.
- Select a layer to see its sizes, spacing and styles, and code for it in CSS, HTML, React, Vue, Tailwind, Leptos, SwiftUI, Jetpack Compose, ArkUI or Flutter. For an instance, the component’s properties become the code’s props.
- Hold Alt and point at another layer to measure the distance. Add measurements and annotations that stay on the canvas.
- Mark a frame Ready for dev. Compare changes shows what’s changed since then.
Comment and keep versions
Section titled “Comment and keep versions”- Press C for the Comment tool and click to pin a comment to a frame. Comments have replies, @mentions and reactions. Shift+C shows or hides them.
- File › Save to version history… (Ctrl+Alt+S, ⌥⌘S on a Mac) saves a named version. File › Show version history lists them.
Try changes in a branch
Section titled “Try changes in a branch”A branch is a copy of the file where you can try changes. When you like them, review the differences and merge them back.
- Choose File › Create branch…, give the branch a Branch name and confirm. The branch opens in its own tab.
- Work on the branch. The file’s version history lists it under Branches, where you can Open branch or archive it.
- On the branch tab, click Review and merge in the banner over the canvas. The review shows the main file and the branch side by side, frame by frame, and lists what changed on each side.
- If the same layer changed on both sides, choose which version to keep under Conflicts. Every conflict needs a choice.
- Click Merge into main. The merge is one undo step, and the branch is archived.
If the main file changed while you worked, click Update from main to bring its changes into the branch first.
Run a workshop on a board
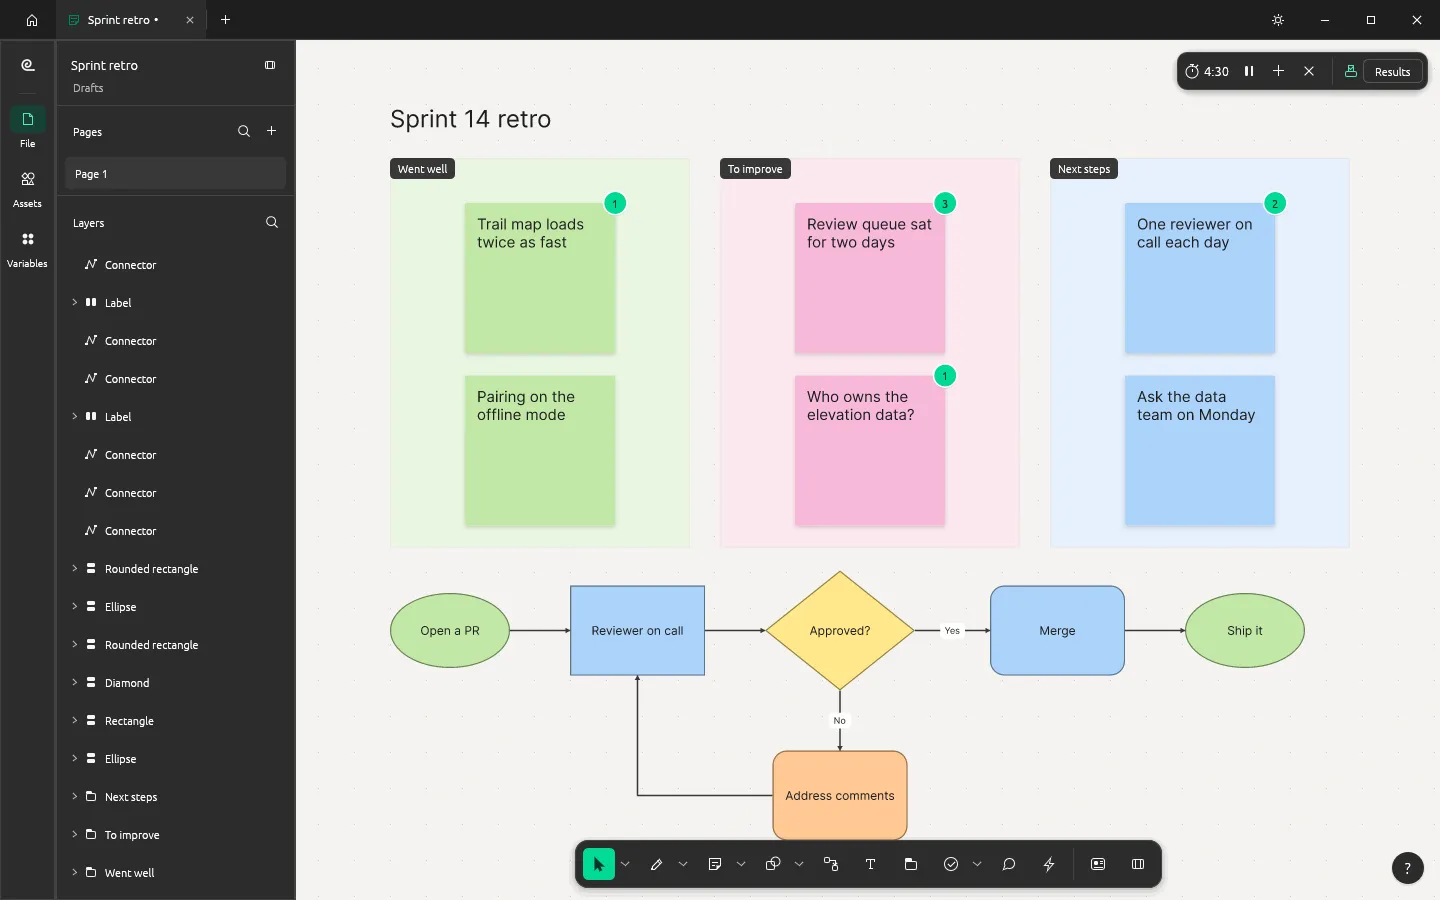
Section titled “Run a workshop on a board”File › New board makes a whiteboard file. It has sticky notes (Q), shapes (B), connectors (X), a marker (M), a highlighter (U) and stamps (W), and templates such as a retrospective and a flow chart. Run a timer and a vote from the bar at the top right. Boards work in live sessions too.
Export
Section titled “Export”- File › Export… (Ctrl+Shift+E, ⇧⌘E on a Mac) exports the selection, or the page when nothing is selected, as PNG, JPEG, WebP, SVG, PDF or Android vector drawable XML.
- Add export settings to a layer in the Design panel to export it the same way each time. The Export dialog then exports every layer that has them.
- Each export setting has a Suffix, which is added to the file name. Ignore overlapping layers leaves out layers that overlap the one you export, and Include bounding box exports the layer’s whole bounding box. For SVG, you can also choose Outline text, Include id attribute and Simplify stroke. PNG, JPEG and WebP have a Color profile choice.
- File › Color profile… sets the color space of the file. View › Soft-proof sRGB previews how Display P3 colors look in sRGB.
- File › Export frames to PDF… puts every frame on its own page.
- Edit › Copy as copies the selection as text, CSS, SVG or PNG for pasting into another app.
- The Export dialog can also save the whole file as .fig. This is experimental: other apps may not open every .fig file it makes.
Open files from other apps
Section titled “Open files from other apps”File › Open… (Ctrl+O) opens .figcraft, .fig, .sketch, .penpot and .jam files, design files exported as JSON, SVG, and PNG, JPEG, WebP, GIF and TIFF images. File › Import from file… (Ctrl+Shift+I) adds one to the file you have open.
To bring in layers from Figma, copy them in Figma and press Ctrl+V in FigCraft. FigCraft pastes them as design layers. If the clipboard didn’t carry the images of some layers, a message names them. Components you paste twice may not link to the ones you pasted earlier (#2022).
File › Place image… (Ctrl+Shift+K) places an image or a video on the page.
Files from other apps open on a best-effort basis. Some layers or effects may not come across exactly. Check the result, and keep the original.
Plugins
Section titled “Plugins”Plugins › Manage plugins… lists your plugins. To add one, choose Plugins › Development › Import plugin from manifest… and pick its figcraft-plugin.json file. Plugins run in a sandbox with no access to your files or the network, and each run is one undo step. Plugins › Run last plugin runs the last one again.
Work in tabs and windows
Section titled “Work in tabs and windows”Each open file has a tab. Ctrl+Tab and Ctrl+Shift+Tab move between them. In the File menu, New window opens another window, Duplicate and Rename work on the open file, Revert to saved drops your unsaved changes, Close tab closes the file, and Open recent lists the files you opened last.
Change the look and language
Section titled “Change the look and language”- View › Theme switches between Light, Dark and Follow system.
- Preferences › Preferences… (Ctrl+,) sets the language, your name for comments and live sessions, the nudge amount, auto-save, the interface size and more. By default, FigCraft follows your system’s language. Many of its 24 languages are draft translations.
Keyboard shortcuts
Section titled “Keyboard shortcuts”On a Mac, use ⌘ in place of Ctrl and ⌥ in place of Alt. Click ? at the bottom right and choose Keyboard shortcuts to see them all.
| Shortcut | What it does |
|---|---|
| Ctrl+K | Actions: find any command |
| Ctrl+S, Ctrl+Shift+S | Save, Save as |
| Ctrl+Z, Ctrl+Shift+Z | Undo, redo |
| Ctrl+D | Duplicate |
| Ctrl+G, Ctrl+Shift+G | Group, ungroup |
| Ctrl+Alt+G | Frame the selection |
| V, K, H | Move, Scale, Hand |
| F, R, O, L, T | Frame, Rectangle, Ellipse, Line, Text |
| P, Shift+P | Pen, Pencil |
| C | Comment |
| Shift+A | Add auto layout |
| Ctrl+Alt+K | Create component |
| Shift+1, Shift+2 | Zoom to fit, zoom to selection |
| Shift+0 | Zoom to 100% |
| Space + drag | Pan the canvas |
| Shift+D | Dev Mode on and off |
| Ctrl+\ | Show or hide the interface |
| F6 | Move the keyboard between toolbar, layers, canvas and properties |
| Alt+1, Alt+2 | Layers panel, Assets panel |
| Alt+8, Alt+9 | Design panel, Prototype panel |
| Ctrl+Alt+Shift+=, -, 0 | Make the interface larger, smaller, or reset it |
| Ctrl+Space or F8 | Select with a box from the keyboard |
You can’t change the shortcuts yet (#2036). The Keyboard shortcuts panel only lists them.