
Workflows
FilmCraft’s Edit tab is made of panels: the Project panel, the Source and Program monitors, the Timeline, Effect Controls, Lumetri Color, the mixers and more. Open any panel from the Window menu, and drag a panel’s tab to dock it somewhere else.
Workspaces
Section titled “Workspaces”A workspace is a saved panel layout for one kind of work. Switch with Window › Workspaces, or click the workspace name at the top right.
| Workspace | Shortcut |
|---|---|
| Editing | Alt+Shift+1 |
| Assembly | Alt+Shift+2 |
| Color | Alt+Shift+3 |
| Effects | Alt+Shift+4 |
| Audio | Alt+Shift+5 |
| Captions and Graphics | Alt+Shift+6 |
On a Mac, use Option for Alt. If you have moved panels around, Window › Workspaces › Reset to Saved Layout puts them back. Save as New Workspace… keeps your own layout.
Edit with the Source monitor
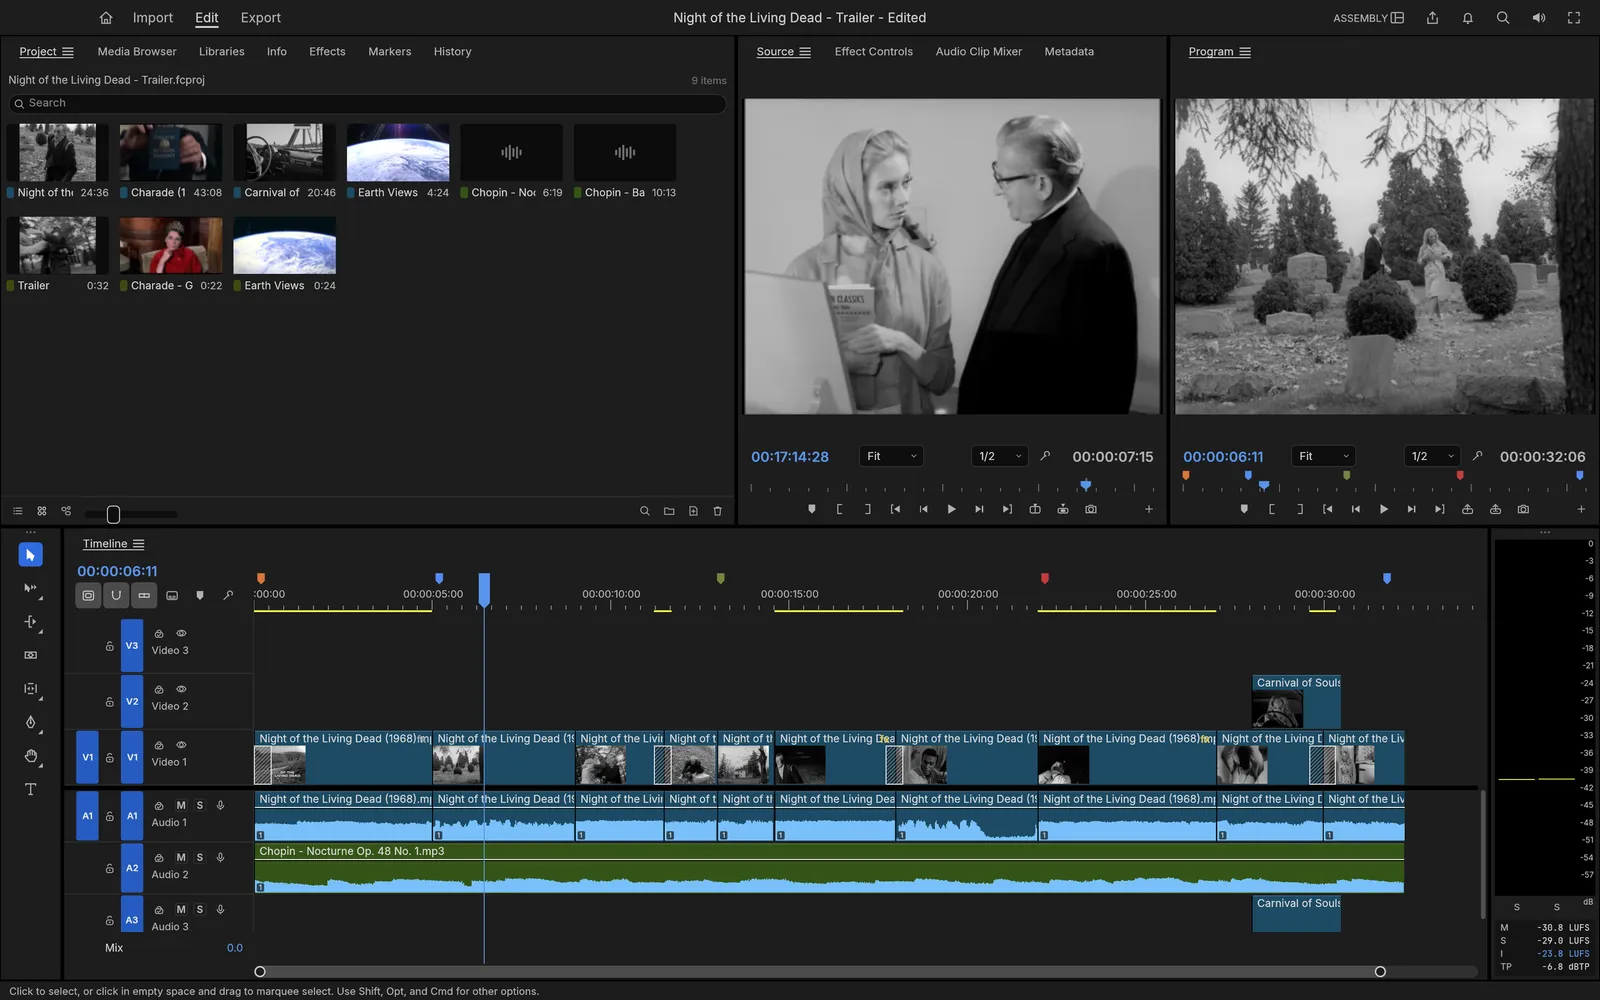
Section titled “Edit with the Source monitor”Three-point editing puts exactly the part of a clip you want onto the timeline.
- Double-click a clip in the Project panel to open it in the Source monitor.
- Press I to mark the In point and O to mark the Out point.
- In the Timeline, move the playhead to where the clip should go.
- Press , to insert it (later clips move along) or . to overwrite what’s there.
The track buttons at the left of the timeline choose which tracks the clip goes onto. ; lifts the marked range out of the sequence and leaves a gap. ’ extracts it and closes the gap.
| Tool | Key | What it does |
|---|---|---|
| Selection Tool | V | Select, move and trim clips |
| Ripple Edit Tool | B | Trim a clip and move everything after it |
| Rolling Edit Tool | N | Move a cut between two clips |
| Rate Stretch Tool | R | Change a clip’s speed by trimming it |
| Razor Tool | C | Cut a clip in two |
| Slip Tool | Y | Change which part of a clip is used, keeping its place |
| Slide Tool | U | Move a clip between its neighbors |
Q and W ripple-trim the start or end of a clip to the playhead. Sequence › Add Edit (Ctrl+K, or ⌘K on a Mac) cuts the targeted tracks at the playhead. Sequence › Trim Edit (Shift+T) opens the trim monitor, which shows both sides of a cut.
Markers live on the Markers menu: M adds one, and Shift+M jumps to the next.
To change any shortcut, choose Edit › Keyboard Shortcuts… (Ctrl+Alt+K, or ⌥⌘K on a Mac). There are presets for FilmCraft’s own keys and for the keys of other common editors.
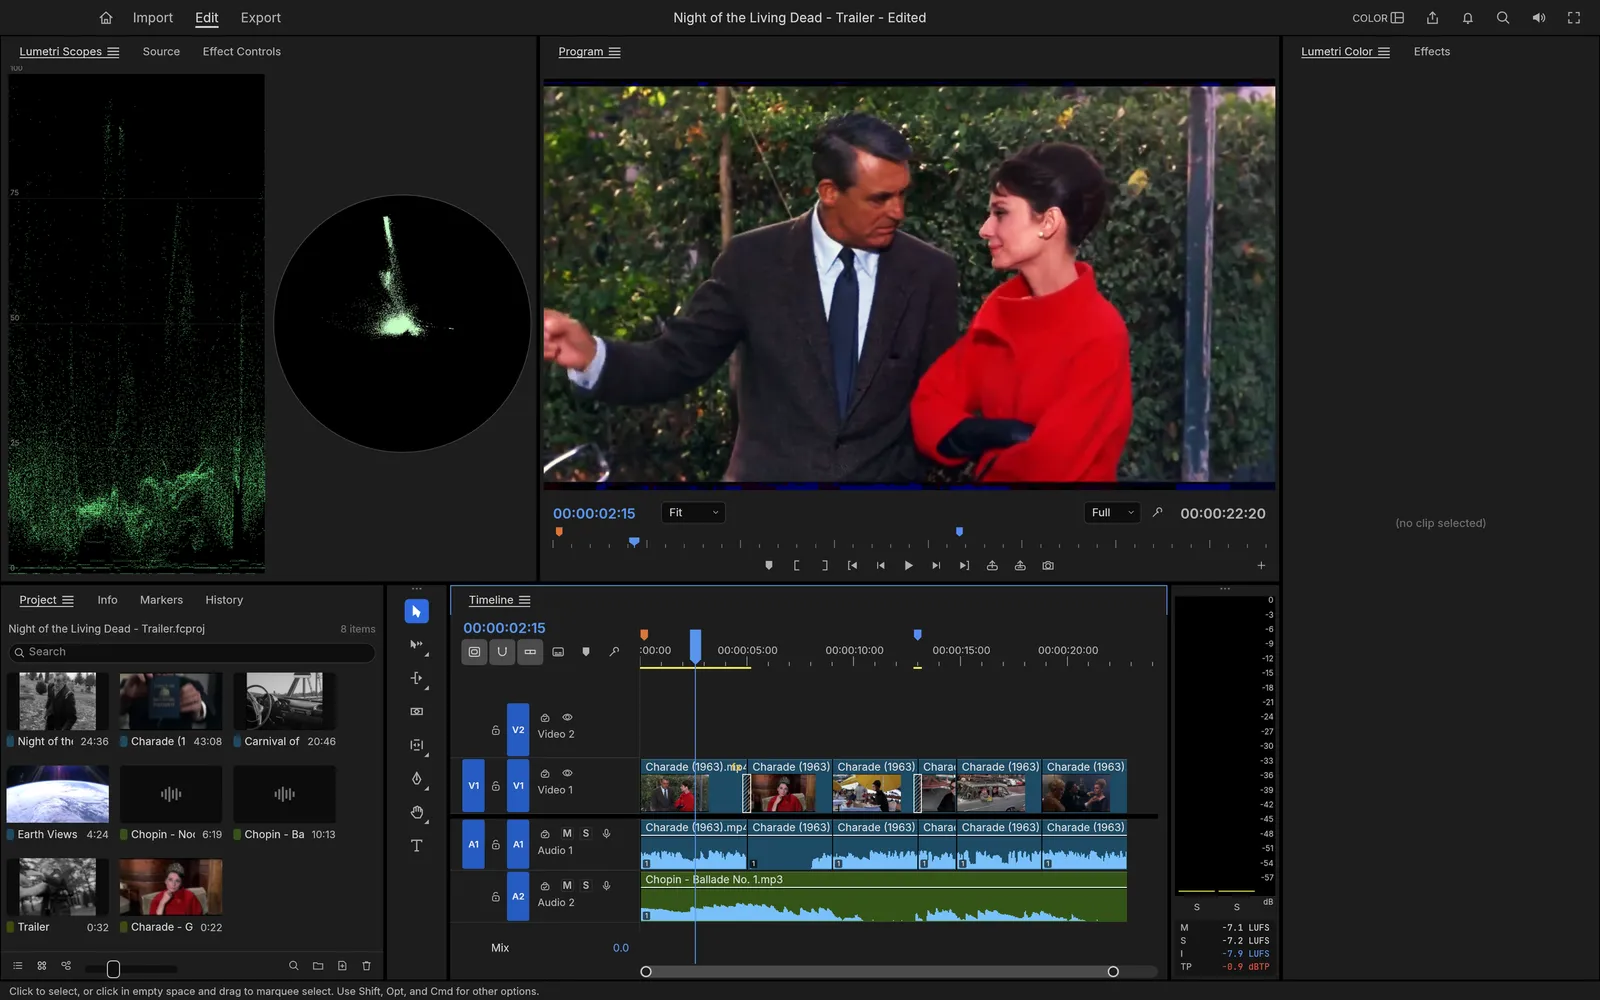
Switch to the Color workspace. Select a clip on the timeline, then use the Lumetri Color panel. Its sections each have an on/off switch:
- Basic Correction: white balance (temperature and tint), exposure, contrast, highlights, shadows, whites, blacks and saturation.
- Creative: built-in looks with an intensity control, plus faded film, sharpen and vibrance.
- Curves: an RGB curve, and hue and saturation curves.
- Color Wheels & Match: shadow, midtone and highlight wheels.
- HSL Secondary: pick out one color range and correct only that.
- Vignette: darken or lighten the edges of the frame.
The Lumetri Scopes panel shows a waveform and a vectorscope of the graded picture.
HDR and log footage
Section titled “HDR and log footage”Phone HDR clips and log footage look washed out unless FilmCraft converts them for your sequence.
- Choose Sequence › Color Management….
- Under Working Color Space, pick Rec. 709 for a normal SDR video, or Rec. 2100 PQ or Rec. 2100 HLG to edit in HDR.
- For an SDR sequence, check Auto tone map media (HDR and log into SDR). FilmCraft then maps HDR and log clips into SDR as you edit.
- Click OK.
Wide gamut color (composite in BT.2020) keeps more color range while FilmCraft composites, even in a Rec. 709 sequence.
If a clip still looks wrong, select it in the Project panel and choose Clip › Modify › Interpret Footage…. It shows the color space FilmCraft read from the file and lets you pick another one instead of Use file metadata.
Effects, transitions and keyframes
Section titled “Effects, transitions and keyframes”Open Window › Effects to browse the library of video effects, audio effects and transitions. Type in the search box to find one, then drag it onto a clip.
- Fade in or out: drag Cross Dissolve (in Video Transitions › Dissolve) onto the start or end of a clip.
- Dissolve between two shots: drag Cross Dissolve onto the cut between them.
- Change a transition’s length: double-click it on the timeline and set Duration, or edit it in Effect Controls.
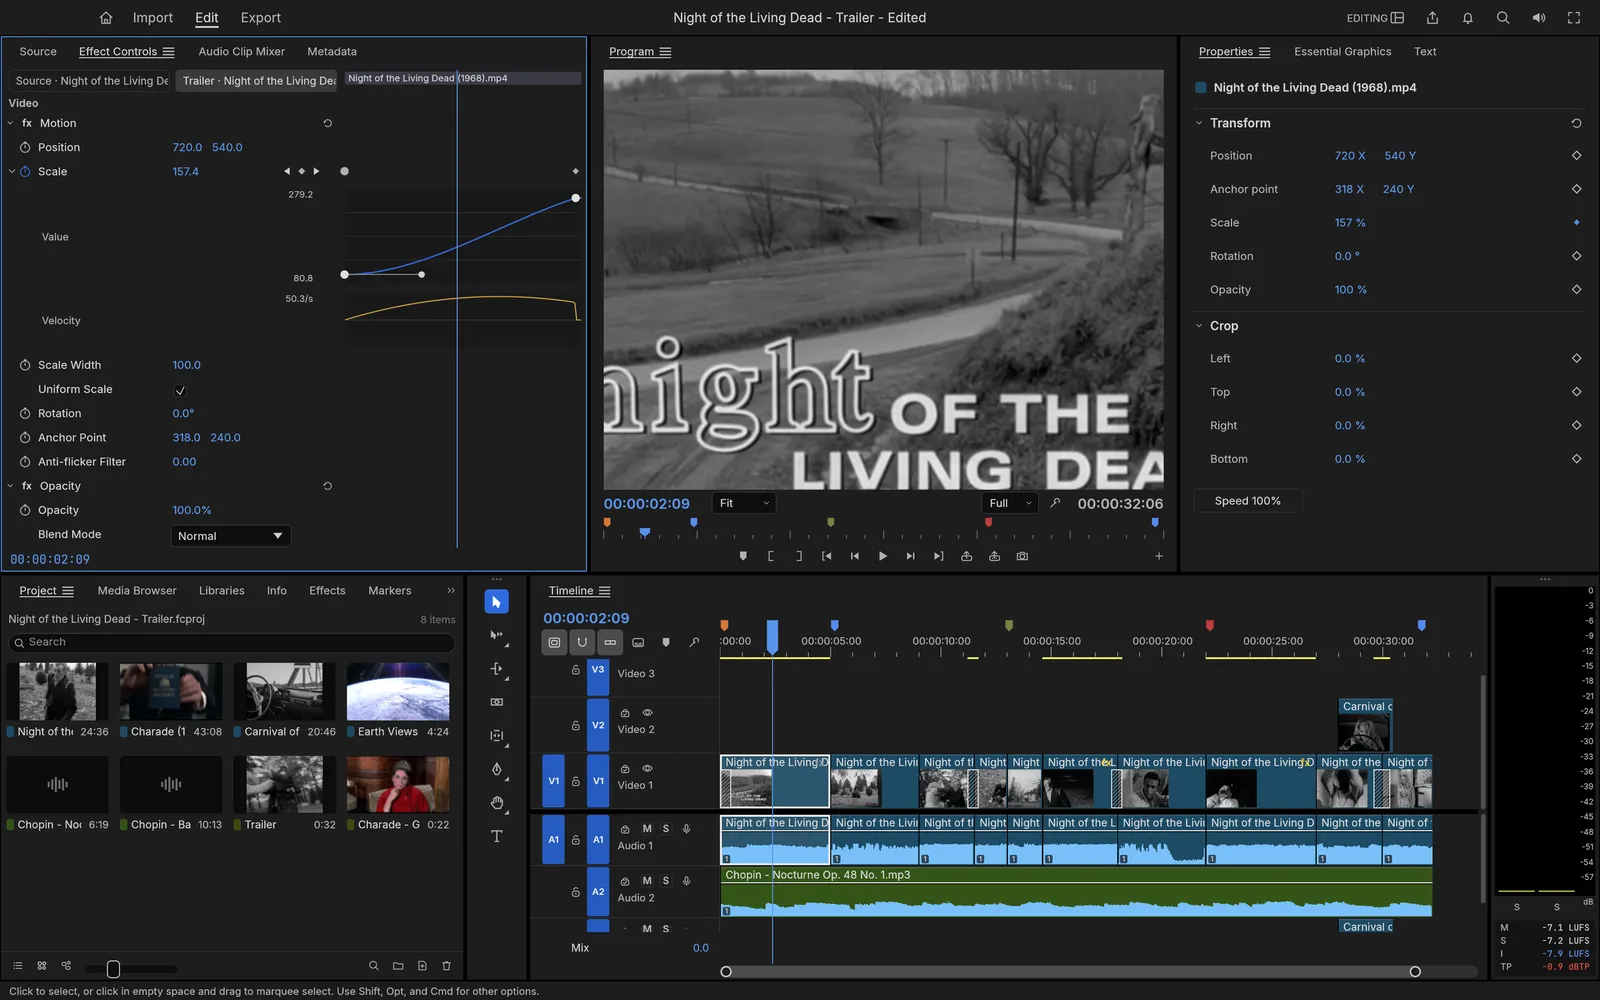
Effect Controls shows every effect on the selected clip, including Motion (position, scale, rotation and anchor point) and Opacity (with blend modes). To animate a value, click the stopwatch beside it, move the playhead, and change the value. Each change adds a keyframe. Open an animated value to see its value and velocity graphs, and drag the handles to ease the motion.
Keyframe limits
Section titled “Keyframe limits”Some things you may expect from other editors don’t work yet:
- You can’t copy and paste keyframes (#2582).
- Alt+drag doesn’t duplicate a keyframe (#4379).
- The Delete key deletes the clip, not the selected keyframe (#1590). Right-click the keyframe and choose Clear instead.
- You can’t reorder effects by dragging them in Effect Controls (#1731).
A mask limits an effect to a shape. Masks sit under a video effect in Effect Controls, and Opacity works too: a mask there cuts out the clip itself. Motion doesn’t take masks.
- Select the clip and open Effect Controls.
- Under the effect, click Create ellipse mask, Create 4-point polygon mask or Free draw bezier.
- For a free-drawn mask, click in the Program monitor to place points (drag to make a curve). Click the first point or press Enter to close the shape.
- Select the mask in Effect Controls, then drag its points, curve handles or the whole shape in the Program monitor. Alt-click a point to switch it between smooth and corner. Ctrl-click a point (⌘-click on a Mac) to delete it.
Each mask has Mask Path, Mask Feather, Mask Opacity and Mask Expansion, and you can keyframe all four. Check Inverted to apply the effect outside the shape. The dropdown on the mask’s row sets how it combines with other masks: None, Add, Subtract, Intersect, Lighten, Darken or Difference. To remove a mask, right-click its row and choose Delete Mask.
To make a mask follow a moving subject, move the playhead to a frame where the mask fits, select the mask, and click a tracking arrow beside Mask Path. The arrows track backward or forward, to the clip’s edge or one frame at a time. Click again to stop. The wrench beside them sets the Tracking method: Position, Position & Rotation, or Position, Scale & Rotation. Tracking adds keyframes to Mask Path.
- Every audio clip has a Volume effect. To fade sound in or out, add keyframes to its volume line on the timeline with the Pen Tool (P), then drag them.
- Add audio effects such as EQ, filters, dynamics, a limiter, reverb, DeNoise and DeHummer from Window › Effects.
- The Audio Track Mixer and Audio Clip Mixer have faders, pan, mute and solo. The track mixer can record automation while the sequence plays.
- The loudness meters beside the timeline show momentary, short-term and integrated loudness and true peak.
Record a voice-over
Section titled “Record a voice-over”Each audio track header has a microphone button. Click it to record from your microphone onto that track.
- Right-click the microphone button and choose Voice-Over Record Settings… to pick the Source and Input channel, and to set Pre-roll and Post-roll (2 seconds each to start with). Name sets what the recording is called. Countdown Sound Cues plays beeps before recording starts.
- Move the playhead to where the voice-over should begin. If you have marked an In and Out point, recording starts and stops at those points.
- Click the microphone button. Playback starts one pre-roll before that point, and recording begins when it gets there.
- Click the button again, or stop playback, to finish. FilmCraft saves a WAV file named like Voice-over 1 and places it on the track.
The file goes into your project’s Scratch Disks folder for captured audio, or beside the project file if none is set. To throw a take away while recording, open Voice-Over Record Settings… and click Discard take.
Text to Speech
Section titled “Text to Speech”Window › Text to Speech turns typed text into a narration clip.
- Type the text in the Text box. Click Add pause to insert
[pause 1s]. Change the number for a longer or shorter pause, for example[pause 500ms]. - Pick a Voice. Basic Female and Basic Male are built in and sound synthetic.
- Open Advanced to change Vocal pitch (Extra low to Extra high) or Pace (0.5× to 2×).
- Click Preview to listen, then Add to timeline. FilmCraft puts the clip at the playhead on the first audio track that has room, or adds a new track.
To change a narration later, select its clip on the timeline. The panel loads its text and settings. Click Save to regenerate it. The clip keeps its length: longer speech is trimmed at the clip’s end, and shorter speech is padded with silence.
Titles and graphics
Section titled “Titles and graphics”Press T for the Type Tool, click in the Program monitor and type. FilmCraft adds a graphic clip to the timeline. The Pen Tool draws shapes. Change the font, fill, stroke, background and shadow in the Properties panel; they can all be keyframed.
Captions
Section titled “Captions”Choose File › Import… and pick an .srt, .vtt or .scc file. FilmCraft adds it as a caption track above the video tracks. Edit the captions in the Text panel.
When you export, the Captions section can burn them into the picture or write them as a separate SRT or WebVTT file.
Proxies for heavy footage
Section titled “Proxies for heavy footage”A proxy is a small copy of a clip that plays back easily. You edit with the proxy, and FilmCraft always exports from the full-resolution file.
- Select clips in the Project panel.
- Choose Clip › Proxy › Create Proxies… and pick a preset: ProRes 422 Proxy, ¼ size, ProRes 422 Proxy, ½ size, ProRes 422 LT, ½ size, H.264, ¼ size or H.264, ½ size.
- FilmCraft makes the proxies in the background and attaches them when they finish.
- Choose View › Toggle Proxies to switch between proxies and the full-resolution media.
If you already have proxy files from a camera or another program, use Clip › Proxy › Attach Proxies…. A proxy needs the same duration and frame rate as the original. Its frame size can differ.
Clip › Proxy › Detach Proxies removes the link to a proxy. Reconnect Full Resolution Media… points a clip at a different full-resolution file.
Change speed and find cuts
Section titled “Change speed and find cuts”- Clip › Speed/Duration… (Ctrl+R, or ⌘R on a Mac) changes the speed of the selected clips. To change speed by dragging, use the Rate Stretch Tool.
- Clip › Scene Edit Detection… finds the cuts inside a long clip. Choose whether to cut the clip at each one (Apply a cut at each detected cut point), put each shot in a bin of subclips, or add a marker at each cut. Use Sensitivity to catch more or fewer cuts.
Nest, simplify and match
Section titled “Nest, simplify and match”- Clip › Nest… replaces the selected timeline clips with one nested-sequence clip. FilmCraft suggests a name like Nested Sequence 01 in the Nested Sequence Name box. Double-click the nest to open its contents in their own timeline tab. If the selected sound is on more than one audio track, the nest holds only the picture and the sound stays on the timeline.
- Sequence › Simplify Sequence… makes a cleaned-up copy named like My Edit (Simplified) and opens it. Your original stays as it was. Under Remove, check what to drop: Disabled clips, Empty tracks, Gaps, Video effects, Audio effects or Text (graphics and captions). Move clips to the lowest track possible stacks the video down. Keep can limit the copy to Video Only or Audio Only. Click Simplify.
- Sequence › Normalize Mix Track… raises or lowers the Mix fader so the loudest peak of the whole sequence lands on the level you type under Normalize Mix Track to (0 dB to start with). It fails on a silent mix.
- Sequence › Match Frame (F) opens the clip under the playhead in the Source monitor, parked on the same frame. Sequence › Reverse Match Frame (Shift+R) does the opposite: with a clip open in the Source monitor, it moves the playhead to where that frame sits in the sequence. Targeted tracks win when the clip appears more than once.
Multi-camera editing
Section titled “Multi-camera editing”Use this for several cameras that filmed the same event. FilmCraft lines the angles up, then you cut between them while the sequence plays.
- In the Project panel, select one clip for each camera.
- Choose Clip › Create Multi-Camera Source Sequence….
- Name it under Sequence Name. Under Synchronize Point, choose how to line the clips up: In Points, Out Points, Timecode, Clip Marker or Audio. Audio is the one to use when the cameras have no shared timecode. Under Audio, choose Camera 1, All Cameras or Switch Audio. Click OK.
- Drag the new sequence onto your timeline, select its clip, and choose Clip › Multi-Camera › Enable.
- Choose View › Multi-Camera View (Shift+0). The Program monitor shows every angle in a grid.
- To cut live, turn on Multi-Camera Record (key 0, or the Record button in the grid) and play the sequence. Press 1 to 9, or click an angle, at each cut. Each pass is one undo step.
With playback stopped, the same keys and clicks switch the angle of the clip under the playhead. Ctrl+1 to Ctrl+9 adds an edit at the playhead and shows that camera from there on.
Click the wrench in the Program monitor for the rest:
- Multi-Camera Layout: Automatic, 2 × 2, 3 × 3 or 4 × 4. When there are more angles than fit, arrows at the grid page through them, and the number keys pick cameras on the page you see.
- Edit Cameras…: rename cameras or hide ones you don’t want in the grid.
- Multi-Camera Audio Follows Video: switching the picture switches the sound too.
Clip › Multi-Camera › Flatten replaces a multi-camera clip with the clips of the angle it shows, so you can edit them as normal clips.
Interface language
Section titled “Interface language”Choose Edit › Language to switch the menus and panels to another language. FilmCraft has 16 besides English: Bahasa Indonesia, Bosanski, Čeština, Deutsch, Español, Français, Italiano, Polski, Português (Brasil), Svenska, Türkçe, Русский, Українська, 日本語, 简体中文 and 한국어. Japanese, Chinese and Korean may need a font for that script on your computer. If FilmCraft has none to use, it tells you and stays in the current language.
Export
Section titled “Export”Click the Export tab, or choose File › Export › Export (Ctrl+M, or ⌘M on a Mac).
- Set File Name and Location.
- Pick a Preset, or a Format:
- H.264: an MP4 that plays almost anywhere. FilmCraft has its own H.264 encoder.
- Apple ProRes, DNxHR or Motion JPEG: QuickTime files for further editing.
- MXF, image sequences (PNG, TIFF, JPEG, DPX, EXR and others), animated GIF, and audio-only WAV, AIFF, AAC or FLAC.
- H.265 (HEVC) and AV1 need a hardware encoder in your computer. If there isn’t one, FilmCraft says so next to Format.
- Open Video, Audio, Captions, Effects and Metadata to fine-tune the export.
- Click Export, or Send to Queue to line up several exports and run them together.
For a fast export with a preset, use the Quick Export button at the top right.
The timeline’s render bar shows which parts play back smoothly. Sequence › Render Effects In to Out (Enter) renders previews of the slow parts.
Move timelines to and from other editors
Section titled “Move timelines to and from other editors”File › Export writes your sequence for another editor:
- Final Cut Pro XML…: the XML format many editors read.
- FCPXML…: for Final Cut Pro.
- OpenTimelineIO…: an open format used across the film industry.
- EDL…: a CMX 3600 edit decision list.
- AAF… and OMF…: for handing audio over to a sound editor.
To bring a timeline in, choose File › Import… and pick the XML, FCPXML, OpenTimelineIO, EDL or AAF file. FilmCraft adds its bins and sequences to your project, and links the media files it finds.
Save and recover
Section titled “Save and recover”- File › Save, Save As… and Save a Copy… save the project.
- Auto-save writes a copy every 5 minutes to an
Auto-Savefolder next to the project, and keeps the last 20. Open one with File › Open Project…. Change this in Edit › Preferences › Auto Save… (on a Mac, in FilmCraft › Settings…). - If FilmCraft closes before you save, it offers to recover your changes the next time it starts. You can also choose File › Recover Unsaved Changes….
Move a project to another computer
Section titled “Move a project to another computer”FilmCraft doesn’t copy media into the project, so copying only the project file leaves the clips missing. Use File › Project Manager… instead.
- Select the sequences to keep under Sequences.
- Under Resulting Project, choose one:
- Collect Files and Copy to New Location copies the media the sequences use, unchanged.
- Consolidate and Transcode writes only the part of each clip you use, plus extra frames at each end (Include Handles), in the preset you pick. The files are smaller, but they are no longer the originals.
- Turn on Exclude Unused Clips to leave out media no sequence uses.
- Under Destination Path, click Browse… and choose a folder.
- Click Calculate to compare disk space before and after, then OK.
The copy runs in the background. FilmCraft writes the new project file last.