
Workflows
On a Mac, use ⌘ in place of Ctrl, and Option in place of Alt.
Panels and workspaces
Section titled “Panels and workspaces”EffectCraft’s panels follow After Effects: Project, Composition, Timeline, Effect Controls, Effects & Presets, Properties, Preview, Character, Paragraph, Align, Info, Audio and the Render Queue, among others. Open any of them from the Window menu.
The workspace buttons at the top right (Default, Review, Standard, Small Screen and more) rearrange the panels for different jobs.
Import footage
Section titled “Import footage”Choose File › Import › File… (Ctrl+I) to pick a file, or File › Import › Multiple Files… for several. You can also drop files or folders on the window. Files dropped on the Composition panel become layers there.
Photoshop, PDF and Illustrator files ask whether to import them as footage or as a composition. Window › Media Browser browses your folders and imports what you pick.
Image sequences
Section titled “Image sequences”Numbered stills, such as shot_0001.png, shot_0002.png and so on, can import as one clip:
- Choose File › Import › File… and pick any one file of the run.
- In the Import Image Sequence window, select the sequence option. It’s named after the file type, for example PNG Sequence, and it’s off by default.
- Set Frame rate (fps), then confirm.
If a frame is missing, EffectCraft shows color bars for it. Add the missing file and choose File › Reload Footage (Ctrl+Alt+L).
Change how footage is read
Section titled “Change how footage is read”Select the footage in the Project panel and choose File › Interpret Footage › Main… (Ctrl+Alt+G) to change its alpha, frame rate or start timecode. File › Replace Footage › File… (Ctrl+H) points the item at another file.
Animate
Section titled “Animate”- Click the stopwatch beside a property to start animating it. Change the value at another time and a new keyframe appears.
- F9 applies Easy Ease to the selected keyframes. Shift+F9 eases in and Ctrl+Shift+F9 eases out. They are under Animation › Keyframe Assistant.
- Animation › Toggle Hold Keyframe makes a keyframe jump instead of moving smoothly.
- Animation › Keyframe Interpolation… and Keyframe Velocity… set the curve exactly.
- The Graph Editor shows value and speed graphs with handles you can drag. Turn it on with the Graph Editor button at the top of the Timeline.
- Alt+click a stopwatch to add an expression. Expressions are JavaScript, with familiar functions such as
wiggleandloopOut.
Show one property in the Timeline
Section titled “Show one property in the Timeline”Select layers and press a key to show only that property:
| Key | Shows |
|---|---|
| P | Position |
| S | Scale |
| R | Rotation |
| T | Opacity |
| A | Anchor Point |
| E | Effects |
| M | Masks |
| F | Mask Feather |
| L | Audio Levels (press twice for the waveform) |
Add effects
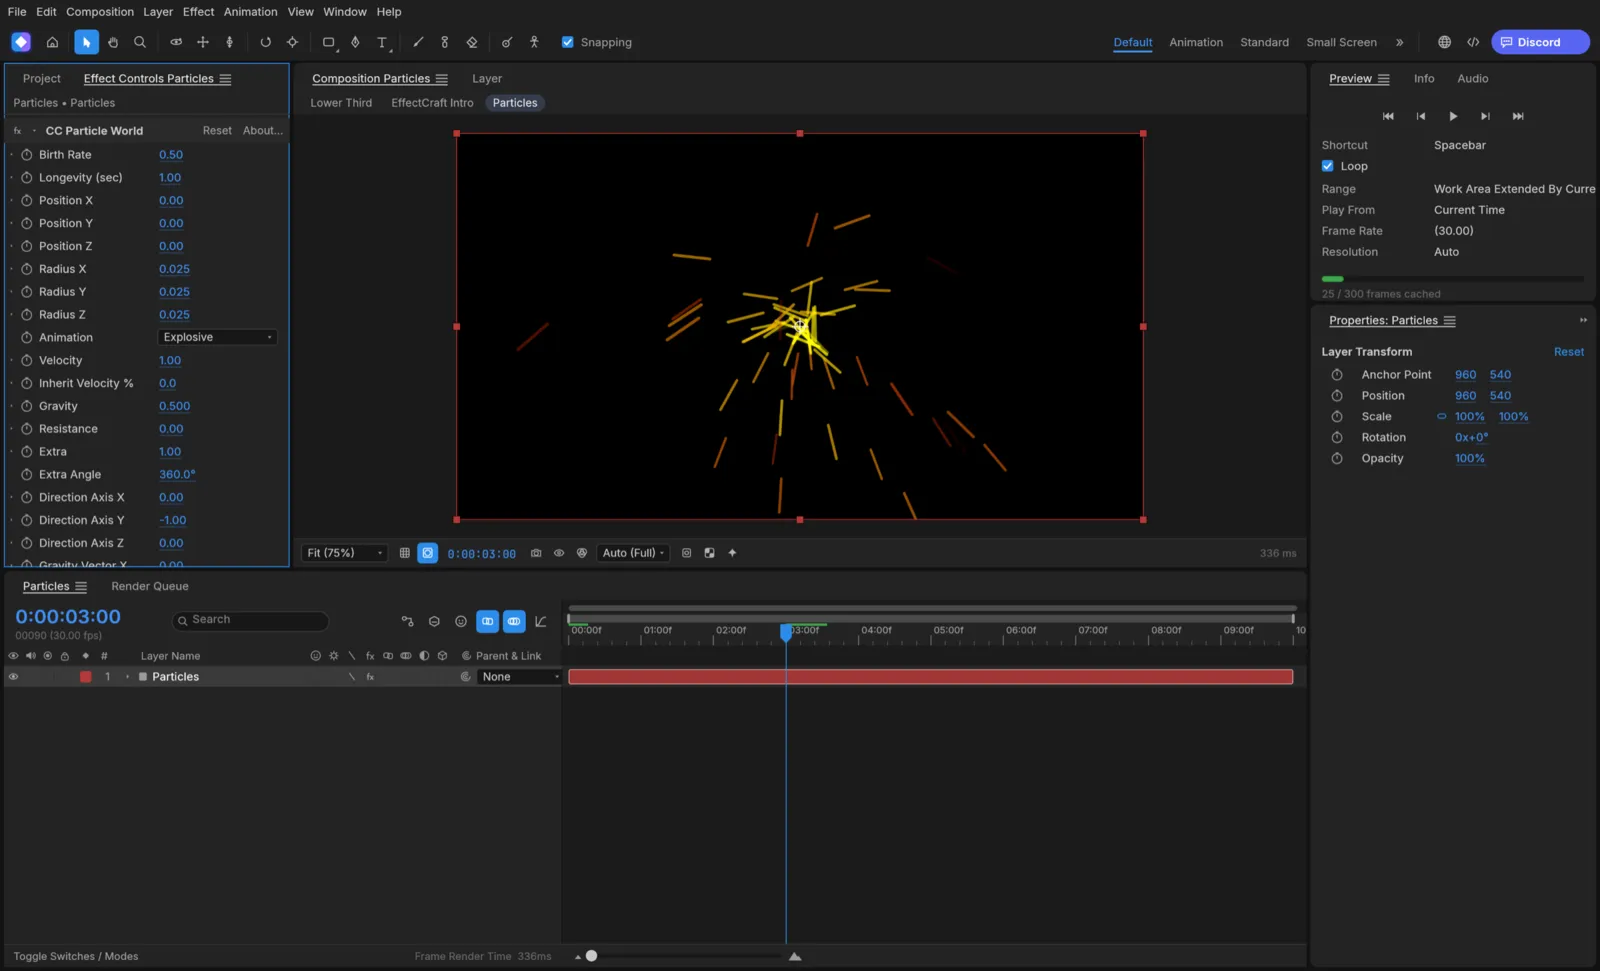
Section titled “Add effects”Select a layer, then choose an effect from the Effect menu, where effects are grouped by category. Or open Window › Effects & Presets (Ctrl+5), search, and double-click the effect or drag it onto a layer.
Change its settings in Effect Controls (F3).
- Effect › Last Effect applies the effect you used last.
- Effect › Remove All removes every effect from the selected layers.
- In Effects & Presets, click the star beside an effect to add it to your favorites. Recently used effects are listed too.
For drop shadows, glows and bevels, use Layer › Layer Styles. It has Drop Shadow, Inner Shadow, Outer Glow, Inner Glow, Bevel and Emboss and Satin, among others.
Render
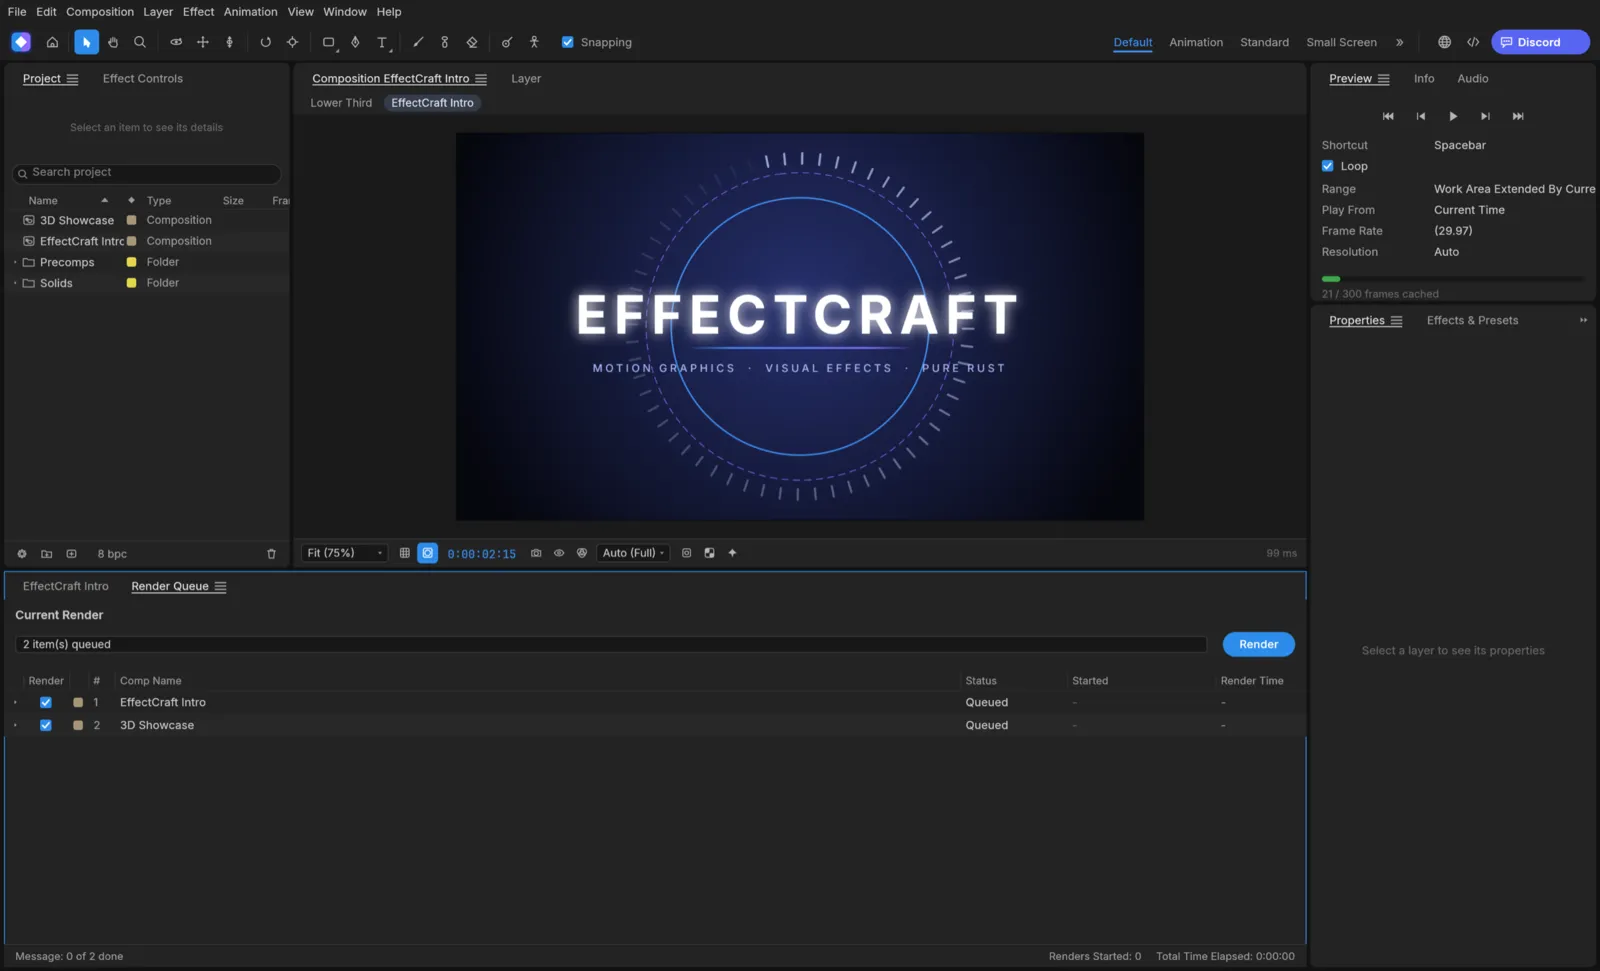
Section titled “Render”- Select a composition and choose Composition › Add to Render Queue (Ctrl+M). You can also drag compositions onto the Render Queue panel (Window › Render Queue, Ctrl+Alt+0).
- Twirl the item open. Click Output Module to choose the format, and the file name next to Output To to choose where it goes.
- Click Render Settings to render the work area only or the whole composition, at best or draft quality, or at full, half, third or quarter resolution.
- Make sure the item’s Render box is checked, then choose Render. Stop cancels.
Select Notify to get a notification when the queue finishes.
Formats
Section titled “Formats”| Output Module format | File |
|---|---|
| H.264 | .mp4 |
| HEVC (H.265) | .mp4 |
| AV1 | .mp4 |
| QuickTime (ProRes) | .mov |
| QuickTime (Uncompressed) | .mov |
| WebM (VP9 + Opus) | .webm |
| PNG, JPEG, TIFF, Targa or OpenEXR Sequence | One image per frame |
| Animated GIF | .gif |
| WAV, AIFF | Audio only |
To keep transparency, choose Channels: RGB + Alpha in the Output Module menu. It’s there for formats that can store it, such as ProRes and PNG Sequence. H.264, HEVC and AV1 can’t.
EffectCraft encodes everything itself. You don’t need FFmpeg or any other software.
Lottie
Section titled “Lottie”Choose File › Export › Lottie JSON… to save a composition as a Lottie animation (.json or .lottie) for websites and apps. EffectCraft lists anything Lottie can’t express. File › Import › Lottie… opens a Lottie file as a new composition.
Plug-ins
Section titled “Plug-ins”EffectCraft can’t run After Effects plug-ins, but it has its own:
- Effect › Plug-in Library… lets you search, install and update community effects.
- Effect › Install Effect Plug-in… installs a plug-in file you have downloaded.
Tracking and Roto Brush
Section titled “Tracking and Roto Brush”The tracking commands are on the Animation menu:
- Track Motion and Stabilize Motion follow a point in a clip, or steady a shaky one.
- Warp Stabilizer VFX smooths camera shake.
- Track Camera solves a 3D camera from a clip.
- Track Mask moves a mask with the footage.
- Track this Property drives a selected property from a track.
Open Window › Tracker for the tracker’s controls.
Roto Brush and face tracking work out of the box and can also use optional trained models. They are open source and EffectCraft downloads them only when you ask. Open Edit › Preferences, choose the Roto Brush or Face Tracking page, and download a model from the list.
Presets, templates and Essential Graphics
Section titled “Presets, templates and Essential Graphics”- Animation › Save Animation Preset… saves the animation on the selected layers. Apply Animation Preset… puts it on other layers, and Browse Presets… lists what you have. Text Animation Presets has ready-made text moves such as Typewriter and Bounce In Words.
- File › Save as Template… saves the open project as a template. File › New › New Project from Template… starts a project from one.
- Animation › Add Property to Essential Graphics exposes a property so it can be changed without opening the composition. File › Export › Essential Graphics Template… saves the result, and File › Import › Essential Graphics Template… opens one.
Scripts
Section titled “Scripts”EffectCraft runs After Effects-style .jsx scripts.
- File › Scripts › Run Script File… runs a script once.
- File › Scripts › Install Script File… and Install ScriptUI Panel… add a script or a panel to EffectCraft. Installed scripts are listed in File › Scripts, and panels in the Window menu.
- Window › Script Console shows script output and errors, with the file and line.
- Help › Scripting Help… opens the reference.
Scripts can’t write files or use the network until you check Allow Scripts to Write Files and Access Network on the Scripting & Expressions page of Edit › Preferences. To run a script without opening the app, use effectcraft-cli script FILE.jsx.
Proxies
Section titled “Proxies”For heavy footage, use a small stand-in while you work. Select the footage in the Project panel, then:
- File › Create Proxy › Movie… or Still… renders a proxy file.
- File › Set Proxy › File… uses a file you already have. None goes back to the original.
- File › Interpret Footage › Proxy… changes how the proxy is read.
Move a project to another computer
Section titled “Move a project to another computer”Footage stays where it is, so copying only the project file leaves it missing. Use File › Dependencies first:
- Collect Files… copies the project and its footage into one folder.
- Consolidate All Footage merges duplicate footage items into one.
- Remove Unused Footage deletes items that no composition uses.
- Reduce Project removes every item the selected compositions don’t use.
File › Save As › Save a Copy As XML… saves a text copy of the project. Increment and Save saves a new numbered version, and Revert goes back to the last saved version.
Composition and layer tools
Section titled “Composition and layer tools”- Pre-compose: select layers and choose Layer › Pre-compose…. Name the new composition under New composition name. Move all attributes into the new composition nests the selected layers as they are. Leave all attributes in (one footage, solid or composition layer only) nests only the layer’s source and keeps its transform, masks and effects in the current composition. Adjust composition duration to the time span of the selected layers trims the new composition. Layer › Un-precompose reverses it.
- Composition Mini-Flowchart: Composition › Composition Mini-Flowchart (Tab) pops up the compositions nested in the current one. It says No nested compositions when there are none. Composition › Composition Flowchart opens the full flowchart.
- Auto-trace: Layer › Auto-trace… turns a layer’s picture into masks. Pick the Time Span (Current Frame or Work Area) and the Channel to trace: Alpha, Red, Green, Blue or Luminance. Threshold (%) sets where the shape begins, and Minimum Area (pixels) drops tiny specks. Check Apply To New Layer to put the masks on a new solid.
- Content-Aware Fill: remove something from footage. Draw a mask around it, set the mask’s mode to Subtract, select the layer, and open Window › Content-Aware Fill. Pick a Fill Method (Object, Surface or Edge Blend), a Range (Work Area or Entire Duration), and optionally Alpha Expansion and Lighting Correction. Click Generate Fill Layer. It runs in the background (watch Window › Progress) and adds a fill layer above the original.
- Freeze Frame: Layer › Time › Freeze Frame holds the frame at the current time for the whole layer. Freeze On Last Frame holds the last frame. Both need a footage or composition layer, and both turn on time remapping for it.
- Convert Audio to Keyframes: Animation › Keyframe Assistant › Convert Audio to Keyframes adds a null layer named Audio Amplitude. Its Left Channel, Right Channel and Both Channels sliders get a keyframe on every frame of the work area. Link other properties to them with expressions to make things move with the sound.
- Convert Expression to Keyframes: select a property that has an expression, then choose Animation › Keyframe Assistant › Convert Expression to Keyframes. EffectCraft writes the expression’s result as keyframes and turns the expression off.
Render faster
Section titled “Render faster”- In a Render Queue item’s Render Settings menu, pick half or quarter resolution and draft quality for tests.
- Composition › Preview › Cache Frames When Idle renders frames while you aren’t playing.
- Edit › Purge frees cache memory. All Memory is the quick one.
- The Memory & CPU and Disk pages of Edit › Preferences set how much memory and disk space EffectCraft may use.
effectcraft-clirenders on the processor by default. Add--gputo use the graphics card.
Reuse render settings, and render from a folder
Section titled “Reuse render settings, and render from a folder”Edit › Templates › Render Settings… and Output Module… save settings you use often, so you can pick them in the Render Queue.
File › Watch Folder… renders queued projects for you. Put a project with queued Render Queue items in the folder, or use Collect Files… to write one there. When EffectCraft starts a project, it writes <project>.status.json next to it, and it won’t render that project again until you delete the status file.
To save a still, choose Composition › Save Frame As (File…, Photoshop Layers… or ProEXR…) or Copy Frame to Clipboard.
From the command line, effectcraft-cli render also takes --work-area, --resolution, --quality and, for a whole queue, render project.ecproj --queue.
Settings and shortcuts
Section titled “Settings and shortcuts”Choose Edit › Preferences on Windows and Linux, or EffectCraft › Settings… on a Mac. The pages include General, Startup & Repair, Project, Composition, Previews, Appearance, Import, Audio, Disk, Memory & CPU and Scripting & Expressions. The interface language is on the General page, under Language.
Help › Keyboard Shortcuts… shows every shortcut.