
Workflows
DeckCraft’s ribbon groups its tools into tabs: Home, Insert, Draw, Design, Transitions, Animations, Slide Show, Record, Review and View. More tabs appear when you select something, such as Shape Format, Picture Format or Table Design. If you can’t find a command, press Ctrl+Shift+P (⇧⌘P on a Mac) and type its name.
Organize slides
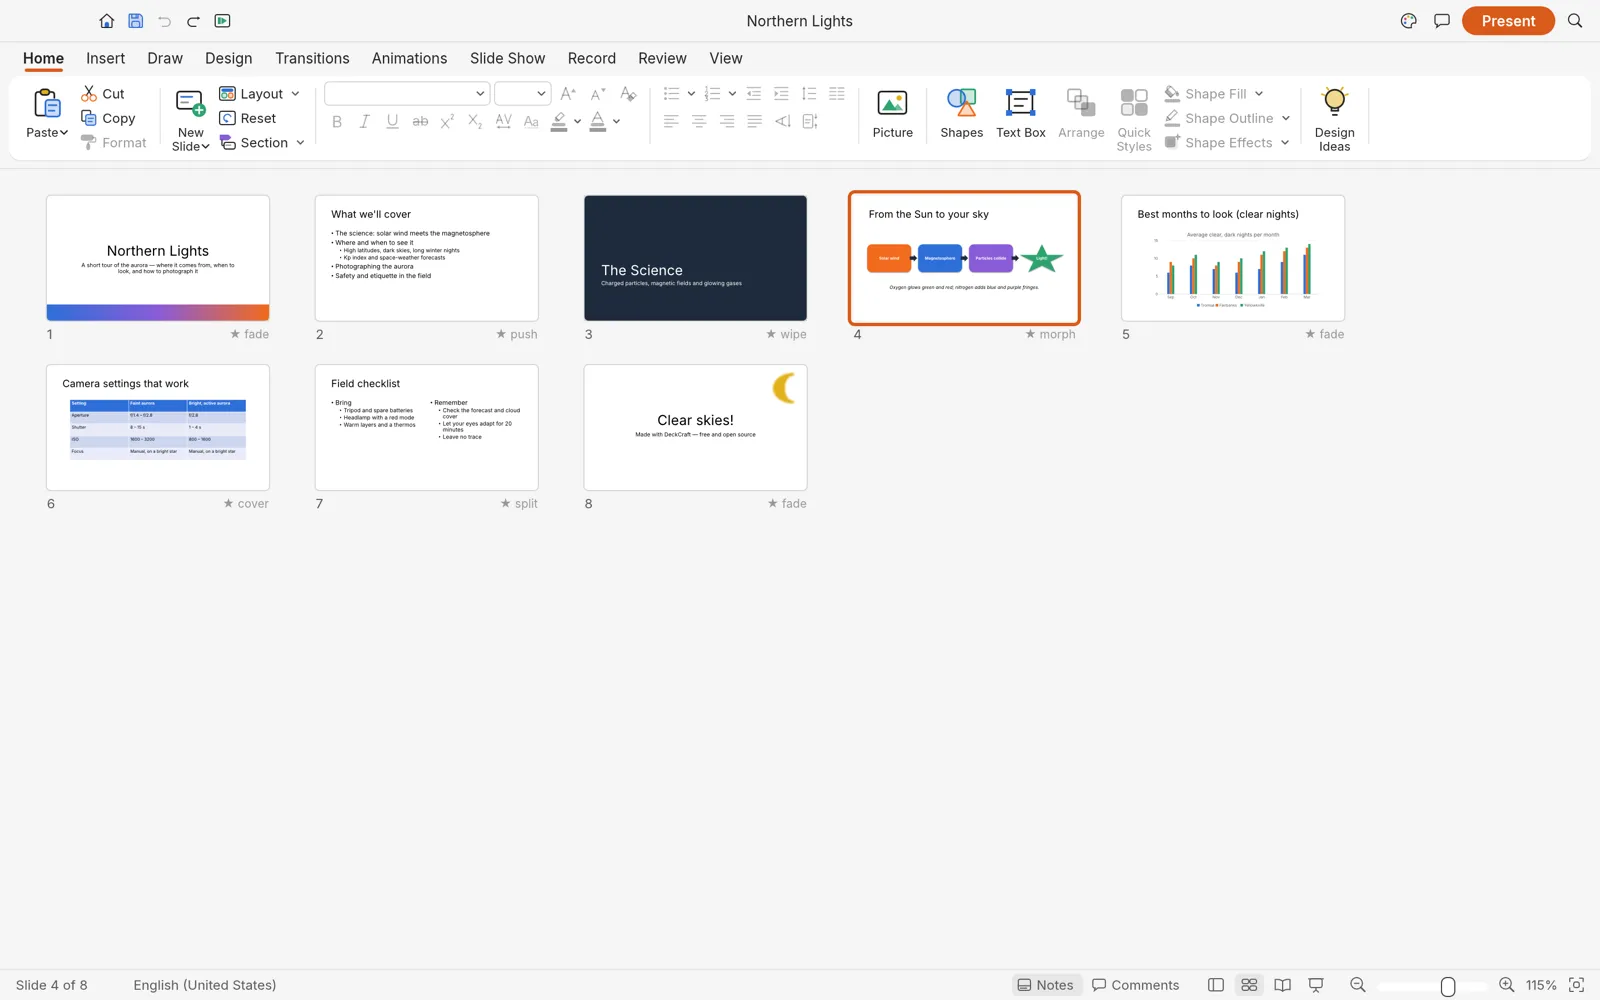
Section titled “Organize slides”- Home › New Slide adds a slide; its arrow picks a layout. Layout changes the current slide’s layout, and Reset puts its placeholders back.
- Home › Section groups slides into named sections. In Slide Sorter, the arrow by a section’s name folds it away.
- Drag thumbnails to reorder slides. View › Slide Sorter shows them all at once, with each slide’s transition.
- Slide Show › Hide Slide keeps a slide in the file but skips it when you present.
Change the design
Section titled “Change the design”- On the Design tab, pick a theme. Colors, Fonts and Effects change one part of it. Customize Colors… and Customize Fonts… make your own.
- Format Background sets a solid, gradient, picture or pattern background.
- Slide Size switches between Widescreen (16:9) and Standard (4:3), or sets a custom size.
- Design Ideas shows the current slide in each theme and in other layouts. Click one to use it. It works offline.
To change the layouts themselves, choose View › Slide Master. Changes there apply to every slide that uses that layout. Notes Master and Handout Master set up printed notes and handouts.
Add shapes, pictures and more
Section titled “Add shapes, pictures and more”On the Insert tab:
- Shapes: preset shapes with yellow handles to adjust them, lines and connectors that stay attached when you move shapes. Select two or more shapes to combine them with Shape Format › Merge Shapes.
- Pictures: add pictures (PNG, JPEG, GIF, WebP, BMP or TIFF), then crop them and adjust them on the Picture Format tab.
- Table and Chart: on the Chart Design tab, Edit Data changes a chart’s numbers and Change Chart Type its kind.
- SmartArt, Icons, WordArt, Equation and Symbol.
- Video and Audio: they play in the slide show. Select one for the Playback tab.
Select a shape and click Format Pane on the Shape Format tab for its fill, line, shadow, glow, soft edges and reflection. Selection Pane lists everything on the slide, so you can pick, hide or rename it.
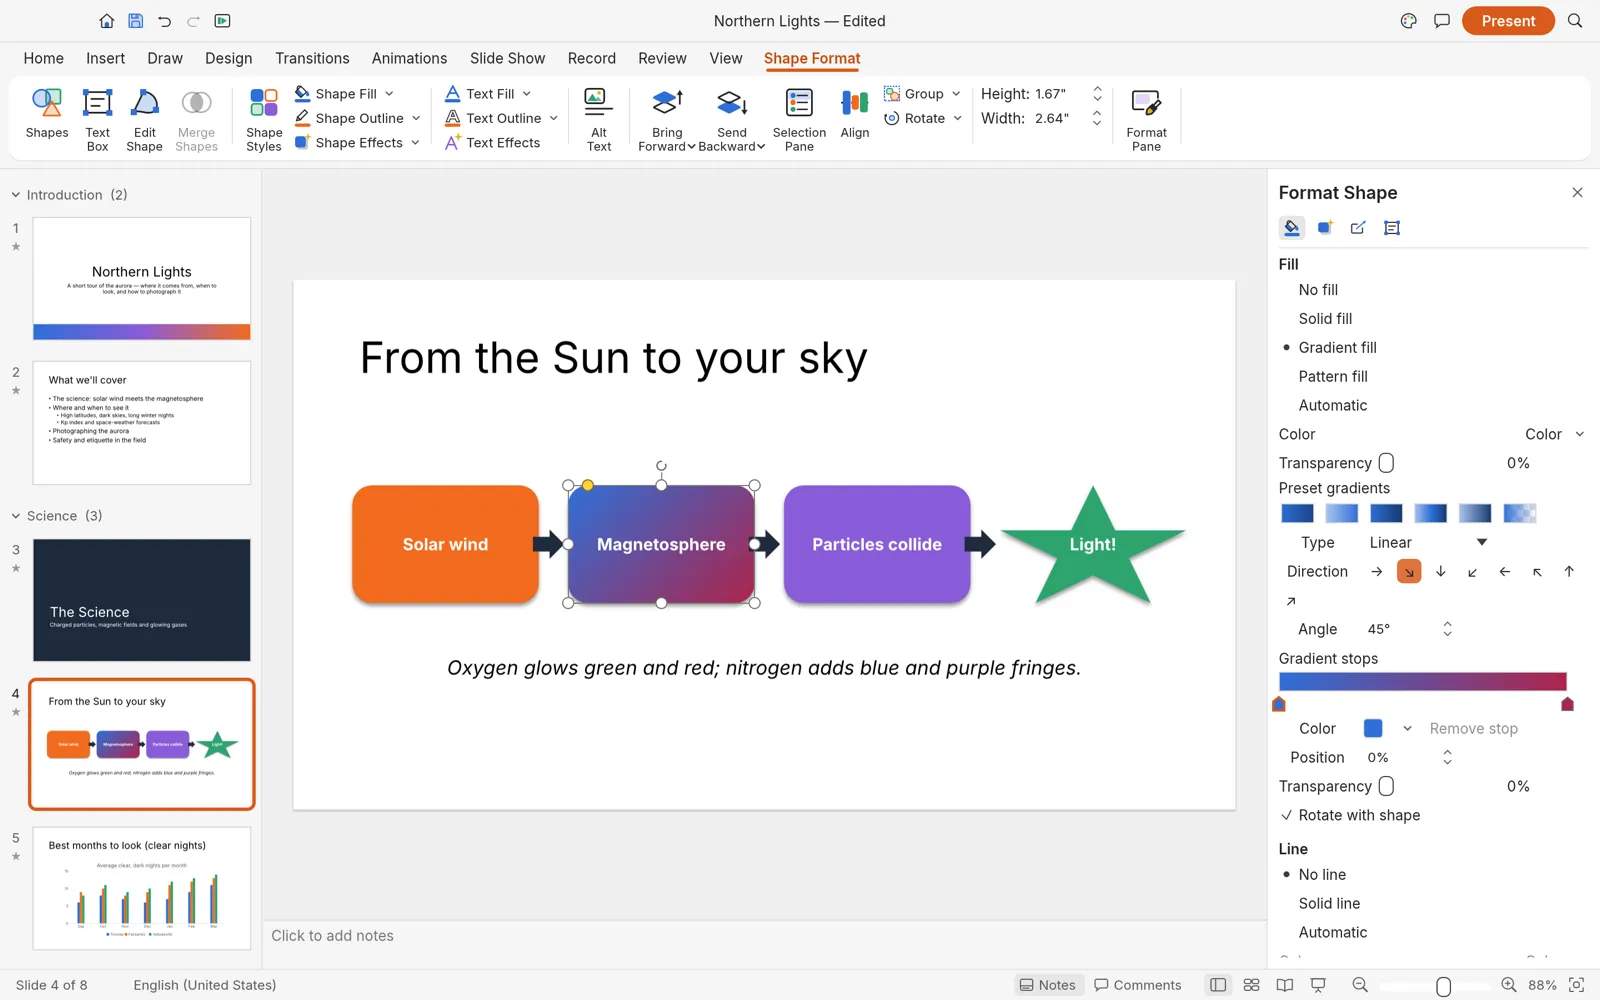
Home › Format (Format Painter) copies formatting from one shape or piece of text to another.
Also on the Insert tab:
- Photo Album… lays pictures out as an album. Add pictures or text boxes (up to 48), choose a Picture layout, a Frame shape and an Album theme, and turn on Captions under pictures if you want them. To change an album later, use Edit Photo Album….
- Zoom adds a slide, section or summary zoom: a link that jumps to a slide or section.
- Action adds an action button, and Action Settings… sets what a selected one does.
- Date & Time, and Header & Footer for text that repeats on every slide.
- Table › Draw Table draws a table with the mouse.
Copy and paste
Section titled “Copy and paste”Home › Paste has more than one way to paste. Paste and Match Formatting takes the formatting of where you paste. Paste Formatting applies the formatting you picked up with Format Painter. Paste Special… lets you choose Use Destination Theme, Keep Source Formatting, Picture (PNG) or Keep Text Only.
To bring slides in from another presentation, choose Home › New Slide › Reuse Slides…, or Reuse Slides (Keep Source Formatting)… to keep their look. Reusing slides needs the desktop app. To start a deck from an outline, choose Home › New Slide › Slides from Outline….
If copy and paste fails, see Copy and paste doesn’t work.
Draw with a pen
Section titled “Draw with a pen”The Draw tab has pens, a pencil, a highlighter and an eraser for writing on slides.
Add transitions
Section titled “Add transitions”On the Transitions tab, pick a transition for the current slide. Effect Options changes its direction, Duration its speed, and Apply To All uses it on every slide. Set After to move on by itself after a time, and add a sound. Morph moves shapes smoothly between two slides that share them.
Add animations
Section titled “Add animations”Select a shape or text box, then pick an effect on the Animations tab: entrance, emphasis, exit or a motion path.
- Effect Options sets the direction, or animates text one paragraph at a time.
- Choose when it starts (On Click, With Previous or After Previous), and its Duration and Delay.
- Animation Pane lists every animation on the slide in order. Animation Painter copies an animation to another shape.
- Preview plays the slide’s animations.
Review
Section titled “Review”On the Review tab:
- Spelling (F7) checks the whole presentation. Misspelled words are also underlined as you type. This needs a dictionary on your computer: see Spelling finds nothing.
- Language sets the language of the selected text or the whole presentation. The list marks the languages that have a dictionary. Do not check spelling or grammar turns checking off for that text.
- Thesaurus (Shift+F7) suggests other words.
- New Comment (Ctrl+Alt+M) adds a comment. Show Comments opens the comments pane.
- Compare shows the differences from a revised copy of the presentation, slide by slide, so you can accept or reject each revised slide.
- Check Accessibility finds things that make slides hard to follow with assistive technology, such as pictures without alt text.
Change the view
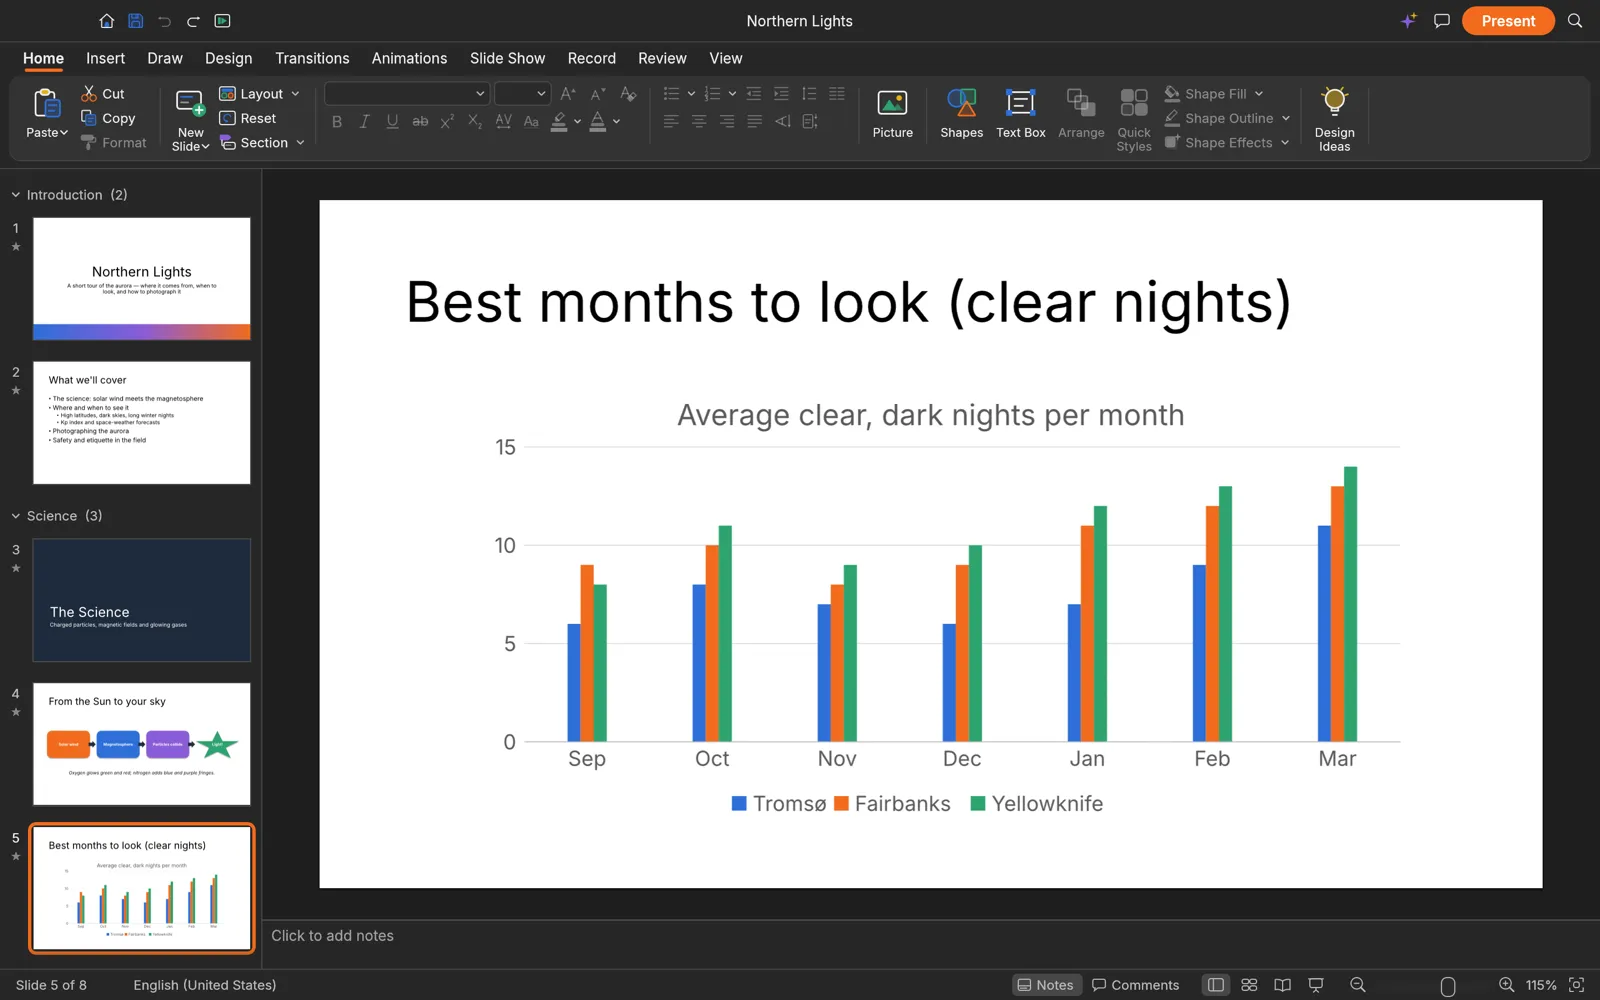
Section titled “Change the view”On the View tab: Normal, Outline View, Slide Sorter, Notes Page and Reading View. You can also show the Ruler, Gridlines (Shift+F9) and Guides (Alt+F9), and turn on Dark Mode. The buttons at the bottom right of the window switch views and zoom.
Export and print
Section titled “Export and print”- File › Export › Create PDF Document makes a PDF of the slides. Create Handouts puts several slides on each page.
- File › Export › Change File Type saves as .pptx, .deckcraft, an outline (.txt or .rtf), or the current slide as a PNG or JPEG picture.
- The Export button in the Quick Access Toolbar at the top left also makes PNG pictures of every slide, notes pages as a PDF, or an Animated GIF of the whole deck. The dialog lets you choose a Size, from Small (640 px wide) to Extra Large (1920 px wide) or a Custom width. You can include hidden slides, and for PNG pictures leave the background out with Transparent background. For a GIF, also set the slide range under From slide and To slide, the Seconds per slide, and whether it should Loop forever.
- File › Print (Ctrl+P) prints slides, notes pages or handouts. See Print.
Converting between formats can lose some formatting. To share a presentation that must look the same everywhere, export a PDF.
DeckCraft prints through a PDF: it makes the PDF and opens it in your PDF viewer, where you pick the printer. So you need a PDF viewer installed. In the web version, the PDF downloads instead.
- Choose File › Print (Ctrl+P).
- Choose which slides and a layout (see below). The preview on the right updates as you go.
- Press Print, then print from your PDF viewer.
| Setting | Choices |
|---|---|
| Slides | Print All Slides, Print Current Slide, or Custom Range. For a range, type slide numbers in Slides, such as 1-3, 5. |
| Layout | Full Page Slides (one slide per page), Notes Pages (each slide with its speaker notes), or Handouts with 1, 2, 3, 4, 6 or 9 slides per page. Three per page adds lines for notes. |
| Paper size and orientation | Letter, A4, Legal or A3, portrait or landscape. For notes pages and handouts only. |
| Print Hidden Slides | Includes slides you hid. |
| Frame Slides | Draws a thin border around each slide. |
| Edit Header & Footer | Opens the header and footer settings. |
If Print is dimmed, there’s nothing to print: the range isn’t valid, or every slide in it is hidden.
To save handouts or a PDF without printing, use File › Export › Create Handouts or Create PDF Document.
Preferences
Section titled “Preferences”Choose File › Options (Ctrl+,) to change the measurement units, interface size, dark appearance, smart guides, snapping, AutoCorrect, and your name for comments.
Keyboard shortcuts
Section titled “Keyboard shortcuts”On a Mac, use ⌘ in place of Ctrl and ⌥ in place of Alt.
| Shortcut | What it does |
|---|---|
| Ctrl+N | New presentation |
| Ctrl+Shift+N | New slide |
| Ctrl+O, Ctrl+S | Open, save |
| Ctrl+Shift+S | Save as |
| Ctrl+Z, Ctrl+Y | Undo, redo |
| Ctrl+D | Duplicate |
| Ctrl+B, Ctrl+I, Ctrl+U | Bold, italic, underline |
| Ctrl+L, Ctrl+E, Ctrl+R, Ctrl+J | Align left, center, right, justify |
| Ctrl+Shift+., Ctrl+Shift+, | Bigger, smaller text |
| Ctrl+K | Insert a link |
| Ctrl+Alt+G, Ctrl+Alt+Shift+G | Group, ungroup |
| Ctrl+F, Ctrl+H | Find, replace |
| F5, Shift+F5 | Present from the start, from the current slide |
| F7 | Spelling |
| Ctrl+Shift+P | Search commands |
| Ctrl+F1 | Collapse the ribbon |