
Workflows
Shortcuts on this page use Ctrl. On a Mac, use ⌘ in place of Ctrl, and Option in place of Alt.
Find your way around
Section titled “Find your way around”DesignCraft’s menus are File, Edit, Layout, Type, Object, Table, View, Window and Help. The Tools panel is on the left, and the panels are on the right.
- The Properties panel changes with what you select. For a text frame it shows its position and size, fill and stroke, columns and text wrap, with quick buttons such as Group and Lock.
- Every panel is in the Window menu. Window › Workspace switches between panel layouts such as Essentials, Typography and Printing and Proofing.
- Edit › Quick Apply… (Ctrl+Return) searches your styles and DesignCraft’s commands. Type a few letters and press Enter.
- Edit › Keyboard Shortcuts… shows and changes every shortcut.
Besides the selection, type, frame and shape tools in Keyboard shortcuts, the Tools panel holds these. Where a tool has a key, press it with the cursor outside a text frame.
| Tool | Key | What it does |
|---|---|---|
| Page Tool | Shift+P | Resizes and moves pages. |
| Gap Tool | U | Moves or resizes the space between objects. |
| Content Collector Tool and Content Placer Tool | B | Copies objects and places the copies elsewhere. |
| Type on a Path Tool | Shift+T | Sets text along a line or shape. |
| Line Tool | \ | Draws a straight line. |
| Pencil Tool | N | Draws a freehand path. |
| Scissors Tool | C | Cuts a path at a point. |
| Free Transform Tool | E | Moves, rotates and scales a selection. |
| Rotate Tool, Scale Tool, Shear Tool | R, S, O | Transforms a selection around a point you pick. |
| Gradient Swatch Tool | G | Sets the direction of a gradient. |
| Gradient Feather Tool | Shift+G | Fades an object out along a line. |
| Note Tool | None | Adds a note to the text. See Review and edit text. |
| Color Theme Tool | Shift+I | Picks colors from an object to make a theme. |
| Eyedropper Tool | I | Copies formatting from one object to another. |
| Measure Tool | K | Measures a distance. |
Set up pages
Section titled “Set up pages”- Window › Pages shows every page and spread. Use it to add, move and delete pages.
- Layout › Pages › Insert Pages… (Ctrl+Shift+P) adds pages.
- Parent pages hold what repeats, such as page numbers and running heads. Make one with Layout › Pages › New Parent…, and use it with Layout › Pages › Apply Parent to Pages….
- Layout › Margins and Columns… changes the margins and columns of the pages you’re on.
- File › Document Setup… (Ctrl+Alt+P) changes the page size, facing pages and bleed of the whole document.
To number pages, draw a text frame on a parent page and choose Type › Insert Special Character › Markers › Current Page Number (Ctrl+Alt+Shift+N).
Thread text from frame to frame
Section titled “Thread text from frame to frame”A long story can flow through several text frames, across columns and pages.
- Select a text frame with the Selection Tool (V). Each text frame has a small in port at its top left and an out port at its bottom right. A red + in the out port means there’s more text than fits.
- Click the out port. The pointer becomes a loaded text cursor.
- Click another frame to thread the text into it. Or click empty space to make a new frame the width of the column there, or drag to draw one.
Hold Shift as you click to flow the rest of the story onto the pages that follow, adding pages as needed. To see how frames link, choose View › Extras › Show/Hide Text Threads (Ctrl+Alt+Y).
Wrap text around objects
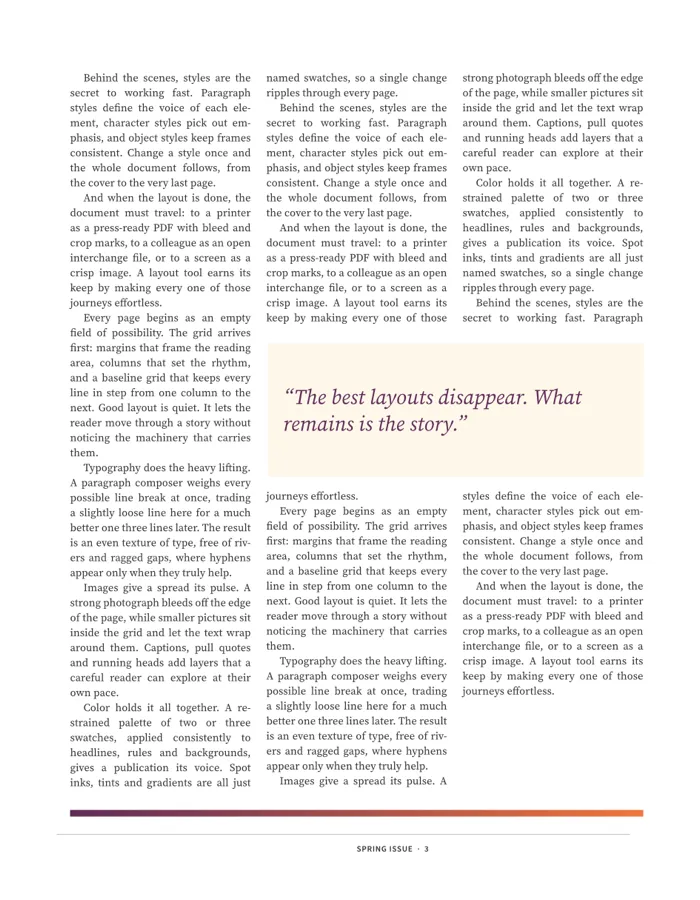
Section titled “Wrap text around objects”Select a picture or shape, then pick a wrap in the Text Wrap section of the Properties panel, or in Window › Text Wrap. Set Offset to keep the text a little way off.
Work with layers
Section titled “Work with layers”Layers stack objects like sheets of clear film. Put the background, pictures and text on separate layers to hide or lock one group while you work on another. Window › Layers shows them, and the Layers tab is one of the three default tabs on the right.
- Click the eye next to a layer to hide or show it. Click the lock to lock or unlock it. A locked layer can’t be edited.
- Click a layer to make it the active one. New objects go on the active layer.
- Double-click a layer to open its options.
- Drag a layer up or down to change what covers what.
- Click the colored square at the right of a layer to select everything on it. Drag the square to another layer to move the selection there.
- Right-click a layer for Move Selection Here, Merge into Active Layer, Hide Others, Lock Others, Show All Layers, Unlock All Layers and Delete Unused Layers.
To hide a single object, select it and choose Object › Hide (Ctrl+3). Object › Lock (Ctrl+L) locks it.
Format with styles
Section titled “Format with styles”Styles keep a document consistent: change a style once, and all the text using it updates.
- Paragraph styles (Type › Paragraph Styles, Ctrl+F11) set the font, size, spacing, indents, hyphenation and so on for whole paragraphs.
- Character styles (Type › Character Styles, Ctrl+Shift+F11) change words within a paragraph, such as a bold run-in or an italic title.
- Type › Character (Ctrl+T) and Type › Paragraph (Ctrl+Alt+T) format the selected text directly.
- Type › Bulleted & Numbered Lists adds bullets and numbering.
Hyphenation follows the text’s language. If a paragraph doesn’t hyphenate, check its language: open Type › Character (Ctrl+T), open More Options and pick one under Language. For German, choose German: 2006 Reform or German: Swiss 2006 Reform. The older German spellings, such as German: 1996 Reform and German: Traditional, have no hyphenation patterns yet (#2119).
To edit long text without the layout getting in the way, choose Edit › Edit in Story Editor (Ctrl+Y). Edit › Find/Change… (Ctrl+F) finds and replaces text.
Place pictures and other files
Section titled “Place pictures and other files”Choose File › Place… (Ctrl+D). It takes:
| Kind | File types |
|---|---|
| Pictures | PNG, JPEG, GIF, WebP, TIFF, BMP, PSD, SVG |
| Vector artwork | PDF, AI, EPS |
| Text | TXT, DOCX, RTF, MD |
| Spreadsheet | XLSX, placed as a table |
| Video and sound | MP4, M4V, MOV, WebM, MP3, M4A, WAV, OGG |
If an empty or picture frame is selected, the file fills it. If not, click to place it at its own size, or drag to draw its frame. For a PDF with several pages, DesignCraft asks which page to place. An EPS shows its preview only.
To fit a picture to its frame, use Object › Fitting: Fill Frame Proportionally, Fit Content Proportionally, Fit Frame to Content and so on.
To map the styles in a Word or RTF file to your document’s styles as it comes in, use File › Place with Import Options… (Ctrl+Shift+D).
Fix and update links
Section titled “Fix and update links”A placed picture is linked to its file on disk. Window › Links lists every link and its status. Select a link to use these actions:
- Update Link reloads a picture that changed on disk.
- Relink… points the link to another file. Relink to Folder… looks for the file in a folder you pick.
- Embed Link stores a copy of the picture inside the document, so the link no longer matters.
- Go To Link jumps to the picture on the page.
Work with color
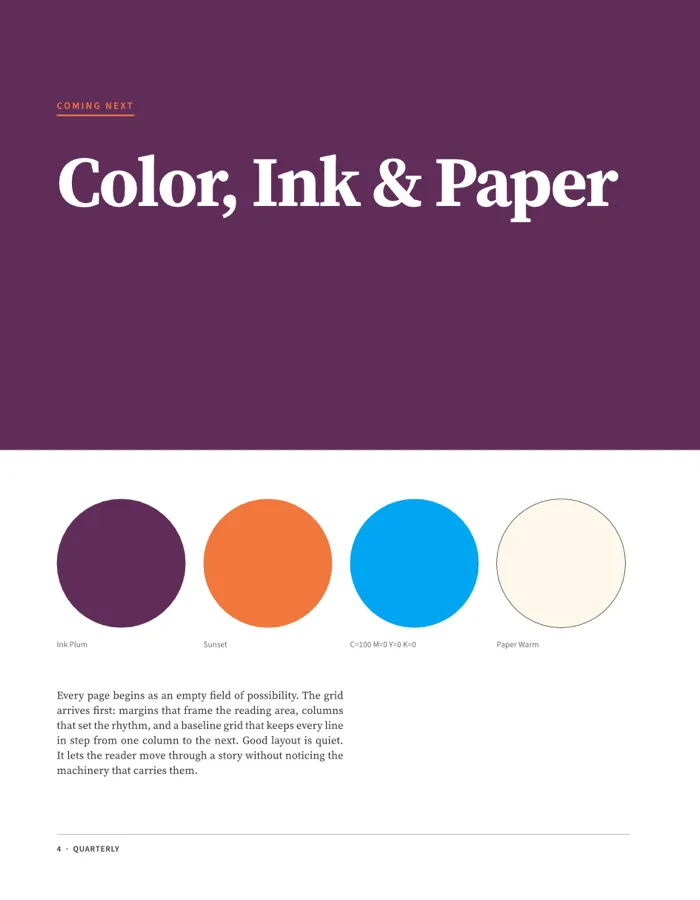
Section titled “Work with color”Window › Color › Swatches lists the document’s named colors. Add a swatch once, then use it everywhere, so a change to the swatch changes every object that uses it. Swatches can be RGB or CMYK colors, tints and gradients.
Before you send a job to print, check it on screen with View › Overprint Preview and View › Separations Preview.
Objects and effects
Section titled “Objects and effects”- Object › Effects adds Drop Shadow (Ctrl+Alt+M), Inner Shadow, Outer Glow, Inner Glow, Bevel and Emboss, Satin, Basic Feather, Directional Feather and Transparency…. Window › Effects shows what an object has.
- Object › Corner Options… changes the corners of a frame to rounded, inverse rounded, inset, bevel or fancy.
- Object › Pathfinder combines shapes with Add, Subtract, Intersect, Exclude Overlap and Minus Back.
- Window › Object & Layout › Align lines up and spaces out the selected objects.
- Object › Clipping Path… cuts a picture out of its background, using its alpha channel or by detecting edges.
- Edit › Step and Repeat… (Ctrl+Alt+U) makes copies of the selection at a set offset, in a row or a grid.
- Object › Generate QR Code… makes a QR code you can place on a page.
- Type › Create Outlines (Ctrl+Shift+O) turns text into shapes.
- Object › Anchored Object ties an object to a spot in the text so it moves with the text. Object › Captions puts a text frame beside a picture, filled from the picture’s metadata.
Add tables
Section titled “Add tables”Choose Table › Insert Table… (Ctrl+Alt+Shift+T) with the text cursor in a frame. The Table menu then inserts and deletes rows and columns, merges and splits cells, and turns rows into header or footer rows. Table › Convert Text to Table… turns tabbed text into a table.
Long documents
Section titled “Long documents”- Type › Insert Footnote adds a footnote at the cursor.
- Layout › Table of Contents… builds a table of contents from your paragraph styles. Layout › Update Table of Contents refreshes it.
- Layout › Index adds index entries and builds the index.
- Type › Insert Endnote adds an endnote at the cursor. Document Endnote Options…, which sets how endnotes look, isn’t on a menu: find it with Quick Apply (Ctrl+Return).
- Type › Hyperlinks & Cross-References makes a New Hyperlink… from the selected text or frame, and Insert Cross-Reference… points to another place in the document. Define Cross-Reference Format… sets the wording.
- Type › Text Variables holds values such as a chapter number or a running header. Use Define Text Variable… to make one, Insert Variable to put it in the text, and Convert Variable to Text to freeze it.
- Type › Bulleted & Numbered Lists › Define Lists… sets up lists that keep their numbering across frames.
- Window › Articles lists objects in reading order for EPUB and HTML export.
- Window › Utilities › Book gathers several documents into one book.
- Window › Utilities › Data Merge fills a layout from a spreadsheet or CSV file, for name badges, cards and the like.
Review and edit text
Section titled “Review and edit text”These tools are for editors working on someone else’s text.
- Type › Track Changes › Track Changes records insertions and deletions as you type. Accept All Changes and Reject All Changes are on the same submenu. Window › Editorial › Track Changes lists each change so you can accept or reject it one at a time.
- Type › Notes › New Note adds a note at the cursor. Next Note and Previous Note step through them. Window › Editorial › Notes lists them all.
- Window › Type & Tables › Conditional Text lists your conditions. Use New Condition… to make one, and apply it to text to show or hide that text as a group.
Check spelling
Section titled “Check spelling”Edit › Spelling › Check Spelling… (Ctrl+I) goes through the document. Turn on Edit › Spelling › Dynamic Spelling to underline misspelled words as you type.
Check before you print
Section titled “Check before you print”Window › Output › Preflight checks the document as you work. The status bar shows a green light and No errors, or a red light and the number of errors. Click the count and choose Preflight Panel… to open the panel.
The panel flags:
- Overset text, which doesn’t fit its frame and isn’t in the export.
- Missing fonts and missing glyphs.
- Missing links and missing graphics.
- Pictures under 150 ppi at their placed size.
- RGB swatches in a print document.
- Empty text frames.
Click a line to select the object and go to its page. Fix the errors before you export a PDF for a print shop.
Export a PDF
Section titled “Export a PDF”Choose File › Export PDF…, pick a Preset, click OK and choose where to save.
| Preset | Use it for | Standard | Crop and bleed marks |
|---|---|---|---|
| Desktop Printing | Your own printer | None | Off |
| Commercial Printing | A print shop | None | On |
| Screen and Email | A small file to send or show on screen | None | Off |
| PDF/X-1a:2003 | A print shop that asks for PDF/X-1a | PDF/X-1a:2003 | On |
| PDF/X-4 | A print shop that asks for PDF/X-4 | PDF/X-4 | On |
| PDF/A-2b | Archiving | PDF/A-2b | Off |
You can change any setting after picking a preset, which switches it to Custom:
- General: Page Range (for example
1-3,5) and Spreads. - Compression: Compress images.
- Marks and Bleeds: Include document bleed, Crop Marks, Bleed Marks and Page Information.
- Advanced: the Standard and Tagged PDF.
DesignCraft remembers your settings for next time.
Other exports
Section titled “Other exports”The File menu also has:
- Export Page as PNG… (Ctrl+E)
- Export IDML…, to open the layout in InDesign. See InDesign files.
- Export EPUB… and Export EPUB (Fixed Layout)…, for e-books
- Export PDF (Interactive)…, with links, bookmarks, buttons and form fields
- Export HTML…, Export PowerPoint…, Export XML… and Export Text…
- Print Booklet…, which makes a PDF of printer spreads for a folded, stapled booklet
- Export Layouts and Versions…, to export several formats at once
More on the File menu:
- Save a Copy… saves under another name and leaves your open document as it is.
- Revert goes back to the last saved version. It can’t be undone.
- File Info… sets the title, author and keywords stored in the file.
- Export › Export Selection as Snippet saves the selected objects as a file you can place into another document.
A few commands aren’t on a menu. Find them with Quick Apply (Ctrl+Return):
- Print… (Ctrl+P) sends the document to a printer.
- New Book and New Library start a book and a library of objects you reuse.
- Import XML… brings in XML. The tags it uses are in Window › Utilities › Tags, where Load DTD… loads a DTD.
File › Package… (Ctrl+Alt+Shift+P) copies the document, its linked pictures and its fonts into one folder, to send to a printer or a colleague.
Interactive documents
Section titled “Interactive documents”Buttons and form fields work in File › Export PDF (Interactive)….
- Draw a frame, or select an object.
- Choose Object › Interactive › Convert to Button or Convert to Form Field.
- Set what it does in Window › Interactive › Buttons and Forms.
The other panels in Window › Interactive are Bookmarks, Hyperlinks, Media, Object States and Page Transitions. Filled-in form fields aren’t saved to the exported PDF yet (#2203).
Make a layout for another size
Section titled “Make a layout for another size”To reuse a layout at a different size, such as a print page and a phone screen, choose Layout › Create Alternate Layout…. DesignCraft copies the pages and objects to the new size. Layout › Alternate Layout Options… changes one. Duplicate Alternate Layout and Delete Alternate Layout aren’t on a menu: find them with Quick Apply.
To control how objects follow the new size, use Window › Interactive › Liquid Layout, or find Liquid Page Rule with Quick Apply. Object › Flex Layout › Convert to Flex Layout turns a group or frame into a container that places the objects inside it and reflows them when you move or resize one.
Keyboard shortcuts
Section titled “Keyboard shortcuts”DesignCraft uses the shortcuts you’d expect from a page layout app. These are some of the most used.
| Shortcut | What it does |
|---|---|
| Ctrl+N | New document |
| Ctrl+O | Open |
| Ctrl+S | Save |
| Ctrl+D | Place |
| Ctrl+Z / Ctrl+Shift+Z | Undo / redo |
| Ctrl+G | Group |
| Ctrl+B | Text Frame Options |
| Ctrl+K | Preferences |
| Ctrl+Return | Quick Apply |
| Ctrl+= / Ctrl+- | Zoom in / out |
| Ctrl+0 | Fit page in window |
| Ctrl+1 | Actual size |
| Ctrl+; | Show or hide guides |
| Ctrl+R | Show or hide rulers |
| V, A | Selection, Direct Selection tools |
| T | Type tool |
| F, M, L | Rectangle Frame, Rectangle, Ellipse tools |
| P | Pen tool |
| H, Z | Hand, Zoom tools |
Change the interface
Section titled “Change the interface”- Window › Interface Color Theme switches between Dark, Medium Dark, Medium Light, Light and High Contrast.
- To change the interface language, open Edit › Preferences… (on a Mac, DesignCraft › Settings…) and choose one under General › Interface Language. DesignCraft comes in 16 languages, including English, German, French, Spanish, Japanese, Simplified Chinese and Arabic.
- Preferences › UI Scaling makes the whole interface larger or smaller.