Make 3D artwork
This guide shows how to turn flat shapes, groups and type into 3D objects with the 3D and Materials panel and the Effect → 3D and Materials commands, how to light them, and how to change or remove the effect later.
Every 3D effect is a live effect. The original path or type stays editable, and VectorCraft redraws the 3D object from it. An object takes one 3D effect.
Open the 3D and Materials panel
Section titled “Open the 3D and Materials panel”Choose Window → 3D and Materials. The panel edits the 3D effect of the selected objects without opening a dialog.
- Four object types sit at the top of the panel: Plane, Extrude, Revolve and Inflate. They are dimmed until you select something.
- When the selection has no 3D effect, the panel shows “Select objects, then pick an object type to give them a 3D effect.”
- When the first selected object has a 3D effect, the panel highlights its type and shows its settings on tabs below the types: Object, Rotation and Lighting for Extrude and Inflate, and Rotation and Lighting for Plane and Revolve.
| Object type | Effect it applies | What it does |
|---|---|---|
| Plane | Rotate | Turns the flat art in 3D without adding depth |
| Extrude | Extrude & Bevel | Uses the art as the front face and extends it backward by Depth |
| Revolve | Revolve | Spins the art around a vertical axis |
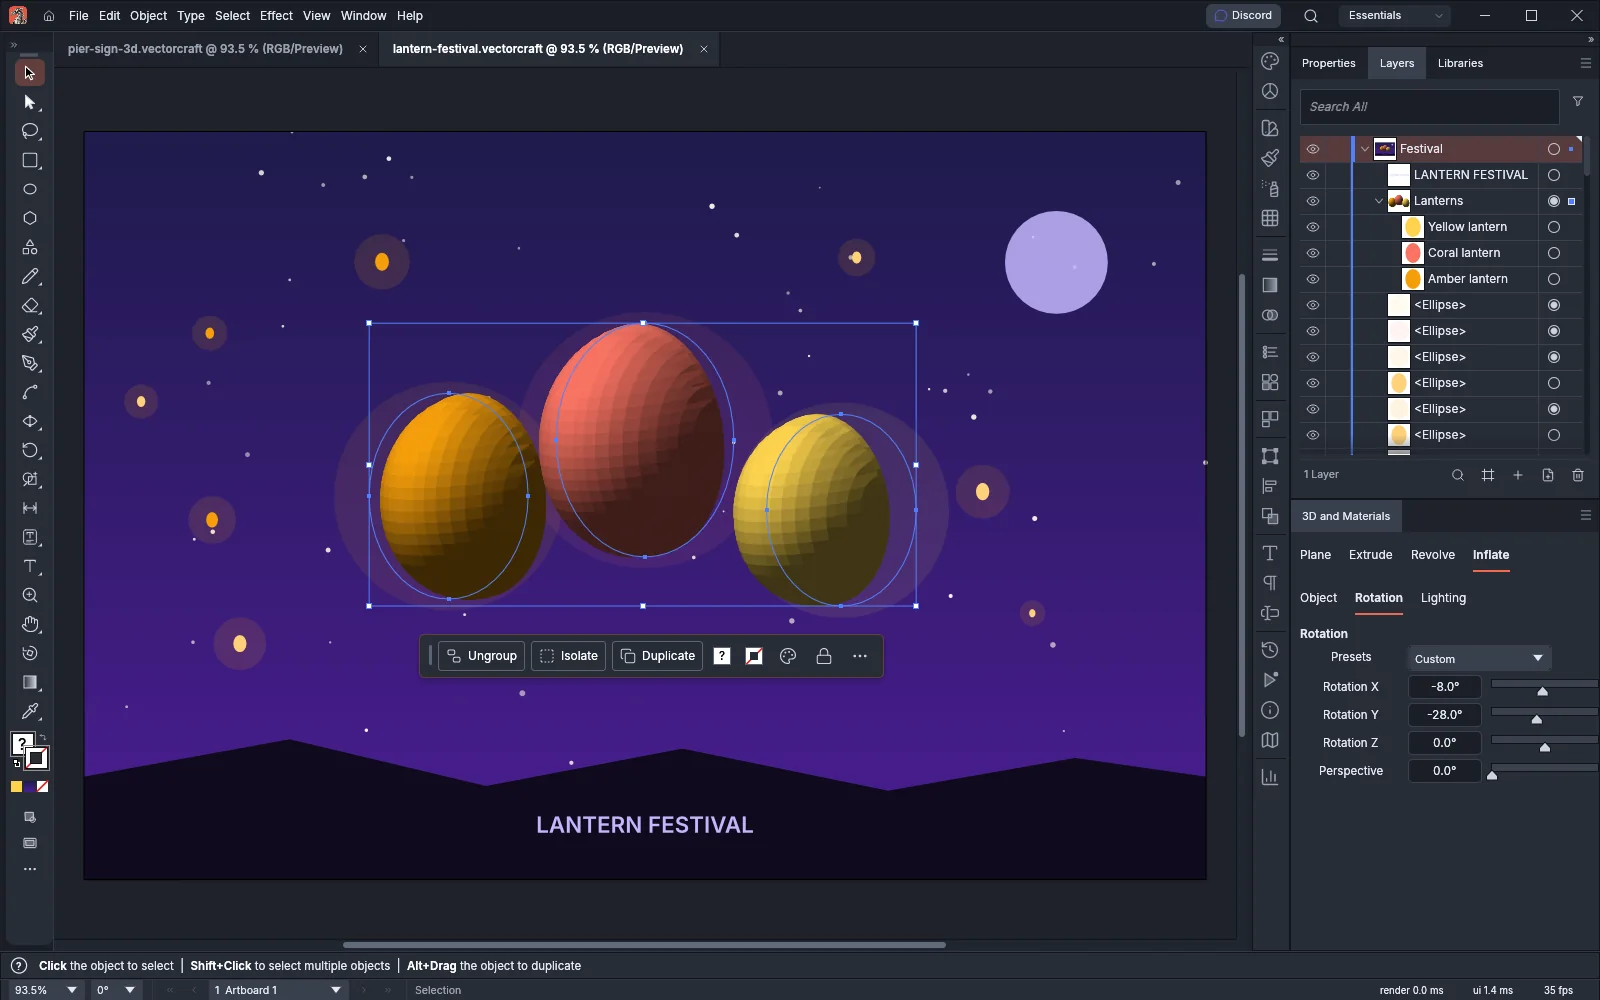
| Inflate | Inflate | Rounds the art outward like a cushion |
Each change in the panel is one undo step. When you drag a value or a slider, the canvas shows the change as you drag, and VectorCraft records one step when you release the pointer. A typed value is recorded when you press Enter.
Give a shape depth
Section titled “Give a shape depth”- Select a shape, a compound path or a line of type.
- Choose Window → 3D and Materials.
- Click Extrude. VectorCraft applies Extrude & Bevel with a depth of 50 pt and turns the object to the Off-Axis Front position.
- On the Object tab, set Depth. Drag the word Depth or the value to the left or right, use the slider, or double-click the value and type a number from 0 to 2000.
- To round or cut the front edges, choose a Bevel Shape: Classic, Rounded, Cove, Step or Ogee. The bevel’s Width, Height, Repeat, Space, Bevel Inside and Bevel both sides settings are dimmed while Bevel Shape is None.
- On the Rotation tab, pick a position from Presets, or set Rotation X, Rotation Y and Rotation Z (-180° to 180°) and Perspective (0° to 160°). Presets shows Custom when the angles match no preset.
To switch an object to another type, click that type. The settings that both effects share keep their values, and the other settings start at their defaults. Clicking the type the object already has does not change it.
The Depth, Width and Height fields show the document’s unit. The settings of each tab are listed in Apply effects and appearance.
Turn a group or a line of type in 3D
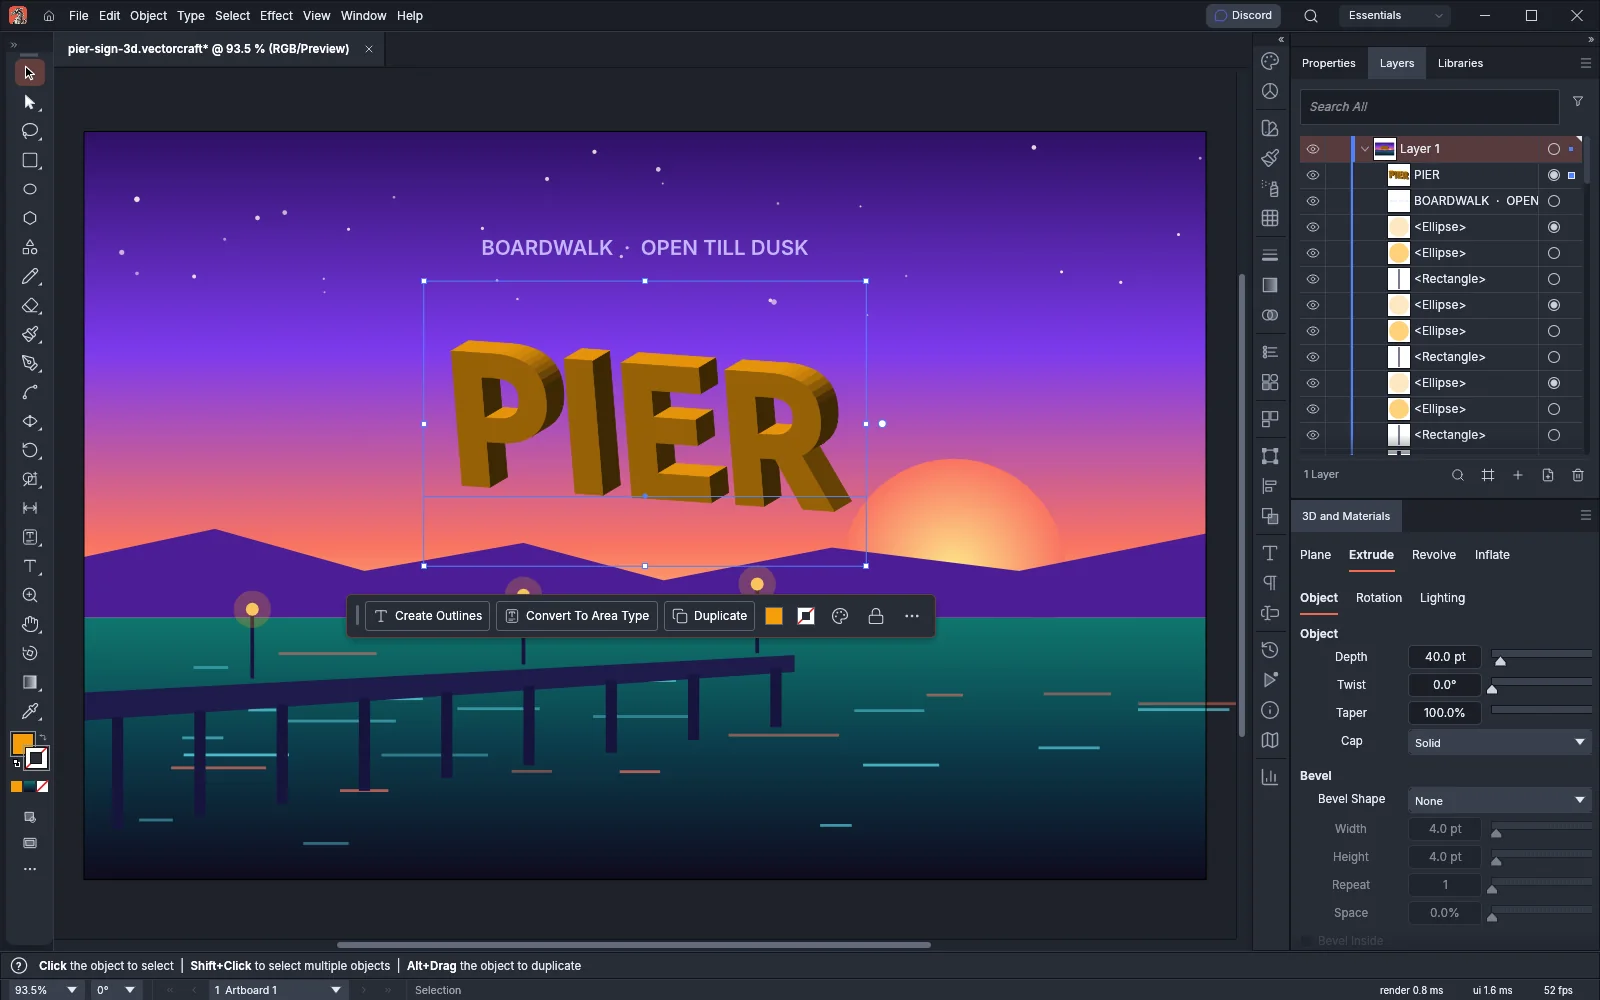
Section titled “Turn a group or a line of type in 3D”Extrude, Inflate and Plane also work on a group or a layer. VectorCraft builds a 3D object from every visible path, compound path and line of type in the group, each in its own fill and stroke, and turns them all together about the center of their combined bounds. If you select the objects one by one instead, each object turns about its own center.
- Select the objects and press Ctrl+G (Cmd+G on macOS) to group them.
- With the group selected, click Extrude, Inflate or Plane in the 3D and Materials panel.
- On the Rotation tab, change Rotation X, Rotation Y or Rotation Z. Every member of the group turns with the same angles.
The members stay editable. Select one with the Direct Selection tool or in the Layers panel and move or reshape it, and VectorCraft rebuilds the 3D object. Hidden members and guides are left out.
A line of type also stays editable after you give it a 3D effect, so you can change its words and font later with the Type tool.
Revolve a profile, a group or type
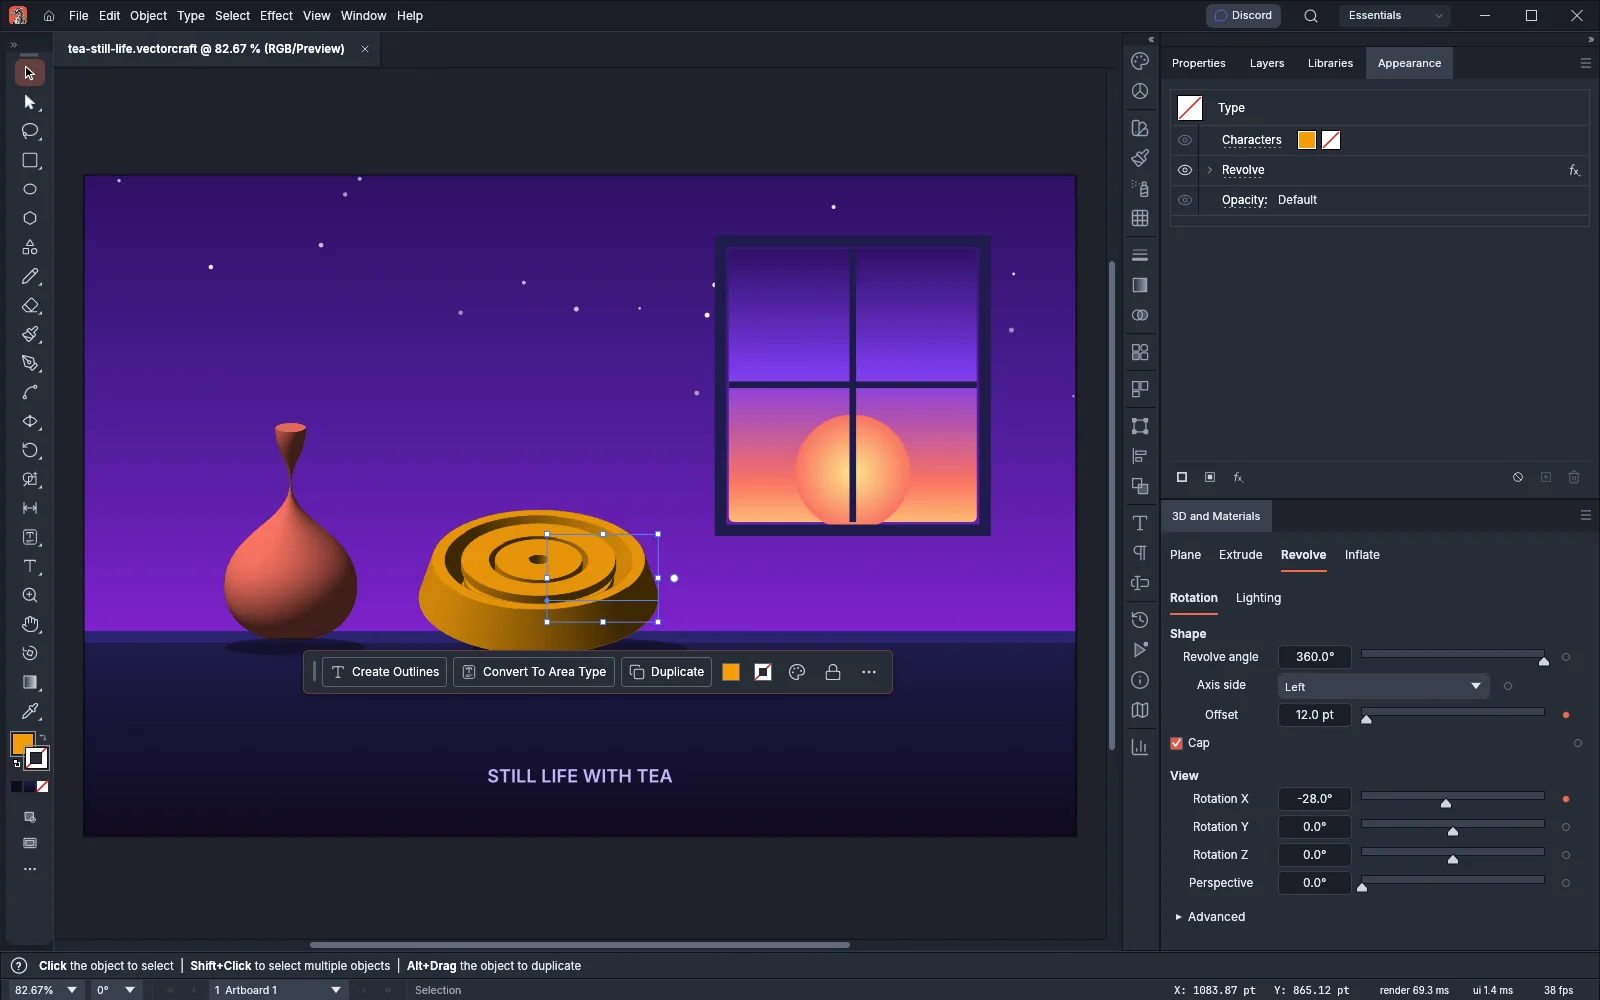
Section titled “Revolve a profile, a group or type”Revolve spins the art around a vertical axis at one edge of its bounds. The distance from the axis to each point of the art becomes the radius of the 3D object at that height, so the outline of half a vase becomes a whole vase.
-
Draw the profile: the right half of the outline, with its left edge where the center of the object should be.
-
Select the profile, a group, a layer or a line of type.
-
In the 3D and Materials panel, click Revolve, or choose Effect → 3D and Materials → Revolve… to use the dialog.
-
On the Rotation tab, set the shape:
Setting Default What it does Revolve angle 360° How far the art sweeps around the axis, from 0° to 360° Axis side Left Puts the axis on the left or right edge of the art’s bounds Offset 0 pt Moves the axis outward, away from the art, which leaves a hole in the middle Cap On Closes the circular ends of an open profile Rotation X, Y, Z 0° The viewing angle around each axis Perspective 0° 0° shows no perspective; a wider angle brings the eye nearer, up to 160° -
To change how smooth the surface is, open Advanced and set Segments (8 to 128, 64 by default).
A vertical straight line at the axis has no surface. Give it an Offset to make a cylinder. Type sweeps as the outlines of its letters and stays editable. On a group or a layer, every visible member sweeps around one shared axis at the edge of the members’ combined bounds, and each member keeps its own paint.
Light the object
Section titled “Light the object”The Lighting tab is the same in the panel and in the Extrude & Bevel, Revolve, Inflate and Rotate dialogs.
| Setting | Default | What it does |
|---|---|---|
| Shading | On | Shades the surfaces by the lights. Off keeps the paint unlit and dims the other settings |
| Presets | Standard | Standard, Diffuse, Top Left or Right. The list shows Custom when the lights match no preset |
| Lights | Light 1 | Picks the light that the settings below change |
| Add Light, Delete Light | One light | Adds a white light, up to 10, or deletes the selected light. One light always stays |
| Color | White | The color of the selected light |
| Intensity | 80% | The brightness of the selected light, from 0% to 100% |
| Rotation | 125.26° | Where the light sits around the object, from -180° to 180° |
| Height | 30° | 0° lights the object from the side, and 90° lights it from the front |
| Softness | 0% | How far around the object the light reaches, from 0% to 100% |
| Ambient Light | 25% | Light that reaches every surface, from 0% to 200%. All lights share it |
| Light behind the object | Off | Moves the selected light behind the object |
In the dialogs, the Lighting tab also shows the light on the canvas. Drag it to move the light, and hold Shift to move it in steps of 15°.
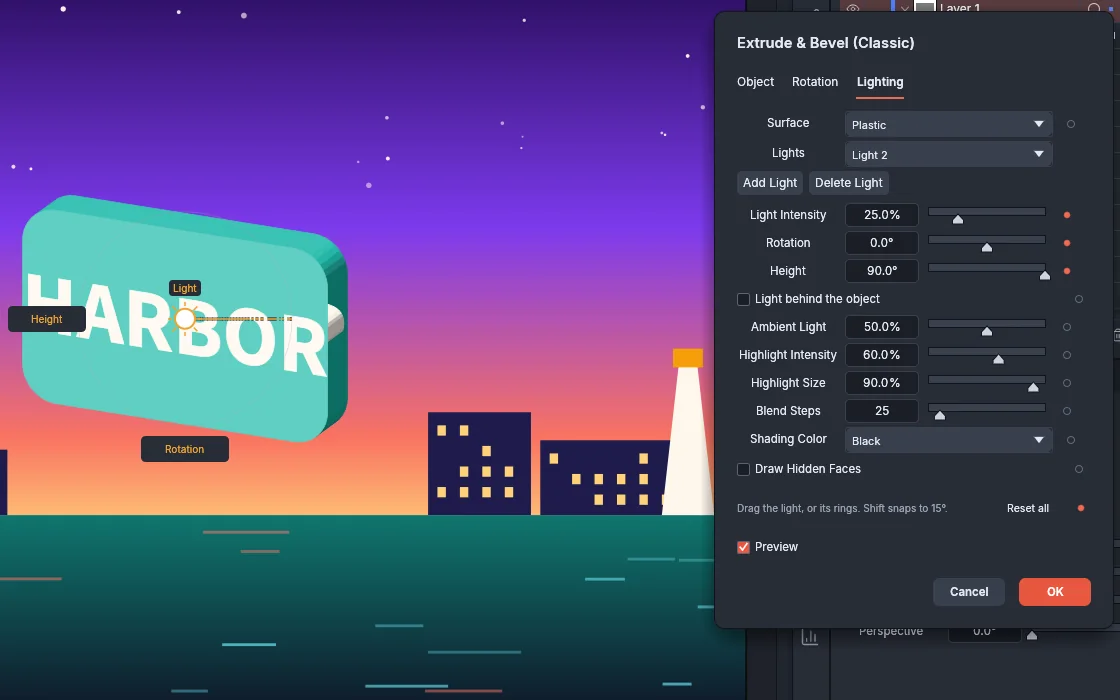
Use Extrude & Bevel (Classic)
Section titled “Use Extrude & Bevel (Classic)”Extrude & Bevel (Classic) extrudes the art like Extrude & Bevel and adds its own surface styles: a wireframe, a glossy plastic highlight, and shading in bands.
- Select the object.
- Choose Effect → 3D and Materials → 3D (Classic) → Extrude & Bevel (Classic)…. The dialog opens beside the artboard on its Object tab, with rotation rings over the object.
- On the Object tab, set the depth and the bevel.
- On the Rotation tab, pick a preset or drag the rings on the canvas. Hold Shift to turn in steps of 15°.
- On the Lighting tab, choose a Surface and set the lights and the shading.
- Click OK. The effect is one undo step. Cancel puts the object back as it was.
| Setting | Tab | Default | What it does |
|---|---|---|---|
| Depth | Object | 50 pt | How far the object extends back, from 0 to 2000 pt |
| Cap | Object | Solid | Solid closes the front and back; Hollow leaves them open |
| Bevel Shape | Object | None | None, Classic, Rounded, Cove, Step or Ogee |
| Height | Object | 4 pt | The size of the bevel, from 1 to 100 pt. The bevel is as wide as it is tall |
| Bevel Inside | Object | Off | Cuts the bevel into the shape instead of adding it around the shape |
| Surface | Lighting | Plastic | Wireframe draws the edges of every face, hidden faces included, with no fill. No Shading keeps the paint unlit. Diffuse lights the faces softly. Plastic adds a glossy highlight |
| Lights, Add Light, Delete Light | Lighting | One light | Up to 10 lights. The lights add up; they have no color or softness |
| Light Intensity | Lighting | 100% | The brightness of the selected light, from 0% to 100% |
| Rotation, Height | Lighting | 125.26°, 30° | Where the selected light sits, as on the other 3D effects |
| Light behind the object | Lighting | Off | Moves the selected light behind the object |
| Ambient Light | Lighting | 50% | Light that reaches every face, from 0% to 100% |
| Highlight Intensity | Lighting | 60% | The strength of the highlight, from 0% to 100%. Plastic only |
| Highlight Size | Lighting | 90% | 100% makes a broad highlight and 0% a small spot. Plastic only |
| Blend Steps | Lighting | 25 | How many levels the shading and the highlight are rounded to, from 1 to 256 |
| Shading Color | Lighting | Black | The color the faces darken toward: Black, Custom or None. Custom adds a color button. None keeps the paint and only the highlight lightens it |
| Draw Hidden Faces | Lighting | Off | Also draws the faces that are turned away, behind the others |
The Rotation tab has the same Presets, Rotation X, Rotation Y, Rotation Z (-180° to 180°) and Perspective (0° to 160°) settings as the panel’s Rotation tab. Height and Bevel Inside are dimmed while Bevel Shape is None.
The light settings, Ambient Light, Blend Steps and Shading Color apply to the Diffuse and Plastic surfaces only.
If a 3D effect cannot be applied
Section titled “If a 3D effect cannot be applied”This section covers all five 3D dialogs: Extrude & Bevel, Revolve, Inflate, Rotate and Extrude & Bevel (Classic).
Some objects cannot take a 3D effect: an image (trace it first with Object → Image Trace → Make), a group that holds an envelope, a mesh or a repeat, and a group of more than 4,096 shapes. For these, the 3D dialogs show the reason under Preview and turn OK off, and Enter does not confirm the dialog. With Preview off, the dialog still tries the values each time you change them and shows the reason.
Change or remove a 3D effect later
Section titled “Change or remove a 3D effect later”- To change the settings, select the object and use the 3D and Materials panel, or double-click the effect’s row in the Appearance panel (Shift+F6) to open its dialog with the current values.
- To try another kind of 3D, click another object type in the 3D and Materials panel. An object takes one 3D effect, so use the panel or remove the effect instead of applying a second one from the Effect menu.
- To remove the effect, click its row in the Appearance panel and click Delete Selected Item.
- To turn the 3D object into ordinary paths, choose Object → Expand Appearance. The faces become editable vector shapes. For Revolve, Keep visible surfaces only when expanding (under Advanced, on by default) removes the faces that other faces cover.
After Object → Expand Appearance, the effect is no longer live, and you cannot change its settings.
Effect → 3D and Materials → Materials… is listed but dimmed. Materials, shadows and ray-traced rendering are not available in this version.