Getting started
1. Install TextureCraft
Section titled “1. Install TextureCraft”The quickest way is ArtCraft Launcher: install it, then press Install on TextureCraft’s card. To download TextureCraft on its own, see Install and update.
2. Open TextureCraft
Section titled “2. Open TextureCraft”TextureCraft opens with a sample project, and a start window over it. From the start window you can:
- New project…: start from a 3D model.
- Open…: open a .tcraft project or a model file.
- Pick one of your Recent projects.
- Continue with the sample project: close the window and look around the sample.
To skip the start window next time, clear Show at startup.
You can also start TextureCraft from a terminal. Give it a project or a model to open it right away, or add --empty to start without the sample project:
texturecraft my-project.tcrafttexturecraft crate.glbtexturecraft --empty3. Move around the model
Section titled “3. Move around the model”| To | Do this |
|---|---|
| Turn the model | Right-drag, or Alt+drag |
| Pan | Middle-drag |
| Zoom | Scroll the wheel |
| Fit the model in the view | Press F |
| Turn the lighting | Shift+right-drag |
4. Start a project from your model
Section titled “4. Start a project from your model”Choose File › New project… (Ctrl+N, or ⌘N on a Mac). In the New project window:
- Under 3D mesh, pick a built-in mesh, or choose Select… to load your own model.
- Pick a Project template, or keep the default.
- Set the Document resolution: the size of the textures you paint, from 512 × 512 to 4096 × 4096. You can change it later.
- Leave UV tiles (UDIM) on Automatic (from the mesh UVs) unless you know your model needs it.
- Give the project a Name and choose Create.
Each material in your model becomes a texture set, listed in the Texture Sets panel.
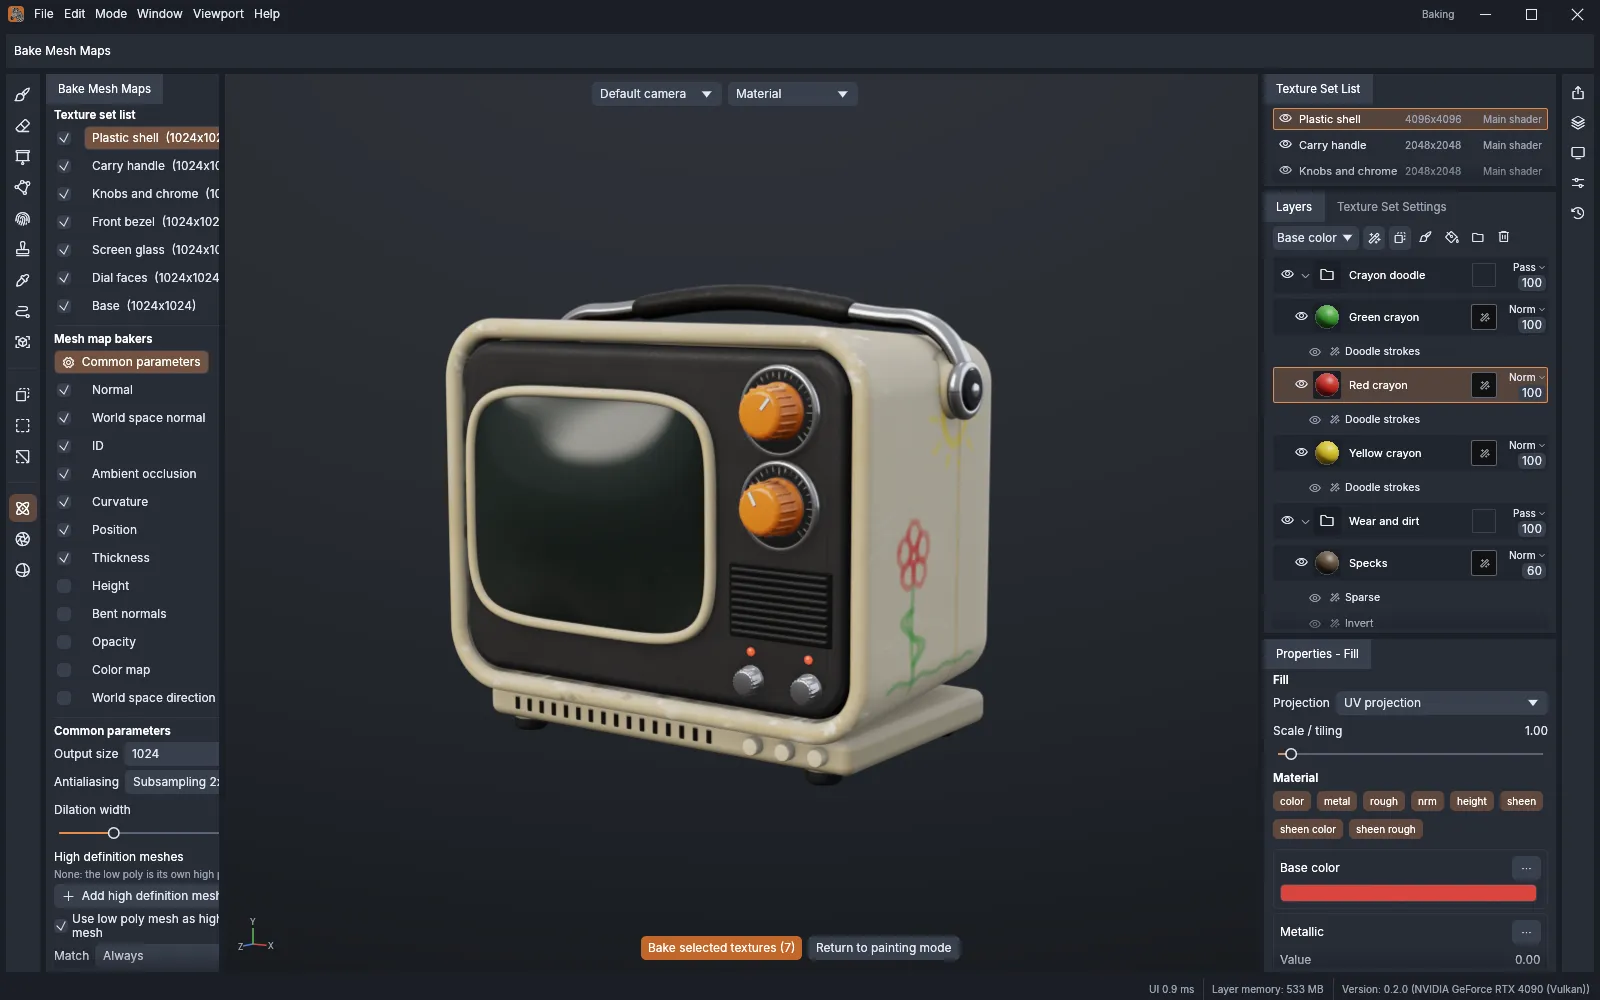
5. Bake mesh maps
Section titled “5. Bake mesh maps”Smart materials and smart masks use mesh maps (ambient occlusion, curvature and so on) to place wear and dirt. Bake them first:
- Choose Mode › Bake Mesh Maps (F8).
- Select the texture sets and the maps you want.
- Choose Bake Selected Textures.
- Choose Return to Painting Mode when it’s done.
6. Add a material
Section titled “6. Add a material”Open the Materials or Smart materials tab of the Assets shelf. Drag a material onto the Layers stack, or straight onto the model. It arrives as a fill layer, which you can change in Properties.
7. Paint
Section titled “7. Paint”Add a paint layer first, with Add paint layer in the Layers panel, so your strokes stay separate from the material below. Then choose the Paint tool (1) and paint on the model. Set Size, Flow and Stroke opacity in the bar at the top.
Ctrl+Z undoes a stroke. The History panel (Window › Views › History) lets you jump back to any step.
8. Save
Section titled “8. Save”Press Ctrl+S (⌘S on a Mac). TextureCraft saves a .tcraft project file. It also keeps autosaves in its data folder.
9. Export your textures
Section titled “9. Export your textures”- Choose File › Export Textures… (Ctrl+Shift+E).
- Select the texture sets to export.
- Choose an Output directory.
- Pick an Output template, for example one for your game engine.
- Choose Export.
Next steps
Section titled “Next steps”- Workflows: layers, masks, export templates and Rendering mode.
- Troubleshooting: if the window doesn’t open or something looks wrong.