Add shadows, glows and scribbles
This guide covers the Effect → Stylize effects listed under Vector Effects in the Effect menu: Feather, Round Corners, Inner Glow, Outer Glow and Scribble, with a short note on Drop Shadow, and the Effect → Rasterize… effect. Each one is a live effect: the object keeps its original path, and you can change or remove the effect later in the Appearance panel. The Stylize group under Raster Effects holds Glowing Edges…, which Apply raster effects with the Effect Gallery covers.
Soften edges with Feather and Round Corners
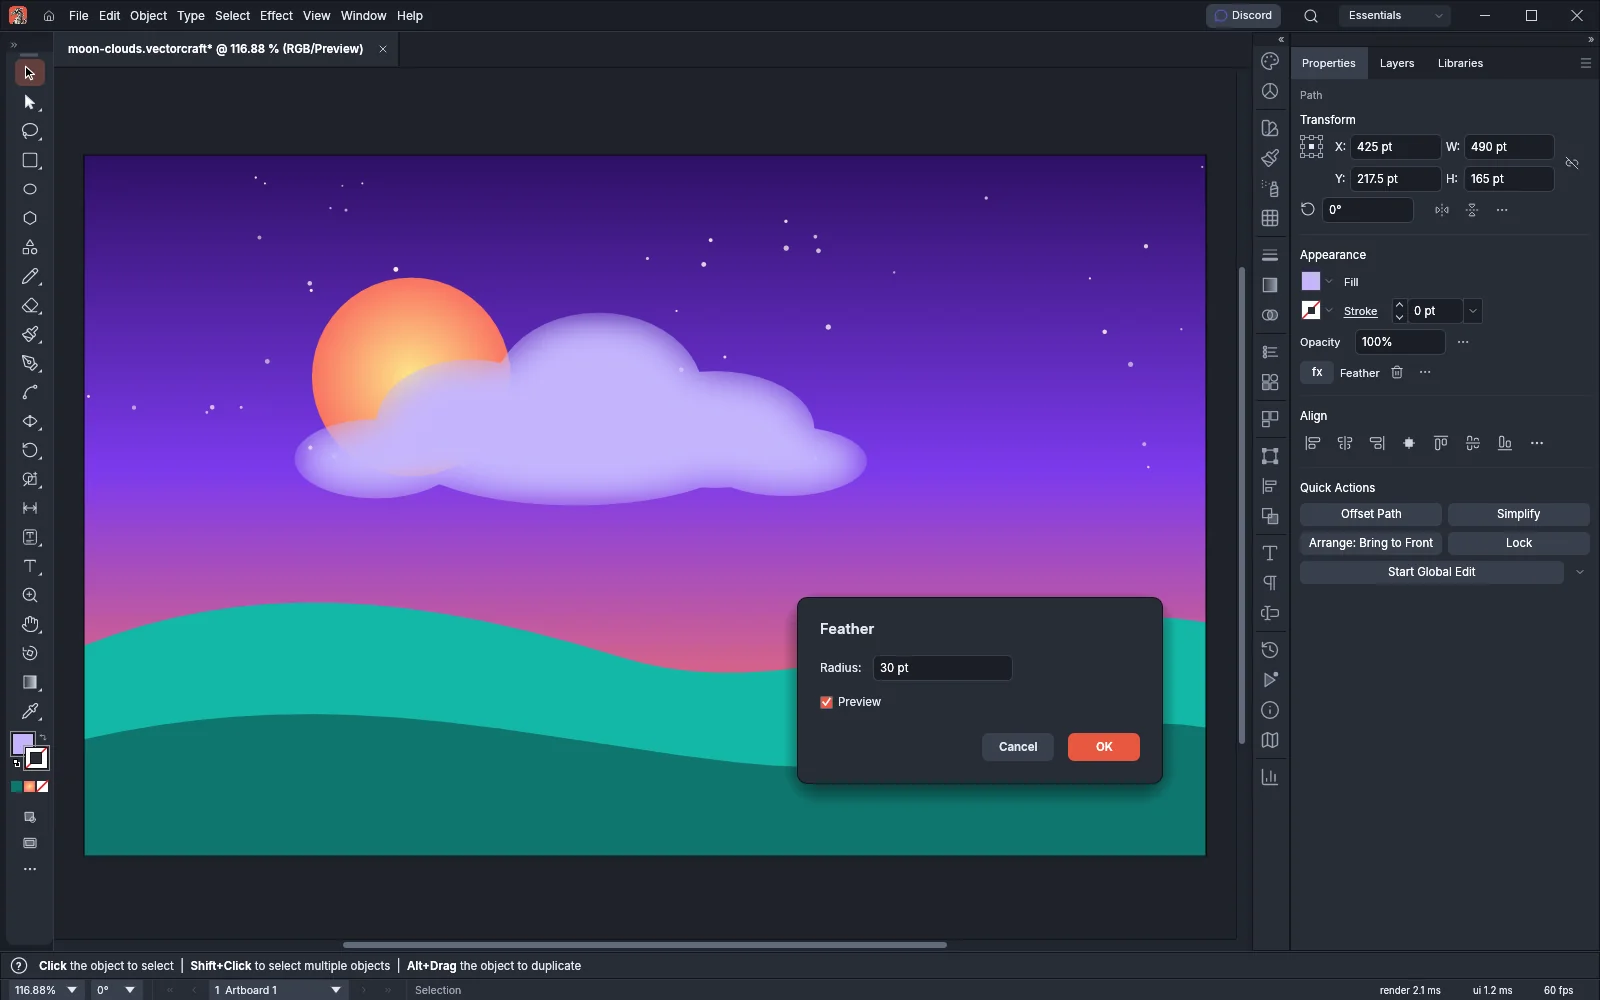
Section titled “Soften edges with Feather and Round Corners”Feather… blurs the edges of an object so that they fade into the art behind it. Round Corners… replaces each sharp corner of a path with a rounded corner of the radius you set.
- Select an object, for example a cloud.
- Choose Effect → Stylize → Feather… or Effect → Stylize → Round Corners….
- Type a Radius. Feather starts at 5 pt, and Round Corners starts at 10 pt. A larger Feather radius gives a wider fade, and a larger Round Corners radius gives rounder corners.
- Leave Preview on to see the result on the canvas, then press OK.
The effect appears as its own row in the Appearance panel. Click the effect’s name, or double-click an empty part of its row, to open the dialog again with the current radius.
Round Corners is a vector effect. Feather is a raster effect, like the glows and Drop Shadow. Draw an object as an image with the Rasterize effect describes the resolution that raster effects use.
Add a glow inside or outside an object
Section titled “Add a glow inside or outside an object”Outer Glow… adds a soft halo of color around an object. Inner Glow… adds the glow inside the object’s edges.
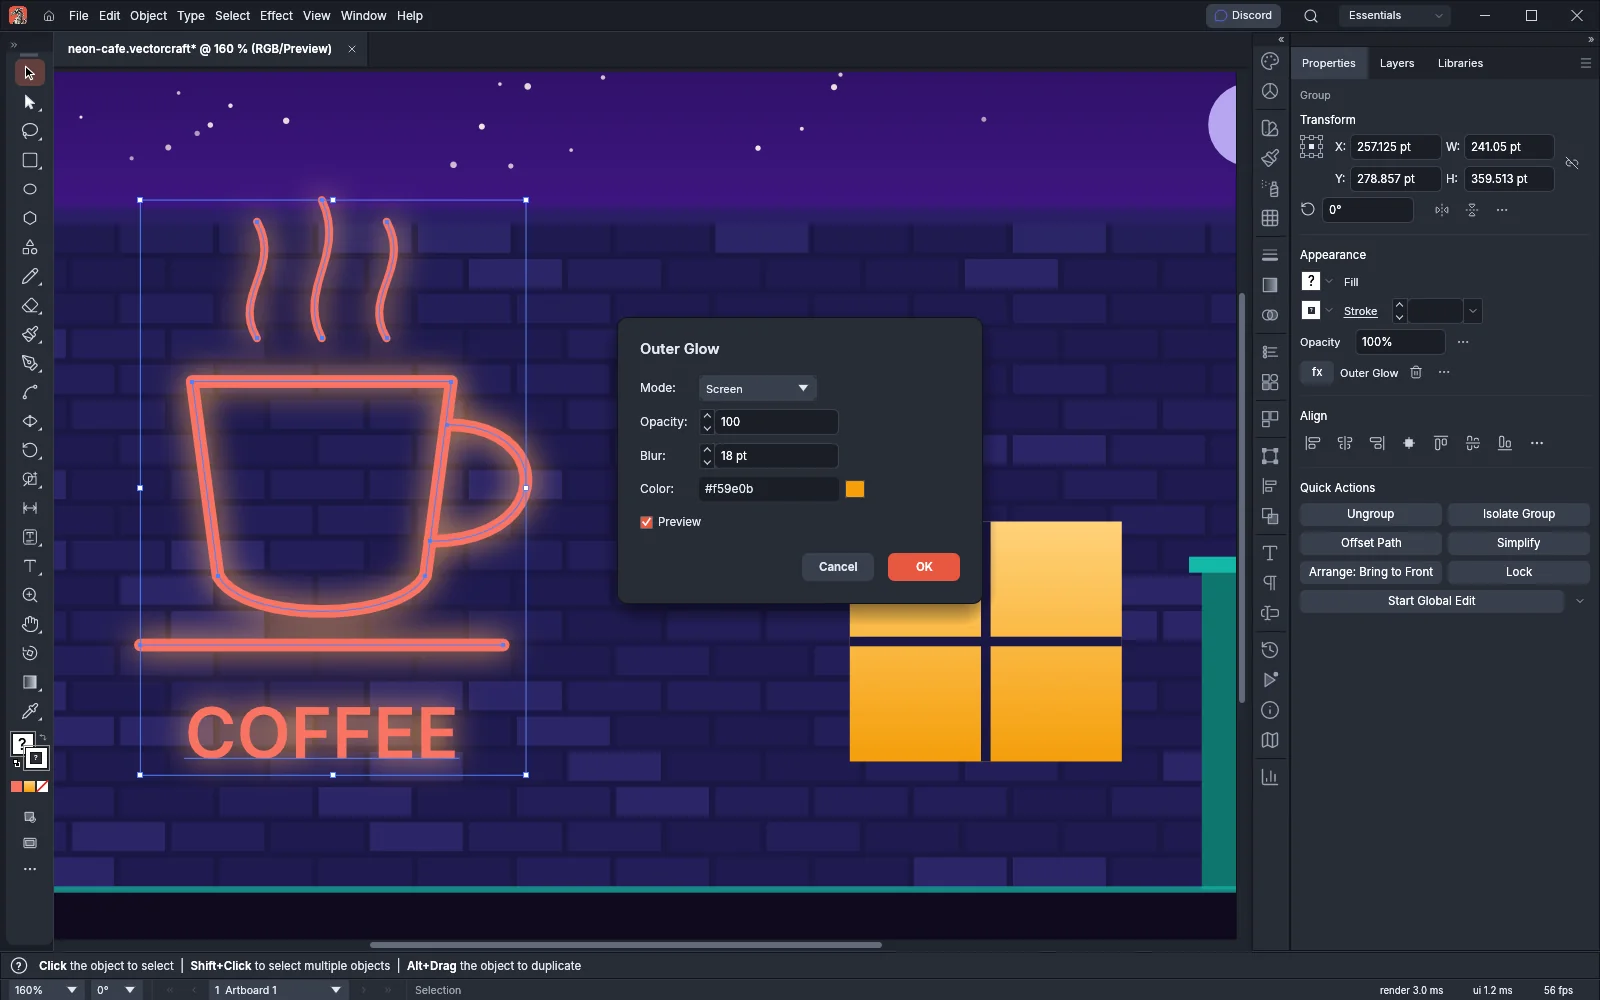
- Select the object. A glow works on a path, on type and on a group, such as a sign made of several strokes.
- Choose Effect → Stylize → Outer Glow… or Effect → Stylize → Inner Glow….
- Set Blur to the width of the glow, and pick a Color. Double-click the swatch beside the color field to choose the color in the Color Picker.
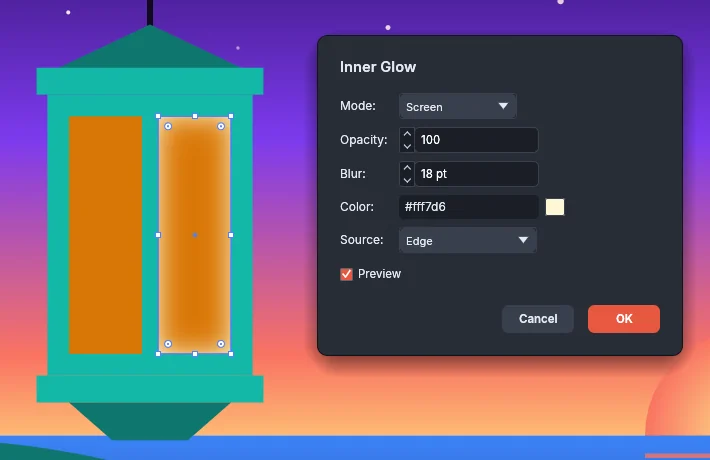
- For Inner Glow, choose Edge to make the glow come in from the edges, or Center to make it spread out from the middle.
- Press OK.
The following screenshot shows Inner Glow on one amber pane of a lantern. The pale glow comes in from the pane’s edges, and the other pane has no effect.
To cast a shadow instead of a glow, choose Effect → Stylize → Drop Shadow…. It opens with Multiply mode, 75% opacity, an X and Y offset of 7 pt, a blur of 5 pt and black. Its dialog has the same Mode, Opacity, Blur and Color fields as the glows, and it also offers Darkness. Apply a live effect describes the Drop Shadow dialog in full.
Glow options
Section titled “Glow options”| Option | Outer Glow default | Inner Glow default | What it does |
|---|---|---|---|
| Mode | Screen | Screen | The blend mode that mixes the glow with the color under it |
| Opacity | 75 | 75 | How strong the glow is, from 0 to 100 |
| Blur | 5 pt | 5 pt | How far the glow spreads from the edge, 0 or more |
| Color | #ffff00 (yellow) | #ffffff (white) | The color of the glow; a double-click on the swatch beside the field opens the Color Picker |
| Source | Not available | Edge | Edge starts the glow at the edges and fades it toward the middle; Center starts it in the middle and fades it toward the edges |
| Preview | On | On | Shows the glow on the canvas while the dialog is open |
The Opacity and Blur fields have arrows beside them. Click an arrow to step the value up or down.
Fill a shape with scribbled lines
Section titled “Fill a shape with scribbled lines”Scribble… fills a shape with lines drawn back and forth across it, like a quick pen sketch. The lines take the object’s fill color, and the gaps between them show the art behind.
- Select a filled shape.
- Choose Effect → Stylize → Scribble….
- Pick a look from the Settings list, for example Sketch. The fields below it change to that setting’s values.
- Change any value to adjust the look. When the values no longer match a setting, the Settings list shows Custom.
- Leave Preview on to see the lines on the canvas, then press OK.
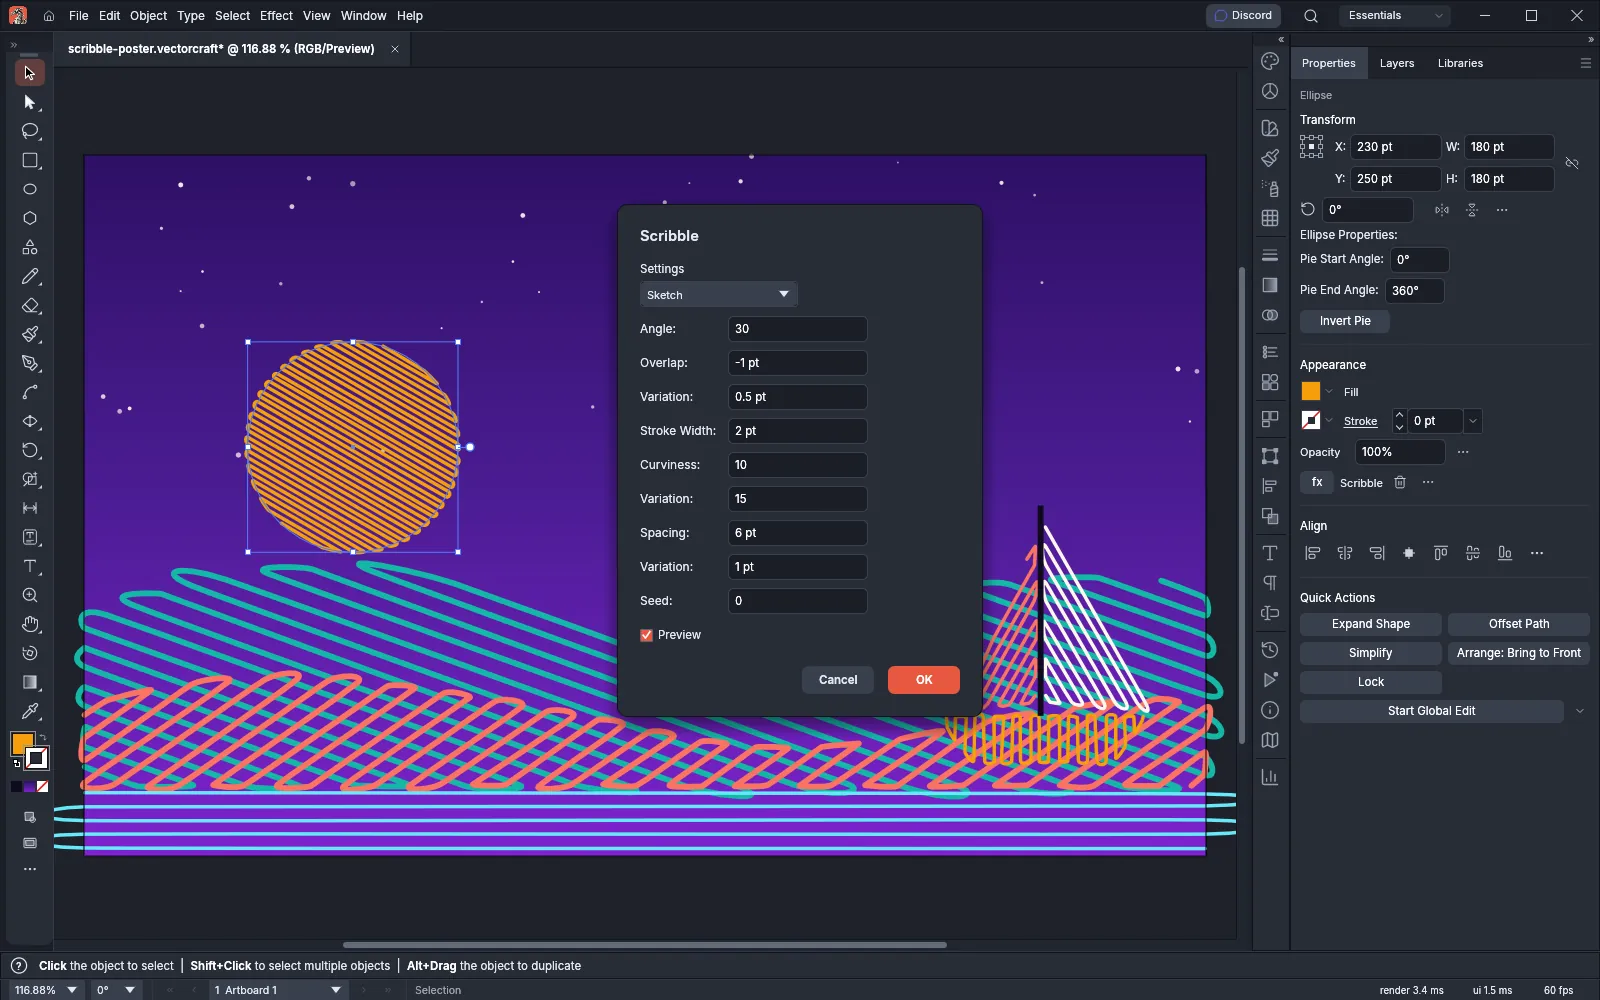
Scribble options and presets
Section titled “Scribble options and presets”The Scribble dialog lists its options in this order. Each Variation field sets the random change of the option above it.
| Option | Default | What it does |
|---|---|---|
| Angle | 30° | The direction of the lines. The value is kept above -180° and up to 180°, so 270 becomes -90 and -180 becomes 180 |
| Overlap | 0 pt | How far each line runs past the shape’s edge. A negative value stops the lines inside the edge |
| Variation (under Overlap) | 0.5 pt | How far the end of each line can move along it at random, from 0 to 100 pt |
| Stroke Width | 3 pt | The width of each line |
| Curviness | 5 | How round each turn is, in percent. 0 gives sharp turns |
| Variation (under Curviness) | 0 | How much the roundness of each turn can change at random, from 0 to 100 percent |
| Spacing | 5 pt | The distance between neighboring lines |
| Variation (under Spacing) | 0.5 pt | How far each line can move toward its neighbors at random, from 0 to 100 pt |
| Seed | 0 | A number that picks another random pattern for the variations. The same seed draws the same lines each time |
The Settings list holds eleven presets and Custom. The list shows seven rows at a time; scroll it to see the rest.
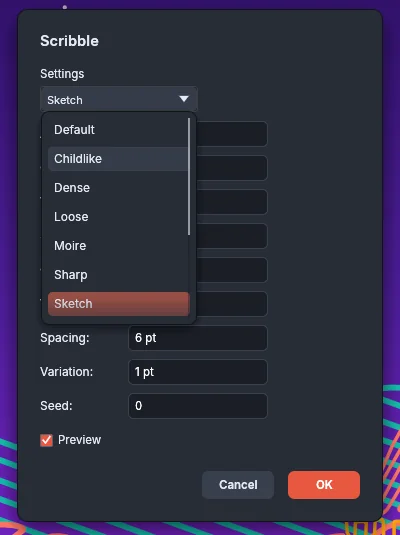
| Setting | Angle | Overlap | Variation | Stroke Width | Curviness | Variation | Spacing | Variation |
|---|---|---|---|---|---|---|---|---|
| Default | 30° | 0 pt | 0.5 pt | 3 pt | 5 | 0 | 5 pt | 0.5 pt |
| Childlike | 45° | 2 pt | 2 pt | 2 pt | 15 | 30 | 4 pt | 1.5 pt |
| Dense | 30° | 0 pt | 0 pt | 3 pt | 0 | 0 | 2 pt | 0 pt |
| Loose | 30° | 0 pt | 1 pt | 2 pt | 20 | 40 | 12 pt | 3 pt |
| Moire | 0° | 0 pt | 0 pt | 1 pt | 80 | 10 | 3 pt | 0.5 pt |
| Sharp | 30° | 0 pt | 0 pt | 2 pt | 0 | 0 | 3 pt | 0 pt |
| Sketch | 30° | -1 pt | 0.5 pt | 2 pt | 10 | 15 | 6 pt | 1 pt |
| Snarl | 15° | 3 pt | 3 pt | 4 pt | 40 | 50 | 8 pt | 4 pt |
| Swash | 60° | 5 pt | 2 pt | 5 pt | 30 | 20 | 10 pt | 2 pt |
| Tight | 30° | 0 pt | 0 pt | 3 pt | 5 | 0 | 2 pt | 0.2 pt |
| Zigzag | 90° | 0 pt | 0 pt | 3 pt | 0 | 0 | 8 pt | 0 pt |
A preset does not change Seed.
Draw an object as an image with the Rasterize effect
Section titled “Draw an object as an image with the Rasterize effect”Effect → Rasterize… draws the object as an image of square pixels. The object’s paths, type and other art stay editable underneath.
- Select the object.
- Choose Effect → Rasterize….
- Set the options in the following table, then press OK.
| Option | Default | What it does |
|---|---|---|
| Color Model | The document’s mode (RGB or CMYK) | Grayscale draws the image in shades of gray, and Bitmap draws it in black and white |
| Resolution | Use Document Raster Effects Resolution | Screen (72 ppi), Medium (150 ppi), High (300 ppi), Use Document Raster Effects Resolution, or Other for any value from 1 to 2400 ppi |
| Background | Transparent | White fills the image’s empty pixels with white |
| Anti-aliasing | Art Optimized | None gives hard edges; Type Optimized keeps small type crisp |
| Create Clipping Mask | Off | Clips the image to the outline of the art |
| Add … Around Object | 0 pt | Adds room around the art, from 0 to 1000 pt |
The image includes every effect before Rasterize in the object’s appearance, shadows and glows included. VectorCraft draws shadows and glows that come after Rasterize around the image.
The resolution of raster effects
Section titled “The resolution of raster effects”Feather, Inner Glow, Outer Glow, Drop Shadow, the Rasterize effect and the effects under Raster Effects in the Effect menu are raster effects. VectorCraft draws them as images when you export, flatten or expand the art. Effect → Document Raster Effects Settings… sets the resolution of those images for the whole document: Screen (72 ppi), Medium (150 ppi), High (300 ppi) or Other. A new document uses 72 ppi.
Object → Expand Appearance turns raster effects into embedded images. When Rasterize is the object’s only raster effect, Expand Appearance gives the same image as Object → Rasterize. Make the appearance permanent describes Expand Appearance.