
Change the look and language of VectorCraft
This guide covers the settings on the User Interface page of Preferences: the brightness and colors of the interface, the canvas color, the interface size, document tabs, tool group labels, iconic panels, the title bar and the interface language. Every setting is listed with its default and range in Preferences.
Open the User Interface page
Section titled “Open the User Interface page”- On Windows, Linux and the BSDs, choose Edit → Preferences… (Ctrl+K). On macOS, choose VectorCraft → Settings → User Interface…, which opens the dialog on the User Interface page. On macOS, Cmd+K opens Settings on its General page.
- On Windows, Linux and the BSDs, click User Interface in the list of pages.
- Change the settings, then click OK. Cancel closes the dialog without changing anything.
Change the brightness and colors
Section titled “Change the brightness and colors”- Open the User Interface page.
- Choose a Brightness: Dark, Medium Dark (the default), Medium Light or Light.
- Choose a Color Scheme:
- Modern (the default) draws the panels in slate grays with the accent color you choose.
- Classic draws the panels in neutral grays with a blue accent. The layout, cards and corners are the same in both schemes.
- With Modern, choose an Accent Color: Coral (the default), Blue, Violet, Green, Amber or Pink. The accent color marks controls that are on, chosen or focused, such as a checked box, the selected page in a list and the OK button. While Color Scheme is Classic, Accent Color is dimmed.
- Click OK. The window is redrawn in the new brightness and colors.
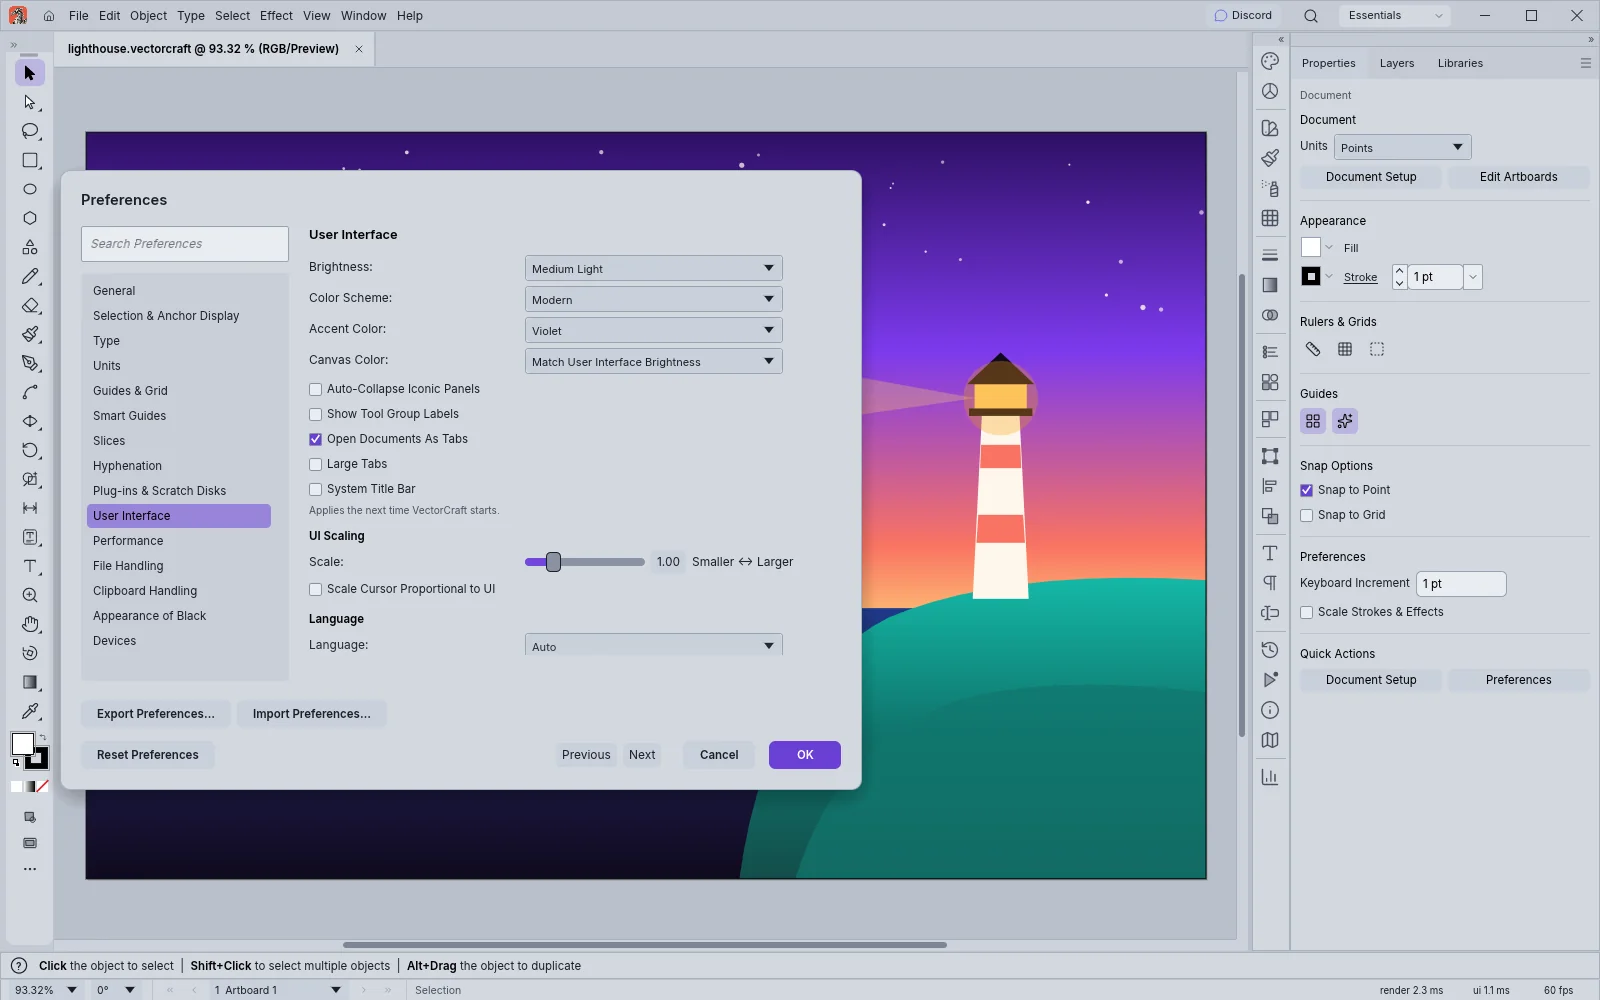
Switching workspaces does not change the brightness. On macOS you can also change the brightness from the Appearance menu (see On macOS: the Language and Appearance menus).
Change the canvas color
Section titled “Change the canvas color”The canvas color is the color of the area around the artboards.
- Open the User Interface page.
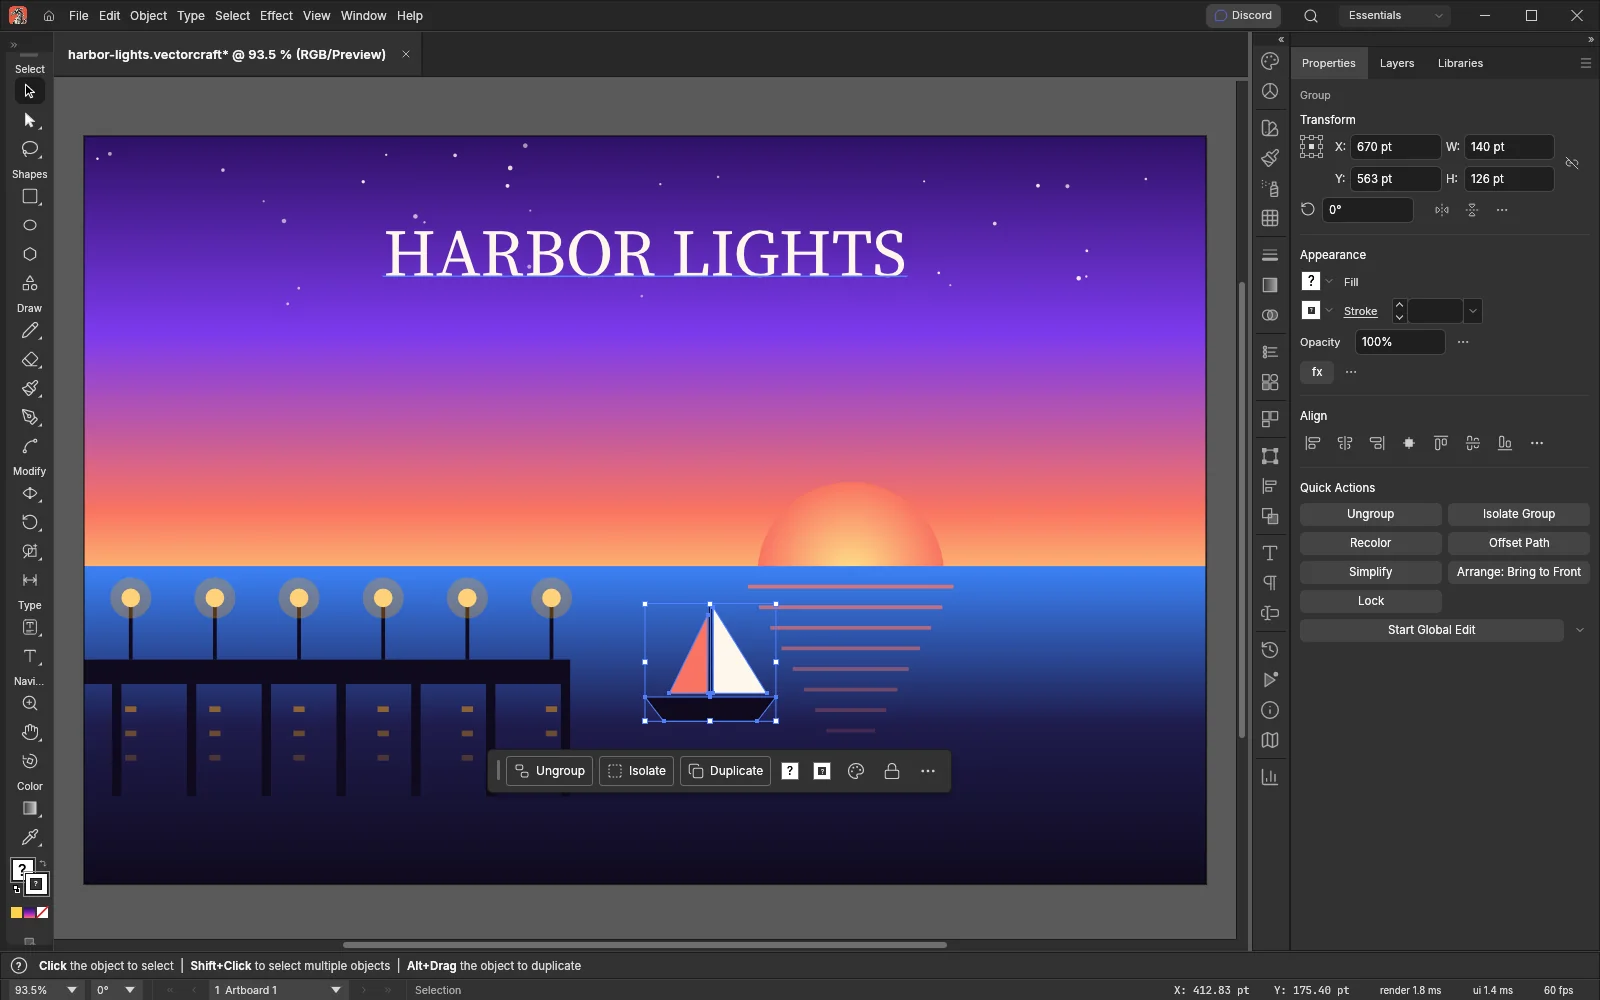
- Choose a Canvas Color:
| Canvas Color | What the area around the artboards shows |
|---|---|
| Match User Interface Brightness (the default) | The color that goes with the current Brightness |
| White | White |
| Light Gray | A light gray |
| Medium Gray | A medium gray |
| Dark Gray | A dark gray |
- Click OK.
Canvas Color does not change the color of the artboards or of the artwork.
Make the interface larger or smaller
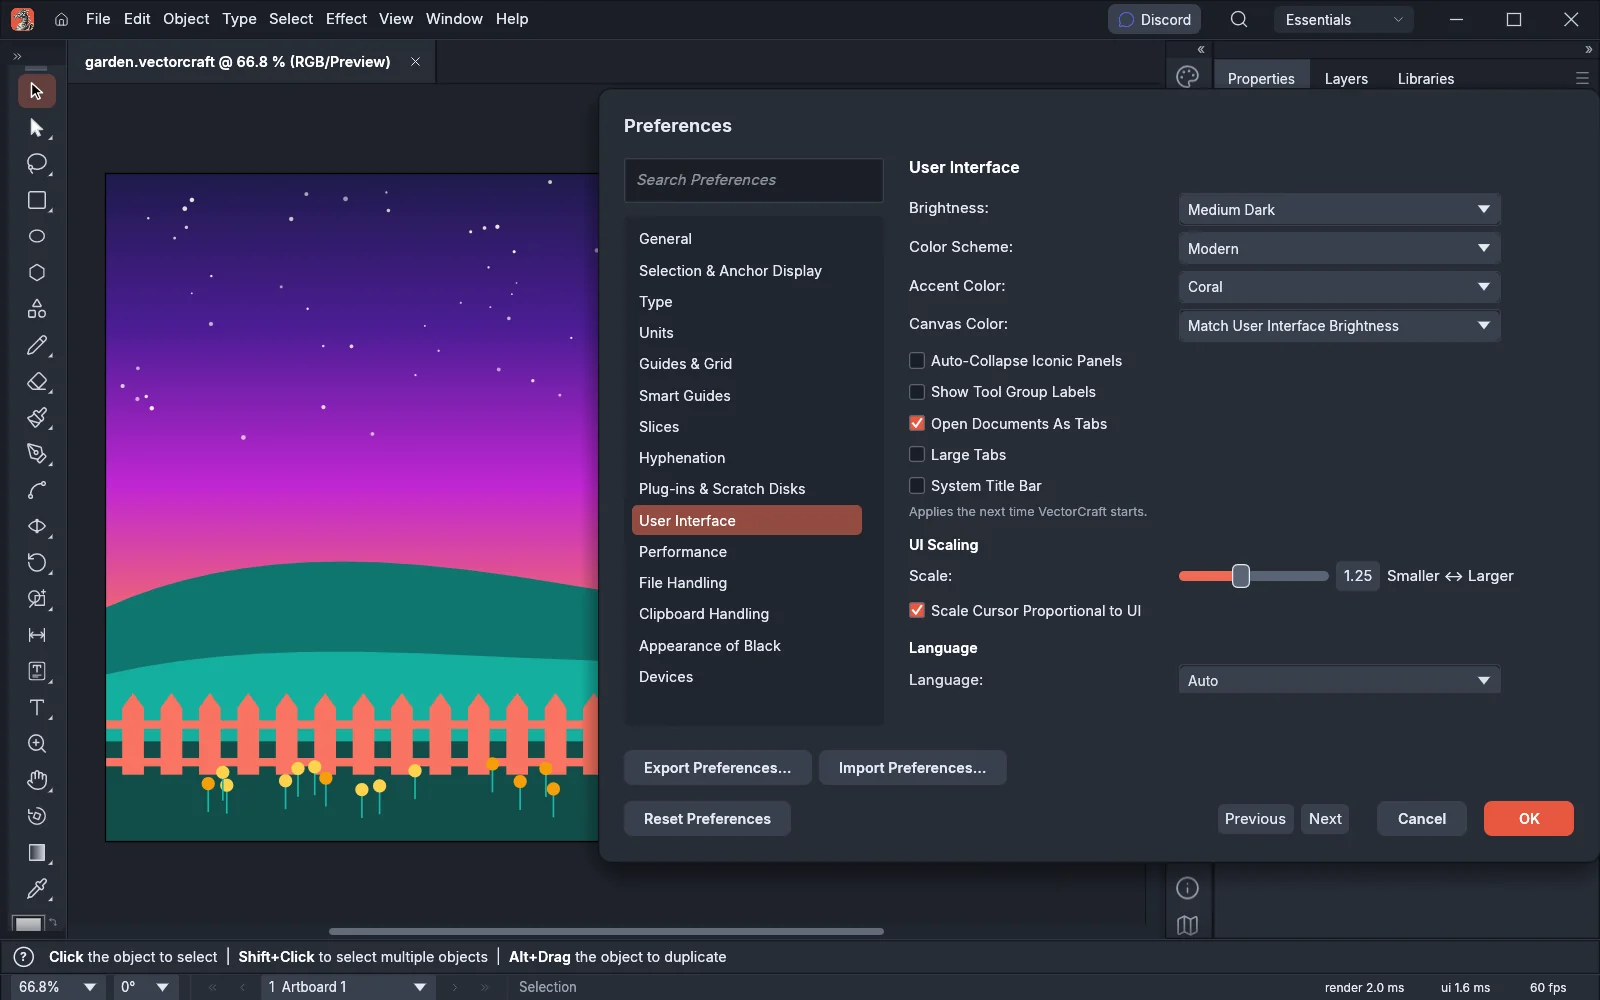
Section titled “Make the interface larger or smaller”UI Scaling changes the size of the menus, panels, dialogs, bars and text. It does not change the zoom of the document.
- Open the User Interface page.
- Under UI Scaling, drag the Scale slider toward Smaller or Larger. The scale runs from 0.75 to 2.0 in steps of 0.05, and the default is 1.0. The value shows beside the slider.
- Turn on Scale Cursor Proportional to UI to make the tool cursors grow and shrink with the scale. While it is off (the default), the tool cursors keep their size.
- Click OK.
Choose how tabs, tools and panels behave
Section titled “Choose how tabs, tools and panels behave”These settings change the document tabs, the Tools panel and panels that are collapsed to icons.
| Setting | Default | On | Off |
|---|---|---|---|
| Open Documents As Tabs | On | Each document you open or create gets a tab in the tab strip. | Each document you open or create afterwards opens in a floating window of its own. |
| Large Tabs | Off | The document tabs are taller, with larger titles. | The tabs have the standard height. |
| Show Tool Group Labels | Off | The Tools panel shows the name of each group of tools (Select, Shapes, Draw and so on). In a single column, names longer than six characters are cut to their first four characters followed by three dots (Navi…). | The tools follow each other with nothing between the groups. |
| Auto-Collapse Iconic Panels | Off | A panel you open from a column of panel icons closes again when you press Esc or click outside it and its column. | The panel stays open until you click its icon again. |
To put floating documents back into tabs, choose Window → Arrange → Consolidate All Windows. You can also turn Auto-Collapse Iconic Panels on or off from the menu of a column of panel icons: right-click the grip at the top of the column. For more about tabs, floating windows and panels, see Customize the workspace.
Choose the title bar (Windows, Linux and the BSDs)
Section titled “Choose the title bar (Windows, Linux and the BSDs)”By default, VectorCraft draws its own title bar on Windows: the menu bar shares a row with the window buttons. On Linux and the BSDs, VectorCraft draws its own title bar where the desktop leaves the frame to the app, and the desktop draws the frame everywhere else. macOS always uses the system title bar, so the page does not show these settings there.
- Open the User Interface page.
- Turn on System Title Bar to use the system’s title bar and window buttons.
- On Linux and the BSDs, turn on VectorCraft Title Bar on Every Desktop to draw VectorCraft’s own title bar on desktops that would otherwise draw the window frame themselves. While System Title Bar is on, this setting is dimmed, and a note says that System Title Bar takes precedence.
- Click OK, then quit and start VectorCraft again. VectorCraft reads these settings only when it starts, and the note under them reads “Applies the next time VectorCraft starts.”
On Linux and the BSDs, the VECTORCRAFT_TITLEBAR environment variable chooses the title bar for one run, whatever the two settings say:
VECTORCRAFT_TITLEBAR |
Title bar |
|---|---|
app |
VectorCraft draws its own title bar. |
system or desktop |
The desktop draws the window frame. |
For example, start VectorCraft with VECTORCRAFT_TITLEBAR=desktop vectorcraft. While the variable is set, System Title Bar and VectorCraft Title Bar on Every Desktop are dimmed, and a note says that the variable chooses the title bar. VectorCraft on Windows and macOS does not read the variable.
Change the interface language
Section titled “Change the interface language”- Open the User Interface page.
- Under Language, open the Language list. It starts with Auto, then English, then the other languages by their own names in alphabetical order. Names in other scripts (Greek, Cyrillic, Devanagari, Georgian, Japanese, Chinese and Korean) follow the Latin ones.
- Choose a language. The menus, panels and the dialog itself switch to it while the dialog is still open.
- Click OK to keep the language, or Cancel to go back to the language you had.
Auto (the default) uses the language of your system. When the system language is not one VectorCraft has, Auto uses English.
| Languages in the Language list |
|---|
| Auto, English, Bahasa Indonesia, Bosanski, Català, Čeština, Dansk, Deutsch, Español, Français, Italiano, Magyar, Nederlands, Polski, Português (Brasil), Suomi, Svenska, Tiếng Việt, Türkçe, Ελληνικά, Български, Русский, Українська, हिन्दी, ქართული, 日本語, 简体中文, 繁體中文, 한국어 |
Menu and panel order follows the language
Section titled “Menu and panel order follows the language”The panels in the Window menu are listed alphabetically by their names in the interface language. The same goes for the Window → Type submenu and for Window → Brush Libraries, Graphic Style Libraries, Swatch Libraries and Symbol Libraries. Accented letters sort with their plain letters, so in Polish Łącza (Links) sorts under L. When you change the language, the order changes with it.
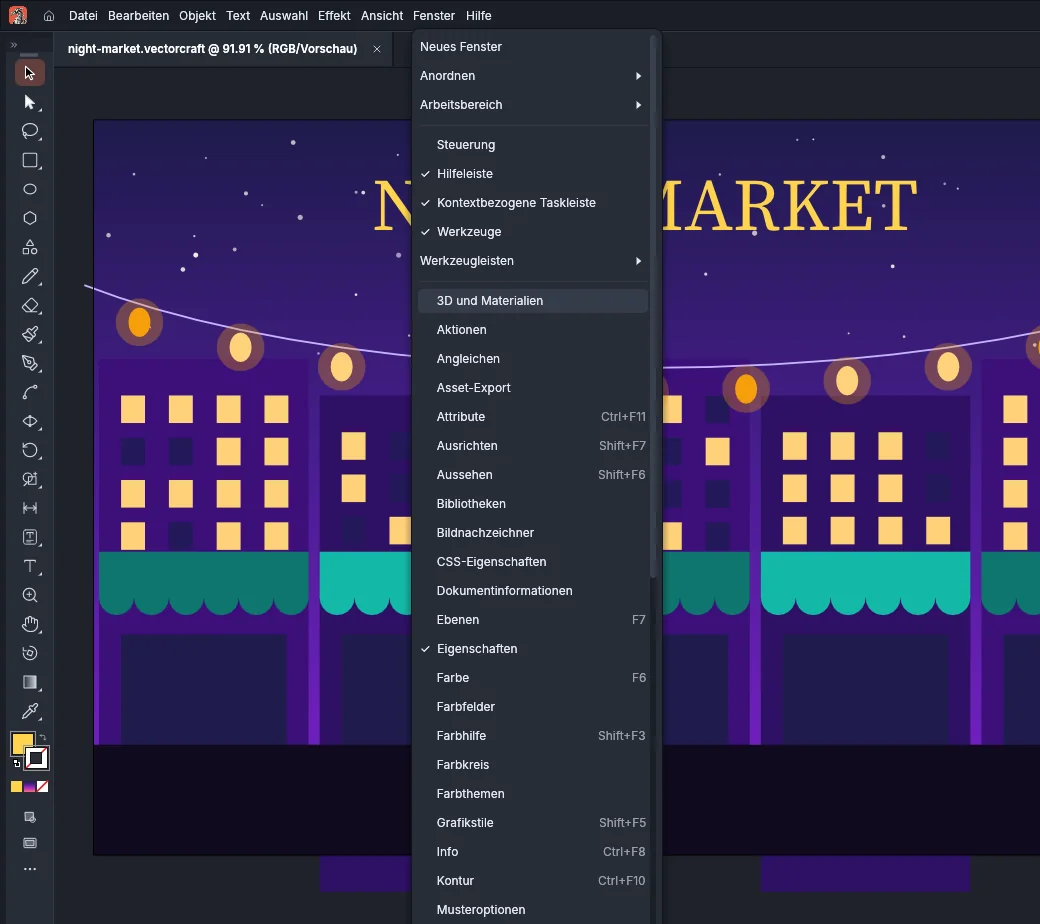
The interface language does not change the language of the text in your documents. To set the language used for spelling and hyphenation, and to set type in other scripts, see Set type for other languages.
On macOS: the Language and Appearance menus
Section titled “On macOS: the Language and Appearance menus”On macOS, the VectorCraft app menu has two submenus after Settings:
- Language lists Automatic, then every interface language by its own name, in the same order as the Language list in Preferences. The current choice has a check mark. Choosing a language changes the interface language at once, the same as choosing it in Preferences and clicking OK.
- Appearance lists the four brightness levels: Dark, Medium Dark, Medium Light and Light. Choosing one changes the Brightness setting.
Windows, Linux and the BSDs have no menu for these settings. Use the User Interface page of Preferences there.